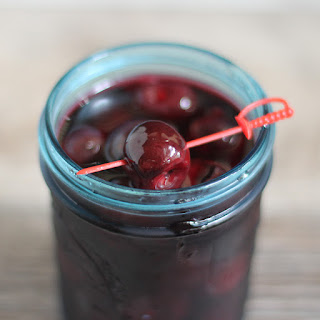
Showing posts with label Canning and Pickling. Show all posts

Wednesday, September 5, 2018

Canned Peaches #Canbassador

As a happy participant in the Canbassador program, the nice folks at Northwest Cherry Growers also sent me a box of peaches this year.

I looooove peaches.

I usually eat them plain. Sometimes I make pies or tarts. But I never thought about canning them, until now.

Just like cherries, peaches are crazy easy to can, requiring little more than a light or medium sugar syrup and a little time. Well, something to keep the peaches from browning helps, but I always keep Fruit Fresh in the pantry.

You can hot pack or cold pack the peaches, and the timing for canning depends on the size of your jars, and your altitude.

If you've never canned anything before, peaches are super-simple. If you have done a lot of canning, then maybe it's time to branch out to another recipe that has a few more ingredients. Like Drunken Peaches. This still isn't a super-complicated recipe, but it adds a little extra zip to the fruit you have stored.

While you might not want to use drunken peaches with your morning oatmeal, they're pretty danged good with ice cream!

Drunken Peaches
Adapted from Ball Canning Back to Basics
Makes 6 1-pint jars

1 lemon
5 pounds fresh, firm, ripe freestone peaches
3 cups water
2 1/2 cups sugar
3 vanilla beans, halved crosswise (if you don't have beans, vanilla extract should be just fine)
6 slices of orange, 1/4-inch thick. You'll need 2 small navel oranges.
3/4 cup bourbon

Rinse the lemon and peaches under cold running water and pat dry. Bring a large pot of water to a boil and fill a large bowl with ice water.

Cut the lemon in half and squeeze the juice into the ice water.

Working in batches, place the peaches in a wire basket and lower them into the boiling water. Let them blanch for 1 minute, then place immediately into the ice water. If you don't have a basket you can use, you can use a spider or slotted spoon to lower the peaches into the water, then retrieve them.

When the peaches are cook enough to handle, peel them and remove the pits. Cut each half into four wedges. Return the wedges to the lemon juice mixture.

Stir together 3 cups water and the sugar in a large stainless steel or enameled saucepan. Split the vanilla beans in half, lengthwise and scrape out the seeds. Add the beans and seeds to the sugar mixture and cook over medium-high, stirring until the sugar dissolved. Keep the mixture at a low simmer while you continue.

Place one orange slice and one vanilla bean half into a hot jar. Drain and tightly pack the peach wedges into the jar. Ladle the hot syrup into the jar, leaving 1 1/2 inches of headspace. Add 2 tablespoons of bourbon to each jar. Add more hot syrup to the jar, leaving 1/2 inch headspace.

Remove air bubbles from the jar, wipe the rims, and center the lids on the jars. Apply the band so it's fingertip-tight. Place the jar in the boiling water canner, and continue with the rest of the jars, until all the peaches are nestled in jars.

Process the jars for 25 minutes, adjusting for altitude, if necessary. Turn off the heat, remove the lid, and let the jars rest for 5 minutes before you remove them from the canner and let them cool.

I got the peaches at no cost; the book is one that I purchased.
Yum

Wednesday, July 18, 2018

Canned Whole Cherries #Canbassador

I love cherries. When I was a kid, they were undoubtedly my favorite fruit. Apples and bananas were okay, but cherries were awesome.

So, when the Northwest Cherries Canbassador Program asked me if I wanted some (a lot!) of cherries, of course I said yes.

What I didn't know about cherries was how easy they are to can. Apparently cherries sit up and the tree and they say, "Hey, being in a jar would be awesome. We should make sure that we're like the perfect acidity so we can go into jars and into a hot water bath and be pretty round things in jars forever."

Or something like that.

Because when I started looking up recipes for canning whole cherries, I found out that you can use pretty much anything for the canning liquid. You don't have to add a ridiculous amount of sugar. You don't have to add lemon juice or vinegar. You can put them in fruit juice, sugar syrup, or even plain old water. Just plain water. Let that sink in.

Oh, and that's not the end of it. You can hot-pack or raw-pack and just adjust the time in the canner.

I was ... totally surprised.

And pleased. Because it's hot as Hades here and thinking too hard makes me sweat. So I liked the idea that I couldn't mess this up, no matter what I did. And YOU can't mess this up no matter what you do.

Right?

So, pit the cherries. For each quart of cherries, you'll need about 1/2 cup of liquid. But you know what - if you're off by a little, you can just add some extra boiling water since we're not worrying about acid levels.

Then figure out how much liquid you'll need. (Math ensues.)

Figure out what liquid you're using. I used a light sugar syrup (1 part sugar to 4 parts water by volume), plus a vanilla bean pod for each quart jar.

Then decide if you want to hot-pack or raw-pack.

Read up on safe canning procedures. Make sure your jars and lids are clean and hot and have everything ready to go.

For hot pack, put the liquid in a saucepan along with the cherries and bring to a boil, then put the cherries and liquid in the jars.  For the raw pack, put the pitted cherries in the jar and heat the liquid separately, then pour the liquid over the cherries. Make sure there's no excess air in the jar and the liquid is to about 1/2 inch of the top.

Process according to this chart. Or seriously, check that page for way more information about canning cherries than you can imagine.

So ... what's this stuff good for? Yeah, pretty much anything you like. They're good over ice cream, French toast, or in cocktails. The liquid is flavorful, so don't leave that behind. They'd probably be good in smoothies, too. Since I went with a really light syrup, they'd be good in recipes, too, and wouldn't add a mad amount of sugar.

So good. So simple. The hardest part is pitting the cherries, but even that isn't hard.

Hint: if you only have a quart of cherries and you're going to use them right away, you could do this without the water bath and just refrigerate the jar. Heat to a boil, maybe a few seconds more, then throw them in a jar. When they've cooled a bit, toss them in the fridge.

I received cherries at no cost to me from the folks at Northwest Cherries. Otherwise I would have been buying them. Because ... cherries.

Yum

Tuesday, January 23, 2018

Quick Pickled Vegetables in your Instant Pot (or other electric pressure cooker)

In today's edition of What crazy thing is Donna cooking? we have some quick-pickled vegetables courtesy of a new cookbook that showed up at my door.

The book is called How To Instant Pot, so obviously it's taking advantage of that particular brand of cooker, but these recipes should work for pretty much any electric pressure cooker. There might be some differences in terms of what buttons the cooker might have, but that's also true among the Instant Pot cookers.

So, yeah, it's a cookbook specifically for electric pressure cookers.

The first thing I tried from this book was risotto. Which was kind of silly because I've made risotto a bazillion ways already, so there was nothing to be surprised about here. Risotto cooked in a pressure cooker is good, but it's not as good as other methods where stirring is involved.

So ... I decided to give the pickled vegetables a try. Pressure cooking makes sense to jump-start the pickling process. And it sure as heck was quick.

The recipe called for either carrots or cucumbers or both, but I didn't have any cucumbers and I didn't have enough carrots. So I started rummaging in the crisper and pulled out a cauliflower. I figured it would work, since cauliflower is about as dense as carrots, and it tastes good pickled.

The process worked, so I'm pretty sure I'll do this again, but I think I'll adjust the tartness. For eating as a snack, these were pretty tart (yeah, I'm weird - I eat pickles as a snack) so next time I'll try a ratio of 1/3 vinegar to 2/3 water or even 1/4 vinegar to 3/4 water.

Also, this basic recipe could be tweaked a zillion ways, by adding some hot peppers or chili flakes, or by adding some garlic, turmeric, or even some herbs.

But that's the great thing about quick pickles. Since these aren't meant to be canned, you can mix and match flavors in a whole lot of different ways, and still get a good result. You know, to your taste.

I'm actually thinking I might use this technique to make a spicy pickled cauliflower recipe that I'm quite fond of.

Quick Pickled Vegetables
Adapted from How to Instant Pot by Daniel Shumski
Makes about 1 quart

1 cup apple cider vinegar
1 cup water
1 tablespoon sugar
1 tablespoon kosher salt or pickling salt
1 teaspoon black peppercorns
1 teaspoon mustard seeds
1 pound carrots, peeled, trimmed, and cut into 2-inch pieces (I cut mine a little smaller) or a combination of vegetables you like

Place the vinegar, water, sugar, peppercorns, and mustard seeds in the inner pot of the pressure cooker and stir until the salt and sugar are dissolved. Add the vegetables and stir.

Put the lid on the pot and lock it. Set the vent to closed. Set the pressure to high, and set the timer for 1 minute. Yup, that's it. Just one minute.

When the cooking is done (a bit more than a minute, since it takes time to get to pressure), turn the vent knob to release the steam and when the pressure has been released, remove the lid. Transfer the vegetables and liquid to whatever container you're going to use. Mine fit well into a 1-quart canning jar.

Allow the vegetables to cool to room temperature, then refrigerate until chilled. The flavor will continue to develop over the next few days, but you can use these as soon as they're cool.

I received this cookbook from the publisher at no cost to me.
Yum

Tuesday, September 12, 2017

Italian Prune Plum Jam with a Hint of Cinnamon

I adore Italian Prune Plums. I guess some people use them for making prunes, but I decided to make some jam. Because you can never go wrong with plum jam.

My first encounter with Italian Prune Plums was when I lived in Chicago and my neighbor has a tree. Some years, there was no fruit at all. Some years, there were a few plums here and there. And some years, that tree was so full of fruit that the branches would bend until they were nearly touching the ground.

Those years, my neighbors would hand me a paper shopping bag, half full of fruit. And I'd be eating plums every day. I'd never had plums like that before. They were tasty and tart when they were just barely getting soft, and they got sweeter as they got softer.

They were greenish yellow inside with a very dark purple outside. The interior would go from green to a less green color that looked like it wanted to be a barely peachy yellow. When they're cooked, the inside turns bright red.

Back in Chicago, it never dawned on me to make jam, but now I like the idea of having a few jars of homemade jam on hand for slathering on English muffins. This particular jam is also good for swirling into yogurt or on top of ice cream.

I adapted this from a recipe on the Northwest Cherry Growers site. It was described as a plum butter, which is typically thicker than a jam - but it depends on how long you cook it to reduce it.

That's what's great about a recipe like this - you can cook it less for something that's a little looser, or cook it more to get a super-thick fruit butter. I let mine cook until it was more jam-like than butter-like. I also made it a little less sweet than the original,and fiddled with the spices a bit.

If you're going to can the jam for room temperature storage, I suggest using the original recipe - you really don't want to mess with sugar ratios when canning. But my version is great for refrigerator storage or for freezing.

Plum Jam with a Hint of Cinnamon
Adapted from a recipe on Northwest Cherry Growers site, courtesy of Sugarcrafter.net
Make two pint jars (or four half-pints)

2 pounds of plums, halved and pitted
1/2 teaspoon cinnamon
1/2 teaspoon salt
2 tablespoons lemon juice
2 cups granulated sugar

Run the plums through your food processor or blender until the mixture is as smooth as you can get it. In a large sauce pan, combine plums, cinnamon, salt, lemon juice, and sugar. Bring to a boil over medium-high heat, stirring frequently.

Reduce heat and simmer, stirring often, until the mixture thickens and holds its shape on a spoon (or it reaches the consistency you like.) The time this takes depends on several factors, including how hard you're simmering, the shape of the pot, and how much moisture there was in your plums. If you cook at a spunkier boil, you'll need to watch more carefully and stir often to make sure the jam doesn't stick and burn. If you opt for a very slow simmer, it will take a lot more time but require much less attention.

Taste and adjust sugar, lemon, and cinnamon to suit your taste, and cook for another minute or two. If the jam seems chunky or bits of skin are visible and you'd prefer them to disappear completely, you can give this another run through your blender or food processor. Make sure to exercise proper caution for blending hot foods in your particular machine.

Transfer the jam to containers for refrigerator storage or freezing.


For the original recipe, including canning instructions, check out Northwest Cherry Growers' site.
Yum

Thursday, August 10, 2017

Chunky Peach Jam with Brown Sugar and Rum #canbassador

Where did summer go? One second, it was spring, and now there's a hint of fall in the air.

What's also in the air *sniff sniff* is the scent of peaches. Mostly because the nice folks at Northwest Cherry Growers and Washington State Stone fruit Growers sent me a giant box of peaches and nectarines.

When I was a kid, I loved peaches and nectarines, but I didn't realize they were different fruits that you could buy. I thought that nectarines were peaches that had been cleaned better. So when my mom would hand me a peach, I'd give it back to her and ask her to wash it better. And again. And again.

Yeah, I was a weird kid.

I still love both peaches and nectarines, so I was giddy happy to have a whole box of them to cook with, eat out of hand, add to yogurt, and make some jam. And maybe I'll work them into some other recipes, too. Peach ice cream is pretty darned good.

So anyway, as soon as the box arrive, I picked through it and sorted out fruit that had gotten bumped and bruised in shipping so they wouldn't go bad, and used those to make jam right away. Since I didn't have a jam recipe that I was itching to make, I browsed through the Northwest Cherries site to see what they suggested. I found one credited to Recipezaar (now renamed Food.com) that looked interesting, since it included brown sugar and rum. So I made that one.

Oh, sure, I didn't make it exactly like this recipe. I have a new appliance here that I'm testing (currently code-named "Al") that I used to make the jam. I had to adjust the recipe to fit the appliance, so I tweaked for that. But, since I'm not ready to uncover that appliance yet, I can't really give you the adjusted recipe (and seriously, if you don't have that appliance, you probably don't want the adjusted recipe,)

So, here's the recipe I used. The brown sugar adds some richness that you don't get from white sugar, and the rum adds its own flavor - but it doesn't taste boozy, so this is perfectly fine for your breakfast toast.

It's a little bit chunky, but if you wanted a smooth jam, it would be easy to give it a quick blend with a stick blender before or after cooking.

Here's how it happened:

Chunky Peach Jam with Brown Sugar and Rum
Recipe from Northwest Cherry Growers, courtesy of recipezaar.com
Makes about 3 pints

Memphis salad plate courtesy of Zak! Designs.
6 cups peaches, peeled and coarsely chopped (about 4 lbs)
2 cups light brown sugar, packed
6 tablespoons strained fresh lemon juice
3/4 cup dark Jamaican rum
2 cups granulated sugar

In a large bowl, combine peaches with the brown sugar, lemon juice and about half of the rum, stirring to mix. Cover and let stand at room temperature six hours or overnight.

Wash jars and lids in hot, soapy water. Sterilize jars for 10 minutes in a boiling-water bath, then leave in hot water until ready to fill. Prepare lids according to manufacturer's directions. (Note: if you making this for immediate use, you can skip the canning and refrigerate the jam. If you want to store it at room temperature or save for later use, then follow the canning instructions.)

Pour the fruit mixture into a large saucepan or dutch oven. Bring to a boil over medium-high heat.

Cover the pan, reduce heat, and cook the mixture until the peach chunks begin to look translucent, 15 to 20 minutes; stir occasionally to prevent sticking. If the jam becomes too thick and threatens to scorch before the fruit is done, add 2 to 3 tablespoons of water.

Add the granulated sugar, increase heat to medium-high and cook rapidly, stirring almost constantly, until a spoonful placed on a chilled saucer and refrigerated for a few minutes wrinkles instead of runs when the saucer is tilted. (Take jam off the heat while doing this. If using a candy thermometer, this should happen at about 220 degrees.)

Add remaining rum and stir the jam (it will boil up when you add the rum) for 2 minutes over the heat.

Ladle boiling-hot jam into hot, prepared jars, leaving 1/4 inch head space. Top with lids and process for 15 minutes in a boiling-water bath. Cool jars completely on a dish towel before labeling and storing.

Thanks to Northwest Cherry Growers and Washington State Stone Fruit Growers for sponsoring this post!
Yum

Friday, August 4, 2017

Fired Up Green Beans

Oh dear. I got a sample of an easy fermenter kit and decided to make the recipe they sent me. It sounded like a great idea, but ...

Oops.

I went to a couple of different stores, and fresh green beans were nowhere to be found. Bummer. But then I realized that I had frozen green beans. Would it work?

The lid made a lot of sense and I loved that I didn't have to do anything except screw the lid on. Nothing else to think about, unlike other fermenting methods I've used. I really liked the glass weights, since they had a grooved top that made them really easy to insert into the jars and take them out.

After two weeks, I was really curious about the beans. there was a slight whiff of dill even before I opened the jar that was enticing. It reminded me of pickles that I like. Mmmm.

The brine had good flavor, but the beans were a big nope. They were too soft to be pleasant to eat (although the flavor was good when I nibbled a tiny bit). Not a problem with the recipe, though. I really shouldn't have started with those frozen beans. I'm going to be looking for beans in the stores and farmers market, and I'll give this a try again.

If you're curious about the recipe, here it is. Use fresh beans, okay?

Fired Up Green Beans
Recipe courtesy of Nourished Essentials

1 pound green beans, topped, tailed and trimmed to fit inside the jar
2 cloves garlic
2 sprigs of dill
1/2 teaspoon chili flakes
4 cups of water
2 tablespoons sea salt (I used kosher. Canning salt would also be a good idea. Table salt generally isn't used for pickles)

In a saucepan, heat water. Add salt and stir till dissolved. Cool to room temperature.

Place garlic cloves, dill and chili flakes in the bottom of a pre-sterilized, quart-sized wide mouth mason glass jar. Next, add the green beans.

Carefully pour the cooled brine over the green bean mix until completely covered, leaving 1 1/2 inches of head space. (I used one of the Easy Weights to hold the beans under the liquid.)

Cover the jar with the Easy Fermenter Lid.

Store in a cool, dark place (room temperature 60-70°F is preferred,) for 1 to 2 weeks.

Once jar has been opened, move to cold storage. The flavor will continue to develop with time.

I got the easy fermenter kit from the company at no cost to me to do a review. I decided to post the recipe, as well, since it's a keeper.
Yum

Sunday, July 23, 2017

Got Cherries? Jam 'em, booze 'em, and eat 'em all up! #canbassador

When I was a kid, the best part of summer was walking with my mom to an empty lot a few blocks from where we lived. A guy would park a truck in the lot and sell fresh fruits and vegetables, weighing them on a hanging scale and putting them in paper sacks.

When cherries were in season, my mom would buy some for me. I'd munch on them all the way home, spitting the seeds out as I went. By the time I got home, there were no more cherries.

I'm surprised a forest of cherry trees didn't sprout along our route.

When the nice folks at Northwest Cherry Growers asked if I wanted to be a #canbassador, I jumped at the chance. Enough cherries to do some canning? Count me it!

I'll admit that I might have eaten several pounds of cherries all on my own. But I didn't spit the seeds all over the living room. That would have been weird.

The rest of the cherries were pitted and divided up for several different recipes. My two favorites were a smooth cherry jam, and some brandied cherries.

I also made a Luxardo cherry recipe that was good, but not perfect. I think it would have been better with tart cherries, or perhaps I need to tweak the sweet/tart ratio.

If you like Luxardo cherries, though, that recipe is a great starting place. Check it out!

The recipes I'm posting here were based loosely on some that I found on the Northwest Cherries site, but I cut back on the quantities so I could try more recipes.

Since I made so little of each recipe, I didn't actually can them for preserving, though. I tossed them into the refrigerator and started using them right away.

The great thing about making recipes for use "now" rather than canning is that you can adjust the sugar and acid to your taste, rather than for preservation. If you're making vast quantities of foods for long-term, non-refrigerated storage, make sure you're using a recipe from a trusted food preservation source. There's no sense spending the time and money to make a dozens of jars of jam, only to find they've molded in the jars when you open them.

Yeah, my mom made moldy jam once. It wasn't pretty.

First, I made some brandied cherries. Like this:

Brandied Cherries

Based on a recipe from Northwest Cherry Growers.

Oooooh, this was so good.

I used these as a topping for ice cream. Adults only, of course. They'd also be nice in cocktails, but for that I'd suggest not chopping the cherries.

If you don't happen to have brandy, it should work just as well with bourbon or whisky. Maybe even rum.

1 pound sweet red cherries, pitted, stemmed, and roughly chopped
1/2 cup sugar
2 tablespoons lemon juice
1/4 cup brandy

Combine the cherries, sugar, and lemon juice and bring to a simmer and let it cook for a minute or two.

Add the brandy, bring to a boil, then turn off the heat.

Transfer the cherries and liquid to jars or other storage containers (this makes about a pint, plus a little extra) and allow it to cool, then refrigerate.

Next, I made a cherry jam, also based on a recipe  from the Northwest Cherry Growers website, but I used sweet red cherries instead of yellow ones. 

Sweet Cherry Jam


2 pounds red cherries, stemmed and pitted*
1 1/2 cups sugar, or to taste
1 teaspoon vanilla extract
1/2 teaspoon almond extract
Pinch of salt
2 tablespoons lemon juice

Put all the ingredients in a blender, and blend until smooth. If you're not sure about the sugar amount, feel free to start with less - let's say about 1/2 cup - and add more sugar later, if you want more sweetness.

Transfer the blended cherries to a saucepan and heat to a boil, then lower to a happy simmer. Continue cooking, stirring often, until the jam reaches your preferred thickness.

Like the napkin? Get them here
Since it will become thicker as it cools, the best way to check it is to put a small amount of the jam on a spoon and put the spoon in the refrigerator to chill.

Taste your thickness tester and add more sugar to the pot, if desired.

If you prefer more tartness, add more lemon juice. Continue cooking until your optimal thickness is reached. Since I wanted to stir into yogurt or drizzle onto ice cream and for spreading on toast and muffins, I left it a little looser than if I only wanted it as a spread for toast.

Transfer to jars (this will make a bit more than a pint) or other storage container.

Let it cool, then refrigerate.

*Make sure your cherry pitter is actually ejecting every single pit from the cherries. Sometimes one will get stuck, and since you're blending, it could be a problem.

When I was done with this recipe, I had just a little jam left in the pan. Not enough to fill a jar, but more than I wanted to throw away. I added some pitted chopped cherries and let them cook a while to create a chunkier, not-as-sweet jam, adjusting sweet and tart on a whim. Did I write anything down? No, of course not. But that's the great thing about refrigerator jams - you can wing it, adjust flavors on the fly, and end up with a little half-pint of something fun.


Thanks to Northwest Cherry Growers for sponsoring! 
Napkins shown in photos provided by The Napkins at no cost to me for use on my blog.
Yum

Wednesday, November 23, 2016

Cranberry Jam

Cranberry sauce is fine as a side dish on Thanksgiving, but cranberry JAM is amazing on toast, English muffins, or stirred into yogurt.

Try it on that English muffin with a little smear of cream cheese. Spread it on the bread for a turkey sandwich.

Or how about on quesadilla? Yeah, that's good too! Or as a filling for jam thumbprint cookies.

Cranberry season is fleeting, but I'll bet you can find them on sale now, fresh, and maybe even a better deal frozen.

Speaking of frozen, you might want to toss some in the freezer so you can make this any time. It's so simple and soooo good. You don't even need pectin to make this!

I like mine more tart than sweet, but you can certainly add more sugar, if you like. And you can also experiment with flavors. Or add other fruits, like apples, pears, strawberries, blueberries, or raspberries. Have fun with it!

Cranberry Jam
Makes about 2  1/2 pints

Why yes, that IS a lot of cranberries!
3 pounds cranberries, fresh or frozen
1 1/2 cups sugar
1/2 teaspoon salt.

Put everything in a saucepan. Heat, stirring as needed until the cranberries pop and the mixture boils and becomes thick. It doesn't take a long time, so don't wander away from it. Give it a taste and add more sugar if it's too tart for you. Stir to combine and taste again.

Use a stick blender to blend the mix smooth. Or, transfer to a blender.

Pass the mixture through a fine-mesh sieve to remove the seeds and any unblended skins.

Transfer the mixture to containers for storage, and refrigerate. Note that this is NOT a canning recipe - I have no idea if it would be safe. I'm also not sure how long it lasts, since I somehow manage to use it all before it goes bad.

Want more flavor? I like this as-is, but you can certainly add more flavor, like vanilla extract, almond extract, lemon, ginger, cinnamon, chipotle, basil, or pretty much any flavor you think will be compatible.


Yum

Wednesday, September 7, 2016

Real Pickles

Not long ago, I reviewed a product called Kraut Source, and to do the review I made sauerkraut using the device. Later, they sent me a copy of the Kraut Source Recipe Book which includes 26 recipes for fermenting and for using the fermented foods.

Since I had fresh pickling cucumbers from the farmer's market, I decided to make pickles using one of the recipes in the book. These are the old-fashioned brined pickles that ferment naturally. No vinegar needed.

You can sometimes find this sort of pickle at delis in large jars, or sometimes they're available in jars at the grocery store - they're the ones you'll find refrigerated.

But they're pretty simple to make if you have some patience. It takes a week or more for the pickles to ferment, but you don't really need to do much during that time.

The good thing about the Kraut source and the book I got is that the recipes are for fermenting small batches, right in a canning jar. So you don't need to have a lot of space for fermenting or for storing the pickles later. You can make a batch, taste, and then adjust the flavors for the next batch.

If you decide you want to buy yourself a Kraut Source, the recipe book is a good, particularly if you've never worked with fermented foods before. If you don't get the book, you can still use the Kraut Source since there are recipes in the small booklet that comes with the device, and other recipes on the website. And of course, there are other fermenting recipe that you could use.

Oh, and if the pickles in that jar look dark, it's because it's a purple canning jar.

If you want to know more about the product, here's the review.

Real Pickles
Adapted from Kraut Source Recipe Book

2 1/2 cups filtered water
1-2 tablespoons sea salt
6-8 pickling cucumbers (to fit jar)
2 sprigs fresh dill (I used dried)
1 tablespoon yellow or brown mustard seeds (I used brown)
1/4 onion, thinly sliced (I skipped this; I'm not sure why)
5-6 cloves garlic, peeled (I used three)
1 rounded teaspoon green tea leaves (I used one teabag of green tea)

Bring the water to a boil, add the salt, and let it cool completely.

Put the dill, mustard seeds, onion, garlic, and tea leaves into a clean 1-quart jar. Trim 1/4 inch off the blossom end of the cucumbers and pack them into the jar. It's fine to cut pickles in half to get them to fit in the jar. I only managed to get five pickles into the jar - four standing upright and the fifth one cut in half to fit on top.

Pour the cooled brine into the jar until the pickles are covered by about an inch of liquid.

Place the Kraut Source on the jar. Put the cap on and add water to the moat.

Allow the pickles to ferment out of direct sunlight for 7-10 days, or until the pickles reach your desired taste. Remove the Kraut Source and place a standard lid on the jar for storage. (I like the plastic lids.) Refrigerate the jar.

The Kraut Source book had two recipes for using the brine - a pickle-brined chicken recipe, and a cultured mayonnaise. I haven't tried either one yet, but the pickled-brined chicken sounds like it would be pretty awesome.
Yum

Monday, July 18, 2016

Pickled Radishes - Ball Can-it-Forward Day

Did you ever see a recipe and know IMMEDIATELY that you'd love it? And then you wondered why you'd never even thought of it before?

That's how I felt when I saw the recipe for pickled radishes in The All New Ball Book of Canning and Preserving. Yup, there's yet another version of the Ball canning book.

This one has a major difference compared to previous ones. This one looks more like a book than like a fat magazine.

I love it! It will be so much easier to see when I'm looking for it on my bookshelves. So much easier.

So I was pretty glad I said "yes" when the folks at Ball asked me if I wanted to promote their annual Can-It-Forward Day again. So I got the book and some fresh new Ball canning jars and lids.

But back to the radishes. They're refrigerator pickles rather than preserved pickles, which is fine with me. It gives me the option of making them when I want them, and changing up the flavors if I feel like it.

But the thing that really drew me to them was the lime juice. You see, I love lime-pickled onions. So I figured I'd love lime-pickled radishes just as much. Mmmmmm. Radishes.

I ran into one teeny glitch with this recipe. It says it makes 1 quart, but the liquid was only about half of what I needed after I filled a quart jar with radishes and onion. I think they meant to say it was enough for a pint, but since it said quart, I just kept slicing radishes until it was full.

But these are really good, so just make the quart. This is slightly adapted based on what I did. You'll need to check the book for the original. I promise mine is pretty close.

Lime Pickled Radishes
Adapted from The All New Ball Book of Canning and Preserving
Makes 1 quart

1 cup fresh lime juice (I used a mix of regular limes and some key limes)
1/2 cup water
3 tablespoons sugar
2 teaspoons salt
1 teaspoon ground coriander
1 tablespoon chopped fresh cilantro
1/4 cup red onion slices (thin slices)
Radishes, with leaves and thin roots removed and cut into 1/8-inch slices - enough to fill the jar along with the onion
Note: you can alter the ratio of radishes and onion, if you like. But remember that this is supposed to be pickled radishes with some onion rather than half radishes and half onion.

Put the lime juice, water, sugar, salt, and coriander in a small saucepan and bring to a boil.

Meanwhile, put the cilantro in the bottom of a quart canning jar and fill the jar with the sliced onion and radishes. You're supposed to use a HOT jar, but since these are refrigerator pickles, I didn't boil or sterilize the jar - it was freshly washed and warm.

When the liquid has come to a boil, pour it over the vegetables in the jar. Place a lid on the jar, let it cool for 2 hours, then refrigerate. These are pretty good as soon as they're chilled, but they're even better the next day.

These are awesome on fish tacos.

Can-It-Forward Day

Friday, July 22, 2016 is the sixth annual Can-It-Forward Day, and this year Ball is hosting the entire event on Facebook Live on their Facebook page.

There will be demonstrations going on all day, and for each comment, like, or share on the videos, Ball will donate $1 to charity.

So go, watch, comment, and share, okay?

There is also a digital pledge page on the Freshly Preserved Tumblr page, where you can take the can-it-forward pledge. Go check that out, too, mkay?

Thanks to Ball for asking me to participate, and for supplying me with the book and jars for my use.
Yum

Wednesday, May 18, 2016

Pickled Spicy Cauliflower

A local restaurant serves a small side of what they call pickled vegetables. They're mostly cauliflower, with a few bits of other things, and they're spicy.

I've become sort of addicted to them. Every time I go, I ask for extra.

I figured they'd be easy to make, but wasn't motivated to work on the recipe until I got some Chicken Salt through the blog group 37 Cooks. Upon doing a little sniff test of the different varieties, I decided that the Red Pepper Chicken Salt had enough of a kick to make my cauliflower spicy.

Because I like the color that turmeric adds to pickled vegetables, I added turmeric salt, as well. The first time I made it, I thought it was good, but not quite spicy enough. So I made it again, with more Red Pepper Salt. Now, it's perfect.

Since this is so simple to make, I decided to make just a small jar of it, but if you decide you love it, you can double or triple or quadruple the recipe.

These are quick pickles, so they stay nice and crisp. Since they're not preserved, you'll need to store them in the refrigerator.

Pickled Spicy Cauliflower

Cauliflower florets to fit pint jar
2 teaspoons red pepper Chicken Salt
1/2 teaspoon turmeric Chicken Salt
1/2 cup white vinegar
1 cup water

Cut the cauliflower into bite-size pieces and fit as many as possible into a pint jar. Add the red pepper and the turmeric Chicken Salt.

Put the vinegar and water into a microwave-safe container. I used a glass measuring cup, so just one container for measuring and heating. You could also heat this on the stove in a pan. Heat to boiling.

Pour the hot water into the jar and screw the cover on firmly. Shake the jar to make sure the spices get nicely mixed in. Let the jar come to room temperature, then refrigerate until chilled.

This is done as soon as it's chilled, but it continues absorbing flavors as it sits.

I received products from Chicken Salt via 37 Cooks.
Yum

Monday, November 9, 2015

Mulled Lime-Pickled Onions

You've heard of mulling spices, right? You can make your own mix, but I got some from Frieda's Specialty Produce that's really good - and convenient. I used to be opposed to spice mixes, but lately I've realized that they're really handy to have on hand. Instead of pulling out 8 bottles of spices, I can just grab one jar.

So, anyway, my neighbor had just given me a whole bunch of limes. My first thought was that I wanted to make some lime-pickled red onions. They're one of my favorite things. I put them on tacos, salads, and sandwiches. So darned good.

Usually I make my pickled onions very plain - lime juice, a tiny bit of salt, and red onions. And that's it. But I couldn't get it out of my head that I should try the onions with mulling spices. So I did. And they were really good.

The only thing I'd do different next time is wrap the spices in cheesecloth or put them in one of these so I didn't have to pick the spices out of the onions in the bottom of the jar.

Lime Pickled Onions with Mulling Spices

2 tablespoons mulling spices
1/2 teaspoon salt
Red onions, sliced, to fill a quart jar
Lime juice, to fill jar full of onions

Put the mulling spices in a quart jar (wrap in cheesecloth, if you like) and add the salt. Pack the sliced red onions in the jar. The more you can jam in there, the less lime juice you'll need to fill the jar.

Fill the jar with lime juice. Cover the jar and refrigerate. The onions are ready when they're an even bright pink color. It usually takes 2-3 days. Serve as desired.

I receive products from Frieda's for use on my blog; you can find their products at your local grocery store.
Yum

Wednesday, August 5, 2015

Salt-Block Pickled Zucchini

A while back, I picked up a salt-block-cooking cookbook at my favorite used bookstore.

No, the store isn't used. Most of the books are, though.

I didn't happen to have a salt block to cook on, but I figured that I'd get one eventually, and the book looked really interesting.

The book made it very very clear that grilling on a salt block is not for the faint of heart or the impatient. The salt block has to be heated slowly and there's still a chance it can break suddenly. Or even sort of explode.

Besides heating the salt block slowly, the other really important thing to keep in mind is that not all salt blocks are rated for cooking.

The ones with certain types of flaws are much more prone to breaking and should only be used for serving or for cold uses.

A few weeks after I got the cookbook, I got an email from the PR firm representing a company called SaltRox. And guess what they make? Yup, salt blocks. It was like karma. Salty, savory, delicious karma.

I was pretty happy to see that the salt blocks from SaltRox were rated for cooking, and it said so right on their website. Which is great, because I doubt most folks would be able to tell just by looking at the block. I sure couldn't.

Since salt blocks are a natural product, you'll always see lines of different colors - that's not a flaw. But it does make them very interesting to look at.

While searing a steak on a hunk of salt sounds really interesting, I'm betting most folks would use the block for other purposes, It's lovely for serving, and you can use it for salting or pickling foods. I also saw a recipe for drying food. Or you just display it. It looks really beautiful, and it changes depending on the light source.

The thing to remember if you're going to use the block for serving is that it's not a big pink plate - it's a giant freaking slab of salt. So if you put food on top of it, the food will get salty, and the longer it sits, the saltier it will get.

The food will also begin to lose moisture, if it's something that has moisture in it. I mean, a cracker isn't going to start weeping, but a slice of tomato will definitely lose water and get salty pretty quickly.

I browsed through the book to find something to make that would showcase the salt block, and I settled on a recipe for pickled vegetables. I decided to use zucchini.

But when I got to assembling ingredients, I realized that the recipe had a major flaw. The introduction talked about how the olive oil was essential as it kept the salt from being to aggressive. But there was no olive oil in the recipe. None. Zip. Nada.

Oops.

So I decided to have some fun on my own. The resulting zucchini slices were like brined pickles, but done in much less time, and using a much more interesting method. I'm definitely going to be messing around with pickling on the block a lot more, and maybe I'll even make one of the other recipes from the book. The seared scallops looked pretty amazing.

Salt-Block Pickled Zucchini

1 medium zucchini
1 tablespoon cider or wine vinegar
3 tablespoons olive oil
1 tablespoon sugar
1 teaspoon dry dill
Several grinds black pepper

Have your salt block standing by. Since the zucchini will release moisture, it's a good idea to have the block on something that will catch the drips.

Slice the zucchini in 1/4-inch thick slices. You don't want them too thin, or they'll be too salty.

I cut mine on a slight bias, but cutting them into rounds is fine. I ended up with 12 slices which left plenty of room on the block, but it was plenty for pickles to go with dinner.

Combine the rest of the ingredients in a bowl and stir to make sure the sugar dissolves. Add the zucchini and stir to coat.

Let the excess liquid drip off of the zucchini back into the bowl, then arrange them on the salt block. Reserve the remaining oil/vinegar mixture.

Let the zucchini sit for 15 minutes, then turn them over and let them sit for an additional 10 minutes.

You can taste one now and assess the level of saltiness. If you want them saltier, leave them on the block a few minutes longer. Pat the zucchini dry on both sides with paper towels.

Arrange the zucchini on a plate and drizzle with some of the reserved vinegar and oil mixture.

More about salt blocks

Salt blocks aren't like other cooking surfaces. They get crazy hot and retain the heat. And they wear away when you use them.

And you can't clean them like normal cookware.

You can certainly scrub a salt block to get rid of baked on food or to remove food residue. But you shouldn't use soap, because the salt blocks are porous, and you don't want soap in your next batch of food.

On the other hand, salt is a bacteria-killer, which is why it's used in food preservation. You certainly want to get food residue off the salt block but you don't need to worry about the fact that you can't use soap or shove it in the dishwasher.

They're also heavy and can be slippery when they're wet.

If your salt block does break, you have a couple of choices. You can still use it with the pieces snugged up next to each other. Or, if it's a small corner that broke off, you can crush it, grind it, and use it like ... well, like salt. And when the salt block has worn away so much that it's no longer useful - or if it has broken into too many pieces - you can bust it up, crush it, and use it to fill your salt grinder.

Yup, this is cookware you can eat.

I received a salt block from SaltRox at no cost to me for my use on the blog.
Salt-Block Pickled Zucchini
Yum