Showing posts with label Poultry. Show all posts

Friday, February 10, 2017

Chicken and Mushrooms

When I got the book Stacy Lyn's Harvest Cookbook, I saw a lot of recipes I wanted to make. But, like many books that celebrate harvests, it called for a lot of fresh ingredients that aren't particularly wonderful at the grocery store in February. While I probably could have bought strawberries, I know they would have been sub-par, and that's not fair to the recipe or to the rest of the ingredients.

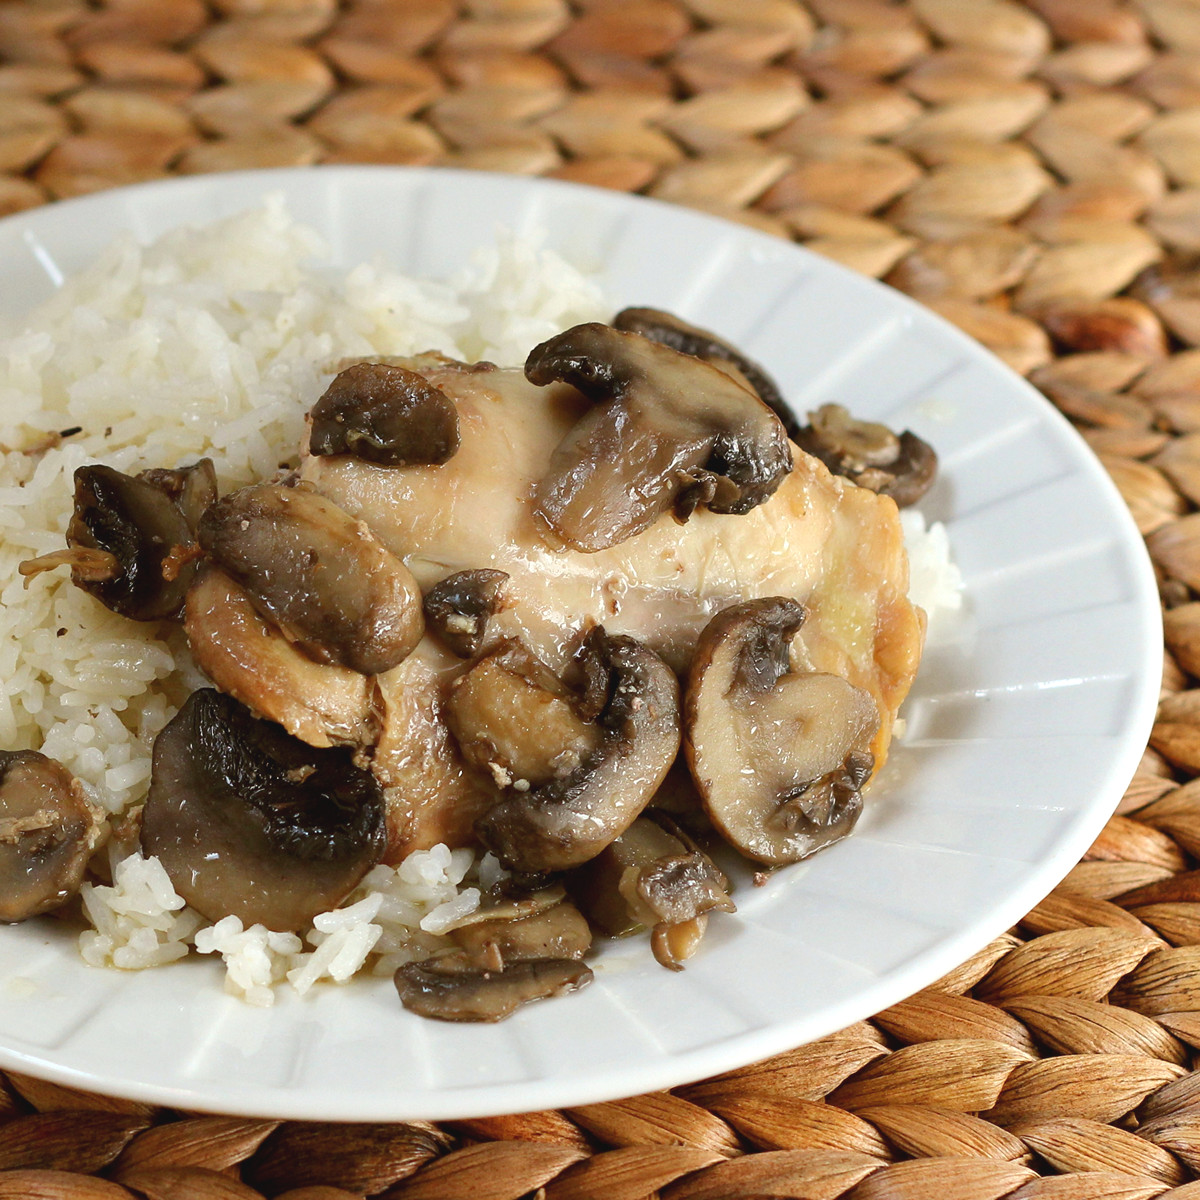
I paged through the book until I saw the Chicken and Mushrooms over Cheesy Grits. It sounded good, and the ingredients all made sense at this time of year. But the grits. Sigh. I adore grits, but I had just made a batch of rice with saffron. So I skipped the grits (waaaah, I love grits) and I served the chicken with the rice.

I followed the recipe pretty closely except that when I grabbed the chicken stock, it was actually turkey stock. Oops.

Oh! And I used all crimini (aka baby bella) mushrooms. I'm not fond of shitaki mushrooms enough to want to buy them. So, instead of 1/2 pound of crimini, 1/4 of button, and 1/4 pound of shitaki, I used all crimini.

The other adjustment I made was that after the chicken was done, I thought the sauce was too thin, so I removed the chicken, removed the lid, and continued cooking the rest until the sauce was reduced and it had thickened more. The instructions called for cooking it "partially covered" which is open to interpretation. I guess mine was more covered than it should have been.

I think if I make it again, I'll cook uncovered at first and cover it if I think it needs to be covered. While it didn't look like it was going to be too liquidy when I first assembled it, the mushrooms exuded a lot of liquid during cooking. But some folks might prefer more liquid, so it's not a fault with the recipe, it's just a preference.

Chicken and Mushrooms
Adapted from Stacy Lyn's Harvest Cookbook by Stacy Lyn Harris

4 skinless, boneless chicken thighs
1/2 teaspoon salt
1/4 teaspoon ground pepper
1/4 cup flour
1 tablespoon olive oil
2 large onions, cut into 1-inch pieces
3 garlic cloves, minced
2 large carrots cut into 1-inch pieces (I had small carrots, so I used 4)
1 pound crimini mushrooms
1 tablespoons rosemary, chopped
1 1/2 cups chicken stock

Combine the flour, salt, and pepper in a shallow dish, then coat the chicken with the flour. Save about 1 tablespoon of the flour remaining in the plate.

Put the oil in a large pot and heat over medium-high heat. When the oil is shimmering, add the chicken and cook until brown on all sides. Remove the chicken from the pan.

Reduce the heat to medium, add the onions, and cook for 2 minutes (I cooked mine a bit longer, until the onions were softened a bit). Add the garlic and cook for 30 seconds, then add the flour and cook for one more minute, stirring.

Add the broth, carrots, mushrooms, and rosemary. Return the chicken to the pan, along with any juices that came out of the chicken. Bring the liquid to a boil, then partially cover the pot and lower the heat so it simmers. Cook for 25-30 minutes, or until the chicken is no longer pink in the middle and the vegetables are tender.

At this point, I removed the chicken so it wouldn't overcook, and I removed the lid and increased the heat to thicken and reduce the sauce. You might or might not need to do this.

Serve over rice, grits, or whatever you prefer.

About the book: There are a lot of recipes here that I'll try when there are more fresh fruits and vegetables in season. My one quibble about the book isn't the recipes, but the printing. It's a pretty book, no doubt, but a lot of the recipes are printed on pages that have colored, patterned backgrounds. It's certainly lovely to look at, but it makes the text harder to read. Not impossible, but not as easy to read at a glance as if the page had black ink on plain white paper.

I received the book from the publisher at no cost to me.
Yum

Thursday, September 15, 2016

Crispy Garlic Paprika Chicken

Usually when I get a new cookbook, I browse through it, bookmark some pages, and then narrow things down to few recipes to see if I have the ingredients on hand or whether I need to go shopping.

When I got The Weeknight Dinner Cookbook by Mary Younkin the book opened itself up to a page that had a recipe for baked chicken thighs ... and I stopped right there.

Whoa. No need to look further. I didn't happen to have chicken thighs on hand, but I had the required spices (and seriously, most people would) so I didn't need to do any intense shopping. Just cruise through the meat section and grab some thighs - and that was it.

For a weeknight dinner cookbook, that's exactly what you need, right? A recipe that you can shop for without much thought, and one that you can cobble together quickly.

I didn't use an many chicken thighs as the recipe called for because I'm cooking for one, but that didn't really matter for this recipe. There's a spice mix that you put on the thighs, but it's pretty easy to sprinkle it on to taste.

Speaking of the spice mix - it's salt, paprika, garlic powder, and black pepper. While the recipe suggests mixing them, then sprinkling, you could sprinkle them on one at a time, or you could mix up a large batch of the seasoning and just sprinkle it on everything, everywhere.

Well, probably not on apple pie. But it would be just as good on pork, beef, or seafood as it is on chicken. Just call it your house-made seasoned salt.

Oh, and if you're wondering about the author, she blogs at Barefeet in the Kitchen, which is a pretty awesome blog. Check it out!

Crispy Garlic Paprika Chicken
Adapted from The Weeknight Dinner Cookbook by Mary Younkin

8-10 small bone-in chicken thighs (I had four)
1 1/2 teaspoons kosher salt
3/4 teaspoon paprika
3/4 teaspoon granulated garlic or garlic powder
1/2 teaspoon ground black pepper
2 tablespoons olive oil

Heat the oven to 400 degrees and line a baking sheet with parchment, foil, or a silicone mat for easly cleanup. Put a rack on the sheet.

Sprinkle the seasoning on the underside of the thighs, then drizzle the skin with the olive oil and sprinkle the skin side with the seasoning.

Place the thighs on the rack and roast for about 50 minutes or until the skin is crisp and the chicken is cooked through. Let the chicken rest for 10 minutes before serving.

More about the book:

I may have chosen the simplest recipe in the book, but it was darned good and well worth making. It's also a good representation of what you'll find in the book. Homey, tasty recipes that you can make with very normal ingredients that are probably in your pantry - spices, mustard, vinegars, oils - and other things that are probably hanging around, too like lemons, garlic, and potatoes.

But the book isn't ALL dinners, because dessert can be important, too. The peanut butter mousse is on my must-try list, for sure. I've made plenty of chocolate mousses, but I've never made one with peanut butter.

Honestly, there aren't a lot of recipes here I don't want to make. Some of them are similar to things I already make and some sound like recipes I could have thought of. But it's darned nice that someone has already made them so I don't have to think to hard about it.

I have to make one comment about the book itself. This has a binding that allows the book to lie flat on the counter which is pretty awesome for a cookbook.

Overall, I like this book a lot. Definitely recommended.

I received this book at no cost.
Yum

Wednesday, August 24, 2016

Technique: The anti-trussed poultry

I grew up with a mom who tended to overcook poultry. Or she overcooked the breast. The dark meat was usually fine. But here's the thing. Dark meat can handle being cooked longer and to a higher temperature. It doesn't mind at all. That's why you'll find thighs in recipes that require braising, and you'll find breasts in recipes that cook quickly.

The problem is that the breast is right there, up-top, where it gets the most oven heat. Meanwhile, the joint between the thigh and body is tucked away, protected from all the heat.

And then recipes tell you to truss the bird. Tie its legs together. This is somehow supposed to protect the breast from overcooking. I don't know about you, but I've never seen a chicken that had legs that covered the breast that well. Meanwhile, that thigh joint is still tucked away, right?

A while back, I was working on a chicken recipe where I was stuffing things under the chicken skin, and with all that fussing, the skin tore and the thighs spread away from the breasts and I decided to just go ahead and cook it that way. It wasn't a pretty, round, neat chicken. It looked messy. Lazy. Sort of ... ugly, if I'm being honest.

But here's the thing. That thigh joint was exposed to oven heat, and the chicken cooked much more evenly.

I had forgotten about that chicken until recently. I don't roast a lot of whole chickens. I cook a lot of chicken pieces. But I was cooking a recipe from Sheet Pan Suppers and I saw the words "truss the chicken" and I said "Oh no. I want to anti-truss it." Instead of trying to protect the breast so it would cook slower, I wanted to expose the thighs so they'd cook faster.

And ... it worked! The only downside was that the skin on the thighs didn't get crisp. If the chicken had been cooking on a rack, the thighs would have gotten some air, but the chicken was sitting on a bed of vegetables, so the skin was kind of flabby.

In the photo, the chicken isn't quite done yet, but it's almost there. You can see how the meat in that body-thigh joint is still a little pink. It would have been a LOT more pink if that joint had been protected.

The good news is that breast wasn't overcooked by the time the dark meat was completely done. It was a sloppy looking chicken, but if you serve your chicken cut up, it doesn't really matter, does it? I'm calling it a win. I'm also calling it dinner, and sandwiches, and soup.

Next time, I might remove the leg-and-thigh sections completely so I can roast them skin-up. I mean, seriously. What would you rather have, a chicken that looks pretty, or one that's cooked correctly?
Yum

Friday, September 4, 2015

Quick and Easy Chicken with Hatch Chiles

Don't get me wrong. This isn't fancy food. This isn't something you'd serve the Queen when she showed up. What this is, very frankly, it the meal you make when you want an hour before dinner to just sit and chill.

Or maybe an hour to help problem child with homework.

This uses (gasp) a can of soup. Yes, there I said it. I was inspired (and possibly frightened) by a recent cookbook that passed this way. It was written by Coolio.

Yes, that Coolio.

He's not a cook, but he wrote a cookbook called Cooking with Coolio, and it's a little weird. He has an odd love for balsamic vinegar, and canned soup made its way into a whole lot of recipes.

So I tried one of the canned-soup concoctions. And you know what? I liked it. It was comfort food. He was also pretty heavy-handed on the salt. Just so you know.

Anyway, this is not one of his recipes; not even adapted. The book is now long gone, so I couldn't peek if I wanted to.

I made this in my slow cooker, which is my usual set-it-and-forget-it cooking tool, but you could also make this in a heavy-bottomed pot, like a Dutch oven, either on the stove or in the oven.

Chicken with Hatch Chile

1 tablespoon olive oil
3-4 bone-in, skin-on chicken thighs*
1 red bell pepper
2 fire-roasted and cleaned Hatch** chiles (hot or mild, your choice)
2 tablespoons balsamic vinegar
1/4 cup water
1 can cream-of-something** soup
1/2 teaspoon salt
Chives or the green part of a scallion, for garnish (optional)

Heat the oil in your slow cooker (if it's got a stovetop/browning function) or in a pan on the stove. Or in your Dutch oven, if that's what you're using. Add the chicken, skin-side down, and cook until nicely browned. Flip the chicken over and cook the same way on the other side.

You can prep the vegetables while the chicken is browning.

Core the bell pepper and cut into a large dice. It doesn't need to be pretty. This is rustic food. Add to the pot when the chicken is browning on that second side.

Combine the peppers, balsamic vinegar, and water in a blender. Or you can use a stick blender or food processor. No tools like that? Just chop the peppers as finely as you can. Otherwise, blend the pepper mixture until it's as smooth as it can get.

Add the soup, pepper mixture, and salt to the chicken in the slow cooker and give it a stir. Cook on high for 60-90 minutes, depending on how much down time you need before dinner.

I served this with rice - made in my rice cooker. The rice was great for sopping up the extra sauce. Easy peasy.

Garnish the chicken with a few snips of chives or scallion, if desired.

* Of course, you can use other parts. Whatever you like. Cooking time might be different, though. I like thighs for the slow cooker because they're so forgiving as far as overcooking is concerned.

** If you don't happen to have freshly fire-roasted Hatch chiles waiting to be used, you can substitute with whatever you happen to have, or that you like.

*** I used cream of chicken, but you could use cream of mushroom, cream of celery, or even cheddar cheese soup.
Quick and Easy Chicken with Hatch Chiles
Yum

Thursday, July 9, 2015

Sweet 'n Spicy Crunchy Crumb-Coated Chicken

I love a good challenge, so when the folks at Honey Bunches of Oats asked me if I'd like to adapt or create a recipe using their product, I decided to create my own masterpiece.

And this is truly a masterpiece. It better be. I've eaten more than my fair share of it.

Apparently, everyone's mom used some kind of cereal to coat chicken. Except mine. It was never part of her repertoire, but I think it's a pretty great idea. So the first trial batch of cereal-coated chicken was left fairly plain, so I could decide what direction to take next.

Second batch was flavored with spices I use in barbecue sauce, and it included some lemon flavoring to give it a little tartness. I thought barbecue flavors would go well with the slight sweetness from the cereal. The result was good, but not perfect. Something was missing.

The final piece of the puzzle was cumin. It doesn't make this taste like Mexican chicken, but the cumin adds a slightly smoky savoriness that rounded out all the other flavors perfectly.

Oh, but that's not all. I used this same breading on pork, which was very good, by the way. But then I decided I liked it better on chicken. So I made more chicken.

But of course, part of being a blogger is taking photos of the food. Oops, we ate it all before I got photos. I made it again and the lighting was terrible. I took pictures but they looked dull. Which isn't so bad for tomato soup, but not so great for crunchy chicken.

Finally, the last batch (because I'm out of cereal now!) was made and photographed and eaten. I served it as an entree with rice mixed with spinach and a little lime, and leftovers made terrific sandwiches with a lettuce, tomato, and a little bit of mayonnaise.

This would also work well with tomato sauce and some melted cheese on top, like a chicken parmesan. Or sliced and served on a salad. Or stuffed into a tortilla and topped with salsa and guacamole. It's good hot or cold. Trust me, I know. I might have snuck a little nibble as a late-night snack.

But I'm still not tired of eating it. It's that good.


Chicken and rice ... so nice!

When you make this, consider your paprika. This includes both smoked and regular paprika, but the regular could be sweet paprika, sharp paprika, or half-sharp. The sharpness refers to the level of spiciness - paprika is ground peppers, after all. I found that the half-sharp gave it a nice little hint heat without making it a super-spicy dish. But use what you like - or what you have.

If you want to amp up the heat, you could add a little cayenne pepper. Start with 1/4 teaspoon, and add more if you think you need it.

I used the plan Honey Bunches of Oats cereal for this recipe, but I'm sure it would also work with the version with almonds.

Sweet 'n Spicy Crunchy Crumb Coated Chicken

For the crumb mix:
Stack 'o Crunchy Chicken
4 cups Honey Bunches of Oats cereal
2 teaspoons paprika (I used half-sharp, but sweet is fine)
1/2 teaspoon smoked paprika
1/2 teaspoon onion powder
1/4 teaspoon garlic powder
1/4 teaspoon allspice
1 teaspoon True Lemon or Fruit Fresh
1 teaspoon salt
1 teaspoon cumin
For the chicken:
3-4 chicken boneless, skinless chicken breasts
1 cup all purpose flour (more, as needed)
1 large egg
Olive oil or vegetable oil, for cooking

To make the crumb mix
Combine all of the ingredients in your food processor and pulse until you have crumbs - but don't process too much. You want crumbs, not flour.

Transfer the crumbs to a suitable storage container. This makes enough for several batches of chicken, but since all the ingredients are dry, it stores well between uses.

To make the chicken:
You can see how crunchy it is!
If the chicken breasts are large, cut them in half. Place the chicken breasts, one at a time in a plastic bag. Use the flat side of a meat mallet to pound the breasts to an even thickness. You can make them a little thinner, if you like, but don't keep pounding until you've shredded them.

Yes, I know it's fun to whap them, but you have to have at least a little restraint. Flatten all the chicken breasts in the same way.

Set up a breading station with three flat bowls or deep plates, with flour in one, the egg in another, and about a cup of the crumb mix in the third. You can always add more, if needed.

Add about 2 tablespoons of water to the egg and beat lightly, just to combine. If you need to coat 4 larger chicken breasts, you might need a second egg, but start with one, You can crack another one later if you really need it.

Coat each piece of chicken in the flour first, then dip in the egg, then coat with the crumbs. As you finish coating the pieces, you can place them on a wire rack or baking sheet.

Heat about 2 tablespoons of oil in a large pan on medium heat. Or, if you have a lot of chicken and don't want to cook in batches, use two pans. When the oil is hot - but not smoking - add the pieces of chicken to the pan.

See those crumbs? Good snackin'!
Cook the chicken on one side until the coating is nicely browned, then flip and cook on the second side. If you need to add more oil, do so. The chicken shouldn't be swimming in oil, but you need a little oil to get the right browning.

When both sides are nicely browned, check the chicken for doneness - you can use a thermometer or simply cut a slit in a piece and peek inside. The temperature should be 160 degrees and it should be barely pink.

If the chicken isn't cooked through, lower the heat a bit - you don't want it over-browned - and continue cooking, flipping the chicken over as needed.

Serve hot, at room temperature, or even cold.

Thanks to Honey Bunches of Oats for sponsoring this post. For more about the cereal, you can find them on Facebook (@HoneyBunchesofOats) Twitter (@HBOats) and Instagram (@HBOats).
Sweet 'n Spicy Crunchy Crumb Coated Chicken
Yum

Tuesday, June 30, 2015

Chicken with Sunflower Butter, Lime, and Sriracha - a slow cooker recipe

A while back, I posted an ice cream recipe made from a chocolate and sunflower seed butter that I got from a local company called Good Luck Chuck.

While I was pretty fond of that recipe, I have to say that the very first recipe I thought of was a savory one. When I heard there was a sriracha-flavored sunflower seed butter, my first thought was about the peanut dipping sauce for chicken sate.

But I envisioned it as a spicy chicken gravy, sort of. Well, first I was thinking that I didn't want to thread chicken onto skewers, and a spicy nutty sauce would be good as a sauce for chicken thighs.

With those thoughts in mind, I went into the kitchen and started fiddling around with flavors.

The first thing I knew I wanted to do was to make this recipe in my slow cooker. It's warm out (and inside) and the slow cooker doesn't heat up the kitchen. And I don't have to watch it all that carefully.

Chicken with Sunflower Butter, Lime, and Sriracha

2 tablespoons olive oil
4 bone-in, skin-on chicken thighs
1/2 cup Good Luck Chuck Sriracha Sunflower Butter
1/4 cup lime juice
1/2 cup water
2 tablespoons chopped fresh cilantro
2 scallions, thinly sliced, white and tender green
1/2 teaspoon salt
Generous grinds of black pepper

If your slow cooker has a browning setting, heat the olive oil in the slow cooker, then brown the chicken, skin-side down, then flip it over and brown it on the other side.

If your slow cooker doesn't have a browning setting, you can brown the chicken in a skillet, then add it to the slow cooker. You can also skip the browning, but it adds extra flavor to the chicken and helps the texture of the chicken skin.

Add all of the other ingredients, and stir to combine.

Cover the slow cooker and cook on low for 4 hours, or until the chicken is tender.

Check the chicken a few times to make sure there's enough liquid in the cooker - you want a sauce consistency, so add water, if needed, during the cooking process. Depending on your cooker, you might not need to add more.

Taste for seasoning and add more salt, pepper, or lime juice, if desired.

Serve hot, with the sauce.

To take advantage of all of the tasty sauce, consider serving this with rice.

Good Luck Chuck is currently for sale in a limited geographic area, but if you're not in the neighborhood, you can also buy it on Amazon.

Thanks to Good Luck Chuck for sponsoring these posts!
Slow Cooker Chicken with Sriracha, Sunflower Butter, and Lime
Yum

Tuesday, May 12, 2015

Potato-Stuffed Roast Chicken

I've stuffed plenty of chickens, but I have to say that I've never stuffed one with potatoes. But why not? Chicken and potatoes go together perfectly. So when I saw a recipe for potato-stuffed chicken in the book Smoke & Pickles by Edward Lee, I knew I had to give it a try.

This is one of the books that's being mailed around in the Cook My Book group that I belong to. I'll admit that the chicken wasn't the prettiest thing I've ever made, but it was delicious, and the skin was super-crisp.

The interesting thing about this chicken recipe was how evenly the thigh and breast meat cooked. Usually the breasts cook faster and tend to dry out, but in this case, the layer of potato shielded the chicken breast from the heat. Meanwhile, all the fussing with the skin caused the legs to splay out a bit. And then I gave them a little encouragement, so that thigh-body joint that tends to be a problem was exposed to more direct heat.

Next time I make this, I'm going to add some flavor to the potatoes. Fresh herbs would be good, or maybe some roasted garlic or some onions cooked with the potatoes.

And there's going to be a next time for sure. This was a really good dish. Not stunningly pretty when it was done  - but I always cut up poultry before I serve it. So it doesn't really matter what it looks like in the pan.

Potato Stuffed Roast Chicken
Adapted from Smoke & Pickles by Edward Lee

1 large Yukon Gold potato (about 11 ounces), peeled
1 tablespoon unsalted butter
2 teaspoons kosher salt (or to taste)
1 teaspoon freshly ground black pepper (or to taste)
Fresh herbs, roasted garlic, or other flavorings (optional)
1 roasting chicken (3 to 3 1/2 pounds)
2 teaspoons olive oil

Grate the potatoes coarsely using the large holes on your favorite grater. Wrap the potatoes in some cheesecloth or a clean kitchen towel and wring out as much liquid as possible.

Melt the butter in your largest cast iron skillet over medium heat (you'll be using this skillet to cook your chicken, so just make sure the chicken fits). Add the grated potato, 1/2 teaspoon of salt, and 1/4 teaspoon of pepper (or to taste). Stir gently and cook for exactly 2 minutes, then transfer the potatoes to a plate and let them cool.

When the pan has cooled, wipe it out with a paper towel; you'll be using it again.

Position a rack in the upper third of the oven and heat to 400 degrees. The chicken needs to fit in the pan on that rack, so make sure it fits - ovens are not all the same, and you don't want the chicken bumping the top of the oven.

Now it's time to wrangle the chicken. Place it on your work surface with the breast side up and the legs facing you. slide your fingers under the skin and start moving it from side to side to release the skin from the breast meat. You want it completely loose from front to back. If you like, you can spin the bird around and work at it from the opposite side. Try not to tear the skin.

If you're adding fresh herbs or other flavorings to the potato mixture, mix them in now. A teaspoon of fresh herbs should be fine, or add what you like to taste. Stuff the potatoes into the space between the loosened skin and breast meat. Try to get it in somewhat evenly, then massage the outside skin of the chicken to get those potatoes into an even layer all across the breast.

Rub the chicken with the olive oil and season with as much of the remaining salt and pepper as you like.

Heat the cast iron pan on medium heat. When the skillet is hot, place the chicken breast-side down in the pan and press it gently against the bottom of the pan. Hold it while it browns lightly - about 3 minutes.

Flip the chicken over onto its back in the pan and place it in the oven. Cook at 400 degrees (yes, that's correct) for 50-60 minutes, until it reaches your desired cooking temperature. These days, 155-160 degrees is accepted. Remove the chicken from the oven and let it rest in the pan for 10 minutes.

Carve the chicken as desired. The best thing to do with the breasts is to carefully remove them from the chicken bones and cut each breast into 3 or 4 large pieces for serving.
Yum

Tuesday, May 5, 2015

Hunter's Chicken (Pollo alla Cacciatora)

So this is how my life works. As I was going to bed, I realized that I hadn't dragged anything out of the freezer to thaw for dinner, and I pondered what I might make for dinner the next day.

I knew I had chicken thighs in the freezer, and I remembered seeing a chicken recipe in one of the piles of cookbooks I'd recently bookmarked.

So, first thing I did (well, after coffee, actually) I pulled the chicken out. Later, I went hunting for the cookbook. The recipe obviously wasn't in the cookie book or the pie book or the bakery book or the mug meal cookbook or ... hmmm ... which one? I knew I saw it somewhere.

Finally, I picked up Extra Virgin by Gabriele Corcos and Debi Mazar. I paged through the bookmarks. Not the potato and pepper stew, not pork loin, not the pasta ... and then I saw the Hunter's Chicken. That was it!

As I perused the ingredients, I realized that I had (sort of) everything I needed. The recipe called for 12 pieces of chicken including white and dark meat. I had six chicken thighs. The recipe called for anchovy filets, and I had anchovy paste. The recipe called for garlic cloves and I had Dorot frozen crushed garlic cubes. The recipe called for red onion, carrot, and celery. Okay, I had those.

But then it called for Sangiovese red wine. I had red wine, but not that one in particular. I used a red blend from Chateau La Paws. The recipe called for chopped fresh Roma or plum tomatoes. I had canned tomato products. The recipe called for black pitted olives. I had Lindsay Naturals green olives (they taste like black olives, but they're green). The recipe called for fresh bay leaves, but I had dry bay leaves sent to me by my friend Charles Turnipseed.

And while we're naming brands, I just happened to notice that I was using Hunt's canned tomato products for a recipe called Hunter's Chicken. On a side note, one of my favorite canned tomato products is the Petite Diced. I can't explain exactly what it is, but they taste fresher and they also tend to hold their shape better when they're used in cooked recipes, so you keep the texture.

So, after reading the recipe and checking my available ingredients I realized that I might as well make my own version of the recipe. Not a big deal, because I'd made Chicken Cacciatore many times, so I knew what it was supposed to be like, and I decided to keep the "bones" of the Extra Virgin recipe. My changes weren't all about substituting ingredients, though. Once I decided to wander off on my own, I also changed the amount of most of the ingredients. Some were small changes and some were much more substantial.

In the end, it worked. Possibly better than other versions of Chicken Cacciatore I'd made before. I served with rotini pasta to take advantage of the sauce - and I cooked it in a new way. Yup, a new way for cooking dried pasta. Whoda thunkit?

And, by the way, when my brain isn't fully engaged, I'm quite likely to call this recipe Kitchen Cacciatore. Which makes no sense at all.

Hunter's Chicken (Chicken Cacciatore)
Inspired by Extra Virgin by Gabriele Corcos and Debi Mazar

1 tablespoon olive oil
6 chicken thighs
Salt and pepper (to taste)
1 teaspoon anchovy paste
2 cubes Dorot garlic (or 2 garlic cloves, minced or crushed)
1 red onion, peeled and diced
1 carrot, peeled and diced
1 celery stalk, diced
1 cup red wine (I used Chateau La Paws red blend)
1 14.5-ounce can petite diced tomatoes
1 8-ounce can tomato sauce
1 6-ounce net weight can Lindsay Naturals pitted green olives (you can use black olives), drained
2 dry bay leaves

In a large skillet or Dutch oven, heat the olive oil on medium heat. Salt and pepper the chicken on all sides. Add the chicken to the pan, skin-side down, and cook until golden brown. Flip and cook on the other side. Remove the chicken from the pan while you continue cooking.

Add the anchovy paste and garlic cubes and cook, stirring, until the garlic cubes have thawed in the pan and the mixture is fragrant. You don't want the garlic to get more than very lightly browned, because a few seconds more could result in burned garlic.

Add the onion, carrot and celery and cook until the onions look translucent and the vegetables are all beginning to soften.

Add the wine and cook at a vigorous simmer until the alcohol scent is gone. You want it to smell winey, but not like alcohol. It will reduce while you're doing this.

Add the tomatoes, tomato sauce, and olives. Stir to combine.

Nestle the chicken into the sauce and add any liquid that came out of the chicken while it was resting. Nestle the bay leaves into the sauce - you'll be removing them before serving, so adding them last makes them easy to fish out.

Cover the pot, turn the heat to low, and cook until the chicken is tender - about 50 minutes. Since you're working with dark meat, it can stand to be cooked longer with no ill effects, so if you need to leave it longer, that's perfectly fine.

Serve hot.

There's a lot of sauce, so it's a good idea to serve this with something to take advantage of that sauce. I suggest pasta, but crusty bread is great, too.
Yum

Tuesday, November 25, 2014

Got-no-time Chicken with Wine and Rosemary

Sometimes you just want an easy dinner, and this certainly fills the bill. There's almost no prep work - I bought sliced mushrooms because they looked good and they were the same price per pound as the whole mushrooms.

If you buy whole mushrooms, you can leave them whole, slice them, quarter them, or whack them into random pieces. It really doesn't matter.

As far as the chicken, I used chicken thighs, because that's my favorite for stewing or braising.

The bad thing about stewing any kind of chicken is that the skin tends to be ... well, not crisp. Actually, it's sort of flabby. I like cooking the chicken with the skin on for flavor, and in fact I brown it first. But don't necessarily eat it.

If you prefer, you can remove the skins before cooking. Or buy skinless, boneless thighs. Whatever makes you happy. The idea here is that this is a super-simple meal, so do what's easiest for you.

This recipe uses Holland House cooking wine. I posted one sponsored post for them and have another one coming little later, but meanwhile I'm working with the products for fun, and in fact I've purchased more of it because I'm finding that it's really handy to have around.

You could substitute your own favorite wine. If you're not using a cooking wine, add salt to taste, since cooking wine includes salt.

Chicken with Wine and Rosemary

2 tablespoons butter
5 chicken thighs (more or less, as preferred)
1 pound mushrooms, sliced
1 cup Holland House white cooking wine
1 sprig rosemary
Rice, for serving

Melt the butter in the bottom of a heavy bottomed pot - like a Dutch oven. Brown the chicken pieces on all sides, then add the mushrooms.

Cook for a few minutes more, stirring to get the mushrooms in contact with the bottom of the pot for a few seconds of browning.

Add the white wine and rosemary and cover the pot. Cook for 20 minutes, then uncover, stir, and cook until the chicken thighs are cooked through and the liquid has reduced a bit - another 10 minutes or so.

Discard the rosemary sprig.

To take advantage of the flavorful liquid, serve with rice. Or potatoes. Those would be nice, too.

This is NOT a sponsored post. I received products from the company for other posts, but since then I have purchased more of their products for my use.
Yum