Showing posts with label Fruit. Show all posts

Wednesday, September 5, 2018

Canned Peaches #Canbassador

As a happy participant in the Canbassador program, the nice folks at Northwest Cherry Growers also sent me a box of peaches this year.

I looooove peaches.

I usually eat them plain. Sometimes I make pies or tarts. But I never thought about canning them, until now.

Just like cherries, peaches are crazy easy to can, requiring little more than a light or medium sugar syrup and a little time. Well, something to keep the peaches from browning helps, but I always keep Fruit Fresh in the pantry.

You can hot pack or cold pack the peaches, and the timing for canning depends on the size of your jars, and your altitude.

If you've never canned anything before, peaches are super-simple. If you have done a lot of canning, then maybe it's time to branch out to another recipe that has a few more ingredients. Like Drunken Peaches. This still isn't a super-complicated recipe, but it adds a little extra zip to the fruit you have stored.

While you might not want to use drunken peaches with your morning oatmeal, they're pretty danged good with ice cream!

Drunken Peaches
Adapted from Ball Canning Back to Basics
Makes 6 1-pint jars

1 lemon
5 pounds fresh, firm, ripe freestone peaches
3 cups water
2 1/2 cups sugar
3 vanilla beans, halved crosswise (if you don't have beans, vanilla extract should be just fine)
6 slices of orange, 1/4-inch thick. You'll need 2 small navel oranges.
3/4 cup bourbon

Rinse the lemon and peaches under cold running water and pat dry. Bring a large pot of water to a boil and fill a large bowl with ice water.

Cut the lemon in half and squeeze the juice into the ice water.

Working in batches, place the peaches in a wire basket and lower them into the boiling water. Let them blanch for 1 minute, then place immediately into the ice water. If you don't have a basket you can use, you can use a spider or slotted spoon to lower the peaches into the water, then retrieve them.

When the peaches are cook enough to handle, peel them and remove the pits. Cut each half into four wedges. Return the wedges to the lemon juice mixture.

Stir together 3 cups water and the sugar in a large stainless steel or enameled saucepan. Split the vanilla beans in half, lengthwise and scrape out the seeds. Add the beans and seeds to the sugar mixture and cook over medium-high, stirring until the sugar dissolved. Keep the mixture at a low simmer while you continue.

Place one orange slice and one vanilla bean half into a hot jar. Drain and tightly pack the peach wedges into the jar. Ladle the hot syrup into the jar, leaving 1 1/2 inches of headspace. Add 2 tablespoons of bourbon to each jar. Add more hot syrup to the jar, leaving 1/2 inch headspace.

Remove air bubbles from the jar, wipe the rims, and center the lids on the jars. Apply the band so it's fingertip-tight. Place the jar in the boiling water canner, and continue with the rest of the jars, until all the peaches are nestled in jars.

Process the jars for 25 minutes, adjusting for altitude, if necessary. Turn off the heat, remove the lid, and let the jars rest for 5 minutes before you remove them from the canner and let them cool.

I got the peaches at no cost; the book is one that I purchased.
Yum

Tuesday, September 12, 2017

Italian Prune Plum Jam with a Hint of Cinnamon

I adore Italian Prune Plums. I guess some people use them for making prunes, but I decided to make some jam. Because you can never go wrong with plum jam.

My first encounter with Italian Prune Plums was when I lived in Chicago and my neighbor has a tree. Some years, there was no fruit at all. Some years, there were a few plums here and there. And some years, that tree was so full of fruit that the branches would bend until they were nearly touching the ground.

Those years, my neighbors would hand me a paper shopping bag, half full of fruit. And I'd be eating plums every day. I'd never had plums like that before. They were tasty and tart when they were just barely getting soft, and they got sweeter as they got softer.

They were greenish yellow inside with a very dark purple outside. The interior would go from green to a less green color that looked like it wanted to be a barely peachy yellow. When they're cooked, the inside turns bright red.

Back in Chicago, it never dawned on me to make jam, but now I like the idea of having a few jars of homemade jam on hand for slathering on English muffins. This particular jam is also good for swirling into yogurt or on top of ice cream.

I adapted this from a recipe on the Northwest Cherry Growers site. It was described as a plum butter, which is typically thicker than a jam - but it depends on how long you cook it to reduce it.

That's what's great about a recipe like this - you can cook it less for something that's a little looser, or cook it more to get a super-thick fruit butter. I let mine cook until it was more jam-like than butter-like. I also made it a little less sweet than the original,and fiddled with the spices a bit.

If you're going to can the jam for room temperature storage, I suggest using the original recipe - you really don't want to mess with sugar ratios when canning. But my version is great for refrigerator storage or for freezing.

Plum Jam with a Hint of Cinnamon
Adapted from a recipe on Northwest Cherry Growers site, courtesy of Sugarcrafter.net
Make two pint jars (or four half-pints)

2 pounds of plums, halved and pitted
1/2 teaspoon cinnamon
1/2 teaspoon salt
2 tablespoons lemon juice
2 cups granulated sugar

Run the plums through your food processor or blender until the mixture is as smooth as you can get it. In a large sauce pan, combine plums, cinnamon, salt, lemon juice, and sugar. Bring to a boil over medium-high heat, stirring frequently.

Reduce heat and simmer, stirring often, until the mixture thickens and holds its shape on a spoon (or it reaches the consistency you like.) The time this takes depends on several factors, including how hard you're simmering, the shape of the pot, and how much moisture there was in your plums. If you cook at a spunkier boil, you'll need to watch more carefully and stir often to make sure the jam doesn't stick and burn. If you opt for a very slow simmer, it will take a lot more time but require much less attention.

Taste and adjust sugar, lemon, and cinnamon to suit your taste, and cook for another minute or two. If the jam seems chunky or bits of skin are visible and you'd prefer them to disappear completely, you can give this another run through your blender or food processor. Make sure to exercise proper caution for blending hot foods in your particular machine.

Transfer the jam to containers for refrigerator storage or freezing.


For the original recipe, including canning instructions, check out Northwest Cherry Growers' site.
Yum

Thursday, August 10, 2017

Chunky Peach Jam with Brown Sugar and Rum #canbassador

Where did summer go? One second, it was spring, and now there's a hint of fall in the air.

What's also in the air *sniff sniff* is the scent of peaches. Mostly because the nice folks at Northwest Cherry Growers and Washington State Stone fruit Growers sent me a giant box of peaches and nectarines.

When I was a kid, I loved peaches and nectarines, but I didn't realize they were different fruits that you could buy. I thought that nectarines were peaches that had been cleaned better. So when my mom would hand me a peach, I'd give it back to her and ask her to wash it better. And again. And again.

Yeah, I was a weird kid.

I still love both peaches and nectarines, so I was giddy happy to have a whole box of them to cook with, eat out of hand, add to yogurt, and make some jam. And maybe I'll work them into some other recipes, too. Peach ice cream is pretty darned good.

So anyway, as soon as the box arrive, I picked through it and sorted out fruit that had gotten bumped and bruised in shipping so they wouldn't go bad, and used those to make jam right away. Since I didn't have a jam recipe that I was itching to make, I browsed through the Northwest Cherries site to see what they suggested. I found one credited to Recipezaar (now renamed Food.com) that looked interesting, since it included brown sugar and rum. So I made that one.

Oh, sure, I didn't make it exactly like this recipe. I have a new appliance here that I'm testing (currently code-named "Al") that I used to make the jam. I had to adjust the recipe to fit the appliance, so I tweaked for that. But, since I'm not ready to uncover that appliance yet, I can't really give you the adjusted recipe (and seriously, if you don't have that appliance, you probably don't want the adjusted recipe,)

So, here's the recipe I used. The brown sugar adds some richness that you don't get from white sugar, and the rum adds its own flavor - but it doesn't taste boozy, so this is perfectly fine for your breakfast toast.

It's a little bit chunky, but if you wanted a smooth jam, it would be easy to give it a quick blend with a stick blender before or after cooking.

Here's how it happened:

Chunky Peach Jam with Brown Sugar and Rum
Recipe from Northwest Cherry Growers, courtesy of recipezaar.com
Makes about 3 pints

Memphis salad plate courtesy of Zak! Designs.
6 cups peaches, peeled and coarsely chopped (about 4 lbs)
2 cups light brown sugar, packed
6 tablespoons strained fresh lemon juice
3/4 cup dark Jamaican rum
2 cups granulated sugar

In a large bowl, combine peaches with the brown sugar, lemon juice and about half of the rum, stirring to mix. Cover and let stand at room temperature six hours or overnight.

Wash jars and lids in hot, soapy water. Sterilize jars for 10 minutes in a boiling-water bath, then leave in hot water until ready to fill. Prepare lids according to manufacturer's directions. (Note: if you making this for immediate use, you can skip the canning and refrigerate the jam. If you want to store it at room temperature or save for later use, then follow the canning instructions.)

Pour the fruit mixture into a large saucepan or dutch oven. Bring to a boil over medium-high heat.

Cover the pan, reduce heat, and cook the mixture until the peach chunks begin to look translucent, 15 to 20 minutes; stir occasionally to prevent sticking. If the jam becomes too thick and threatens to scorch before the fruit is done, add 2 to 3 tablespoons of water.

Add the granulated sugar, increase heat to medium-high and cook rapidly, stirring almost constantly, until a spoonful placed on a chilled saucer and refrigerated for a few minutes wrinkles instead of runs when the saucer is tilted. (Take jam off the heat while doing this. If using a candy thermometer, this should happen at about 220 degrees.)

Add remaining rum and stir the jam (it will boil up when you add the rum) for 2 minutes over the heat.

Ladle boiling-hot jam into hot, prepared jars, leaving 1/4 inch head space. Top with lids and process for 15 minutes in a boiling-water bath. Cool jars completely on a dish towel before labeling and storing.

Thanks to Northwest Cherry Growers and Washington State Stone Fruit Growers for sponsoring this post!
Yum

Sunday, July 23, 2017

Got Cherries? Jam 'em, booze 'em, and eat 'em all up! #canbassador

When I was a kid, the best part of summer was walking with my mom to an empty lot a few blocks from where we lived. A guy would park a truck in the lot and sell fresh fruits and vegetables, weighing them on a hanging scale and putting them in paper sacks.

When cherries were in season, my mom would buy some for me. I'd munch on them all the way home, spitting the seeds out as I went. By the time I got home, there were no more cherries.

I'm surprised a forest of cherry trees didn't sprout along our route.

When the nice folks at Northwest Cherry Growers asked if I wanted to be a #canbassador, I jumped at the chance. Enough cherries to do some canning? Count me it!

I'll admit that I might have eaten several pounds of cherries all on my own. But I didn't spit the seeds all over the living room. That would have been weird.

The rest of the cherries were pitted and divided up for several different recipes. My two favorites were a smooth cherry jam, and some brandied cherries.

I also made a Luxardo cherry recipe that was good, but not perfect. I think it would have been better with tart cherries, or perhaps I need to tweak the sweet/tart ratio.

If you like Luxardo cherries, though, that recipe is a great starting place. Check it out!

The recipes I'm posting here were based loosely on some that I found on the Northwest Cherries site, but I cut back on the quantities so I could try more recipes.

Since I made so little of each recipe, I didn't actually can them for preserving, though. I tossed them into the refrigerator and started using them right away.

The great thing about making recipes for use "now" rather than canning is that you can adjust the sugar and acid to your taste, rather than for preservation. If you're making vast quantities of foods for long-term, non-refrigerated storage, make sure you're using a recipe from a trusted food preservation source. There's no sense spending the time and money to make a dozens of jars of jam, only to find they've molded in the jars when you open them.

Yeah, my mom made moldy jam once. It wasn't pretty.

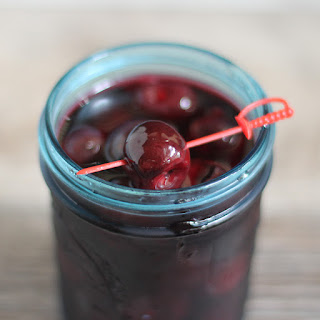
First, I made some brandied cherries. Like this:

Brandied Cherries

Based on a recipe from Northwest Cherry Growers.

Oooooh, this was so good.

I used these as a topping for ice cream. Adults only, of course. They'd also be nice in cocktails, but for that I'd suggest not chopping the cherries.

If you don't happen to have brandy, it should work just as well with bourbon or whisky. Maybe even rum.

1 pound sweet red cherries, pitted, stemmed, and roughly chopped
1/2 cup sugar
2 tablespoons lemon juice
1/4 cup brandy

Combine the cherries, sugar, and lemon juice and bring to a simmer and let it cook for a minute or two.

Add the brandy, bring to a boil, then turn off the heat.

Transfer the cherries and liquid to jars or other storage containers (this makes about a pint, plus a little extra) and allow it to cool, then refrigerate.

Next, I made a cherry jam, also based on a recipe  from the Northwest Cherry Growers website, but I used sweet red cherries instead of yellow ones. 

Sweet Cherry Jam


2 pounds red cherries, stemmed and pitted*
1 1/2 cups sugar, or to taste
1 teaspoon vanilla extract
1/2 teaspoon almond extract
Pinch of salt
2 tablespoons lemon juice

Put all the ingredients in a blender, and blend until smooth. If you're not sure about the sugar amount, feel free to start with less - let's say about 1/2 cup - and add more sugar later, if you want more sweetness.

Transfer the blended cherries to a saucepan and heat to a boil, then lower to a happy simmer. Continue cooking, stirring often, until the jam reaches your preferred thickness.

Like the napkin? Get them here
Since it will become thicker as it cools, the best way to check it is to put a small amount of the jam on a spoon and put the spoon in the refrigerator to chill.

Taste your thickness tester and add more sugar to the pot, if desired.

If you prefer more tartness, add more lemon juice. Continue cooking until your optimal thickness is reached. Since I wanted to stir into yogurt or drizzle onto ice cream and for spreading on toast and muffins, I left it a little looser than if I only wanted it as a spread for toast.

Transfer to jars (this will make a bit more than a pint) or other storage container.

Let it cool, then refrigerate.

*Make sure your cherry pitter is actually ejecting every single pit from the cherries. Sometimes one will get stuck, and since you're blending, it could be a problem.

When I was done with this recipe, I had just a little jam left in the pan. Not enough to fill a jar, but more than I wanted to throw away. I added some pitted chopped cherries and let them cook a while to create a chunkier, not-as-sweet jam, adjusting sweet and tart on a whim. Did I write anything down? No, of course not. But that's the great thing about refrigerator jams - you can wing it, adjust flavors on the fly, and end up with a little half-pint of something fun.


Thanks to Northwest Cherry Growers for sponsoring! 
Napkins shown in photos provided by The Napkins at no cost to me for use on my blog.
Yum

Wednesday, May 31, 2017

Mango Mousse

Let me be honest. I have a love-hate relationship with mangoes. When they're good, I love them. Totally love. But it seems like I also sometimes end up with mangoes that are mealy or that just taste ... weird.

I have a better track record with peaches, plums, and all their relatives.

Also, mangoes are not the most fun thing to peel. So I dragged out my mango splitter. I don't use it often, but it has its place in my drawer full of things that I don't use often, but I use enough.

That said, the little yellowish mangoes tend to be more successful for me, and when I saw them on sale, I grabbed a few of them. And then as I was browsing through a cookbook that just appeared from a publisher - Farm-to-Table Desserts by Lei Shishak - I found a recipe for mango mousse that looked pretty intriguing.

Most of the mousses I've made have been chocolate, and they've been rich and calorie-dense. This mousse is much lighter.

I figured I'd make it as written, and if it worked, I could certainly adapt it to other fruits. Like peaches. A peach mousse, in season, would be pretty awesome.

So anyway, the book's tagline is "80 seasonal organic recipes made from your local farmers' market." Well, mangoes don't grow here and it's only May as I write this. We had snow not that long ago, so there aren't a lot of local crops at all.

But that's why we have grocery stores. That carry in-season fruits and vegetables that are in season in other parts of the country. Otherwise, I'd be fruitless at this time of year, and still living on root vegetables and petrified winter squashes from last season.

So anyway, the mousse was really nice. Fruity and soft and silky and and just sweet enough without being overly sweet. I think it would make sense to make this in a larger quantity, for best blending in the blender and also to have more mousse for dessert.

I think my mangoes were a little smaller than what the author imagined, so what I ended up was probably not four servings. I didn't put it into individual ramekins, as suggested, because I thought one container in the fridge made more sense.

This is one of the easier recipes in the book, which has a nice range of recipes from simple all the way to ones that are a little more of a project. There are baking recipes, ice cream recipes, and some that are uncooked. And kettle corn, too. Lots of variety.

Mango Mousse
Adapted from Farm-to-Table Desserts by Lei Shishak

1 teaspoon powdered gelatin
2 tablespoons water, divided
2 medium mangoes, ripe
1/2 teaspoon fresh lemon juice
5 tablespoons sugar
1/2 cup yogurt (she suggested Fage, so use a Greek-style)

Sprinkle the gelatin over 1 tablespoon of water and set aside while you wrangle the mangoes.

Peel the mangoes, cut the fruit away from the pit, and cut the fruit into chunks. Or use a mango pitter, then use a spoon to slide the fruit out of the skin.

Put the mango pieces and the lemon juice in a blender, and blend until smooth.

Add the softened gelatin to a small pot and add the sugar and the remaining tablespoon of water. Heat on medium, stirring, until the sugar and gelatin have dissolved. At first, this will look like you don't have enough water, but it will be fine. Pour the gelatin into the blender and pulse to combine.

Strain the mango mixture into a small bowl. If you have a super-powered blender, you might not need to do this, but I found that it was even smoother after straining. So, your choice. Whisk in the yogurt.

Chill the mouse for at least 2 hours. You can divide it into individual servings before chilling, or put it into a storage container and scoop it out to serve.

YUM.

I received the book from the publisher at no cost to me.
Yum

Wednesday, August 31, 2016

Watermelon Gazpacho

Spouts, one of the food chains in this area, has started a monthly blogger get-together, and the second one I attended was at a cooking school called Cook Street School of Culinary Arts. And I've got their Watermelon Gazpacho recipe for you.

This is a view of where we had our class.


The theme was pizza. 

Pizzas are baking!

Here's another shot of the pizza oven. Isn't it great?


Needless to say, I rocked it with the dough-making, kneading, and shaping. Maybe I showed off a little bit. Diego, the sole Sprouts representative at the event, seemed like he had a lot of fun even though his pizza wasn't exactly round. He was a good sport!


We also stretched mozzarella, which was fun. They suggested that you can buy mozzarella curd, but you can also make your own - I've actually done it, and it's fun. (Why haven't I blogged about it? I have no idea!) To make it easier, you can buy a kit for making the cheese from scratch. Or actually from milk. But you knew what I meant, right?

They gave us a bunch of recipes to take home, for pizza, sauce, green goddess dressing, and a basil pesto, but the one that really intrigued me was the watermelon gazpacho. Which was one of the few things we didn't have our hands on. It was served to us as a little starter as the people from the cooking school introduced themselves and told us about what we were going to be doing.

Here's my finished pizza. And yes, that's a glass of wine.

The thing I thought was most interesting about the watermelon gazpacho was that it really didn't taste like watermelon. The tomato flavor was much more pronounced. What the watermelon added was a freshness and lightness. It wasn't like drinking pureed tomatoes.

And then there was the dollop of cheese on top - a blend of creme fraiche and feta that I wanted to steal off of everyone else's glass. I didn't know what it was, but I have to say I was pleased it was so simple. I can imagine using it as a dip with the addition of some herbs or as a dressing on fresh tomatoes and cucumbers.

I usually don't publish other people's recipes here, but I liked this so much I wanted to save it to make later. The recipe makes quite a bit, but it should be easy enough to cut this in half or even make just 1/4 of it.

Watermelon Gazpacho
Courtesy of Cook Street School of Culinary Arts

5 cups watermelon, small dice
4 tomatoes, cored, small dice
1 English cucumber, small dice
1/2 cup red onion, small dice
2 Fresno chiles, roasted, peeled, seeded, and brunoised (a really small dice)
2 tablespoons red wine vinegar
4 tablespoons extra virgin olive oil
2 teaspoons cumin seeds, toasted and finely ground
2 ounces feta
1/2 cup creme fraiche
Salt, to taste

Puree half of each of the watermelon, tomato, cucumber, onion, and chile with the vinegar, oil, and cumin in a blender until smooth. Taste and adjust the salt and vinegar, as desired. If it's too thick, add more cucumber or tomato.

Fold in the remaining watermelon and vegetables.

Puree the feta and creme fraiche.

Serve the gazpacho with a small dollop of the feta mix.

Thanks to Sprouts and Cook Street School of Culinary Arts for sponsoring and hosting the event. Some photos are courtesy of Sprouts; photos with captions are mine.


Yum

Wednesday, December 2, 2015

Cran-Apple Holiday Punch #FourRoses

I can remember making punch in an actual punch bowl, usually with sherbet or some fruit frozen into an ice ring. These days, I'm more likely to serve punch from a pitcher for less-messy serving.

And the sherbet is gone, too, since I prefer drinks that are less sweet. This one gets its tartness from cranberry juice and its sweetness from frozen apple juice concentrate. Fizziness comes from seltzer water - or you could use club soda or tonic water, if you like them better.

Serve over plenty of ice.

Cran-Apple Holiday Punch
Makes 12 10-ounce servings

2 quarts cranberry juice
12 ounces frozen apple juice concentrate
1 1/2 cup Four Roses Bourbon
1 orange, cut into wedges
1 lemon, sliced into rounds
2 cinnamon sticks
1 quart seltzer water, club soda, or tonic water

Combine the cranberry juice, apple concentrate, Four Roses bourbon, orange wedges, lemon slices, and cinnamon sticks in a large pitcher. Let the punch rest, refrigerated, for at least an hour before serving.

Add the sparkling water just before serving, so you don't lose the fizz. Or, if you prefer, you can add the sparkling water to each glass at serving time.

Serve in glasses, with ice.

This post was sponsored by Four Roses bourbon.
Yum

Tuesday, November 24, 2015

Yogurt-Filled Crepes with Apple and Cranberry Compote and a #Giveaway

Crepes are so fun - thin little pancakes that you can do so much with. They can be sweet or they can be savory. They can be breakfast, brunch, lunch, dinner or dessert.

They can be whatever you want them to be.

I didn't grow up eating crepes, and the first time I had them, they were cheese blintzes. I thought they were magical. I had no idea how easy they were to make.

Of course, it helps if you have a decent recipe and a good pan to work with.

One of my lucky readers WILL have a pan to work with, because I'm giving one away, courtesy of Anolon. They asked me to create a recipe, so you have that, too. My recipe is a yogurt-filled crepe topped with a seasonal apple-cranberry compote. Follow the link to find it on the Anolon website.

You want this recipe, particularly at this time of year when cranberries are so plentiful.


The beauty of these crepes is that they're so versatile. With a plain yogurt, they're a lovely lunch crepe. But if you use a flavored or sweetened yogurt, the crepes transform into a perfect breakfast or brunch crepe. Add some whipped cream or a dollop of ice cream, and these crepes would make a lovely dessert.

You could, of course, switch things around and fill the crepes with the compote and top it with yogurt, whipped cream, or ice cream, but the compote is so pretty, I thought it was a shame to hide it inside the crepe. It really wanted to be shown off.


If you have extra compote, I'm sure you'll find a use for it. And then you might want to make more. Because it's really really good.

As far as the pan, it's an Anolon 9.5 inch Advanced Bronze pan. It's a pleasure to use - light enough to be able to easily swirl the batter over and over and over while you're making a lot of crepes. And it's very nonstick. The crepes slide right out of the pan when they're done.

And ... shhhh ... the pan is also very useful for heating or reheating tortillas. And for reheating your crepes, too. I think you'll get a lot of use out of it. If you're the lucky winner who gets one.

Thanks to Anolon for sponsoring this post and for supplying the pan to the winner! The giveaway is now over.


Yum

Wednesday, October 28, 2015

Jam Vinaigrette for a Side Salad with #PotPiePlease

This shop has been compensated by Collective Bias, Inc. and its advertiser. All opinions are mine alone. #PotPiePlease #CollectiveBias

When I was a kid, pot pies were one of my favorite foods. After all, they were pies for dinner. What's not to love?

And I still adore them. They're an easy dinner, and filling. And there are a whole lot of choices.

The Marie Callender's pot pies come in two sizes - 16 or 10 ounces - and there are a whole lot of flavors, along with the more traditional ones. These are pot pies just like mom used to make.

Or, if I'm being totally honest, they're better than the ones mom made.

Marie Callender's pot pies are in the
single-serving frozen section at WalMart.
The choice of sizes is great, because people with small appetites can have a small pie and folks with large appetites can have a larger pie.

I think a smaller pie along with a salad is a perfect meal for me. I've got the comfort food goodness of pastry with a stew-like filling, along with crisp, fresh greenness of lettuce along with the brightness of a tangy salad dressing.

Since the pot pies can be baked in the oven or cooked in the microwave, they're great for busy nights and fun for little get-togethers around the holidays when you don't want to make a big fuss.

For singles or couples, a turkey pot pie along with some cranberry sauce and other favorite sides could work for a super casual Thanksgiving for folks who don't want to deal with a month of turkey leftovers.

But me, I love them for the nostalgia factor. And because they're so easy. These days, there are nights when I want to eat, but I don't want to make every little bit from scratch.

To go with my pot pie, I made a vinaigrette that included jam for fruity flavor. I used a cranberry jam, but raspberry, strawberry or any other red berry would taste good and give the dressing a pretty pink color.

If the color of the finished salad dressing doesn't matter, apricot or peach would make a neutral-colored dressing, or any other jam you like. Blueberry or blackberry would be interesting, right?

This dressing recipe makes enough dressing for two two four salads, depending on how large your salads are, and how much dressing you like on your salad.

Jam Vinaigrette

1/4 cup olive oil
1 tablespoon red wine vinegar
1 tablespoon red-colored jam (raspberry, strawberry, cranberry, red plum, etc.)
1 tablespoon Dijon mustard
1/2 teaspoon dry tarragon
1/2 teaspoon dry thyme
1/4 teaspoon salt
Several grinds white pepper
1 teaspoon sugar, optional (or to taste)

Combine all of the ingredients (except the sugar) in a small jar with a tight-fitting lid. Shake to emulsify the dressing.

Taste and add sugar if you think you need it - if your jam is very tart, you might need just a little extra sweetness. Add more salt or pepper, if desired.

Refrigerate the dressing until needed. It's best if you can make this ahead of time to let the herbs hydrate in the dressing - at least an hour. Shake again before serving.

Use this dressing to dress your salad just before serving.

Here's more about Marie Callender's Pies - check out all the flavors! You can also follow them on Facebook.

I cooked the chicken pie for this post, but I bought a selection of flavors.
Because ... pot pie! With a flaky crust. It's comfort food!
This shop has been compensated by Collective Bias, Inc. and its advertiser. All opinions are mine alone. #PotPiePlease #CollectiveBias

Yum

Monday, October 26, 2015

Homemade Apple Cider with Ashmead and Roxbury Apples

In my last box of goodies from Frieda's Specialty Produce, I had some apples that I'd never heard of before. So I looked them up. Both the Ashmead Kernel Apples and the Roxbury apples were a variety of Orange Pippin apple.

Which tells me about as much as I knew before. I'm really not savvy about apple varieties, to be honest. I go to the farmers market or the store and when I see an apple variety I'm not familiar with, I'll ask if it's good for eating, sauce or pie, and then I know what I can use it for.

So ... when I started reading more about these apples, the one thing they had in common was that they were good for juice or cider. The Roxbury was the sweeter of the two.

I tasted both of them, and either would be fine for eating as-is, but I was on a mission to use them for something other than my afternoon snack.

So, I thought, let's give this a whirl. Juice.

But how? I have a juicer, but the first recipes I found all called for cooking the apples, then straining. Hmmm. If I'm going to cook them, I might as well make sauce. Then I found recipes that made an uncooked juice - or, if we're being technical, a cider, since what I made wasn't clear - it included some of the finer solids from the apples.

The recipes I looked at all included a whole lot of other stuff - cinnamon, allspice, maple syrup - which sounds good, but I wondered if they were really needed. And, seriously, they're not things that have to be added to the cider as you make it. If you want maple syrup in your cider, you can add a tablespoon to your glass and just stir it in.

So, I decided to go with a minimalist version. And I was happy I did. This stuff is pretty darned amazing.

Fresh Apple Cider

4 Ashmead Kernel apples
4 Roxbury Apples
Pinch of salt
1 1/2 cups water
Sugar (optional)

Cut the apples in half and remove the core, stem, and any bruised or nasty bits. I didn't peel them, but you can if you prefer*. Cut the apples into chunks that your blender can accommodate. I used a Vitamix, but any decent blender should be able to obliterate some apples.

Blend the apples with water and the pinch of salt until you have a smooth mash. You'll probably need to do this in batches. Try not to add too much water. It's easier to add water if it's too strong, but if you have a weak cider, there's no remedy for that.

Strain the pulp through several layers of cheesecloth, or a clean, lint-free kitchen towel. Or use a jelly bag. Remember that you're keeping the juice and getting rid of the pulp! Let the mixture drip into a bowl. If you're impatient, you can squeeze or mash a bit, but you really want to avoid pressing too much of the solids through the bag.

Taste your cider and add sugar, if you like. Mine didn't need any. If you think it's too strong, add water now, if you like. If you'll be serving over ice, you might want to leave it as is.

As my juice sat, a thin layer of white sediment settled to the bottom of the jar. While it was edible (nothing there but apples!) it had a raw-starch taste. So once the settling was done, I simply decanted to a new container and got rid of the starchy-flavored stuff.

As for the remaining pulp, you could cook it and perhaps squeeze out more juice, or you could make apple sauce or apple butter. If that's your plan, I suggest peeling* the apples in the first step so your sauce has a better consistency, without bits of peel. Unless you like that sort of thing.

Cheers!

I regularly receive produce from Frieda's Specialty Produce for my use on the blog.
Yum

Friday, October 23, 2015

Madras Margarita

Here's one more guest post recipe from my friend Karen who blogs at Karen's Kitchen Stories. You should go check out her blog - she's got lots of fantastic stuff and her photos are lovely. Or follow her on Facebook. Go see all the great goodies she posts about!

This Madras Margarita was inspired by the Madras Mimosa that is served by our favorite Sunday breakfast spot. Their mimosa is mixed with orange and cranberry juice, and has a lovely pink/orange color.

The restaurant sits right on the water and most of the tables are outdoors. The place is wildly popular, and people will wait up to two hours to get a table. I'm pretty sure people are willing to wait because they can buy full bottles of sparkling wine, pitchers of orange juice and cranberry juice, and stacks of plastic cups to take out onto the patio waiting area. It pretty much turns into a party. Thank goodness the leisurely breakfasts that follow are delicious and filling!

There also is a madras cocktail, which consists of vodka, orange, and cranberry juice, rumored to have been invented by Smirnoff Vodka in the 1970s, and named after the preppy plaid fabric.

Long story short, I thought I'd try making a madras margarita. I also added lime juice, and a bit of frozen lemonade concentrate, which i keep in the freezer. Result? This margarita is really tasty. If you don't have any lemonade concentrate, you can substitute agave, sweet and sour, or simple syrup. You can serve it on the rocks or straight up, with or without salt. In the interest of science, you really need to try all of the variations.

Cheers!

Madras Margarita

2 ounces silver tequila
1/2 ounce orange liqueur
1 ounce fresh squeezed orange juice
3/4 ounces cranberry juice
2 tsp lime juice
1 tsp frozen lemonade concentrate
Half slice of orange and lime

Add all of the ingredients to an ice filled cocktail shaker and shake or stir until very cold.

Pour into an ice filled double old fashioned glass or into a chilled martini glass.

Garnish with the orange and lime slices.
Yum

Saturday, August 15, 2015

Watermelon and Peach Salsa

Oh my gosh, this salsa is good. You need to try it!

This started as a what-if, and I have to admit that I was a little bit skeptical of my own idea. I've made fruit salsas before, usually with mango or peach. But ... watermelon?

It totally worked.

Not only did it work but it was oh-my-gosh amazing.

The interesting thing was that as the mixture sat, it exuded a bit of liquid and the watermelon seemed to get a little denser, in a very good way.

I just can't say enough about how ridiculously good this is.

I made a pretty small batch because there are only two of us, but this could easily be doubled or tripled or quadrupled for a party.

And of course, adjust the heat to your liking. If you want to add more heat right off the bat, leave the seeds and ribs in the jalapeno. Or just add the other half of the pepper.

Watermelon Peach Salsa

1 tablespoon finely diced onion
1/2 jalapeno cored, seeded, and finely diced
2 teaspoons lime juice
1/2 teaspoon salt
1 cup cubed watermelon (about 1/4-inch pieces)
1 peach, peeled, pitted, and cut in bits about the same size as the watermelon
1/4 of a red bell pepper, cored, seeded, and cut a little smaller than the watermelon

Put the onion, jalapeno, lime juice, and salt in a small bowl while you prep the rest. The lime helps mute the sharpness of the onion and at the same time it picks up some of the heat of the jalapeno so it can mingle better with the fruits.

Add the watermelon, peach and bell pepper (I used red, but yellow or orange would look nice as well).

Stir to combine.

You can certainly serve this right away, but I think it improves with a little time to rest and let the flavors mingle - at least an hour, if possible.

The fruit exudes quite a bit of juice, so you can drain some of it before serving - but don't get rid of all of it, since there's a lot of flavor in that juice.
Watermelon and Peach Salsa
Yum