Showing posts with label custard. Show all posts

Tuesday, October 6, 2015

Chocolate Custard Pudding #Choctoberfest

Meatloaf with mashed potatoes is my favorite comfort food dinner, no doubt. But when it comes to dessert, chocolate pudding is one of my favorite comfort foods. Sure, I like cake and pie and ice cream. But there's something about the creamy coolness of pudding that's like a hug.

Heavens knows I need a few hugs these days.

I usually make pudding using cornstarch because it's easy, but this time I decided to make a rich custard using egg yolks for thickening. I mean, why not? It's comfort food.

While I'm a huge fan of chocolate and desserts, I don't like super-sweet desserts. I like that little edge of something not-sweet. So I added a bit of espresso powder to add its bit of bitterness to this custard.

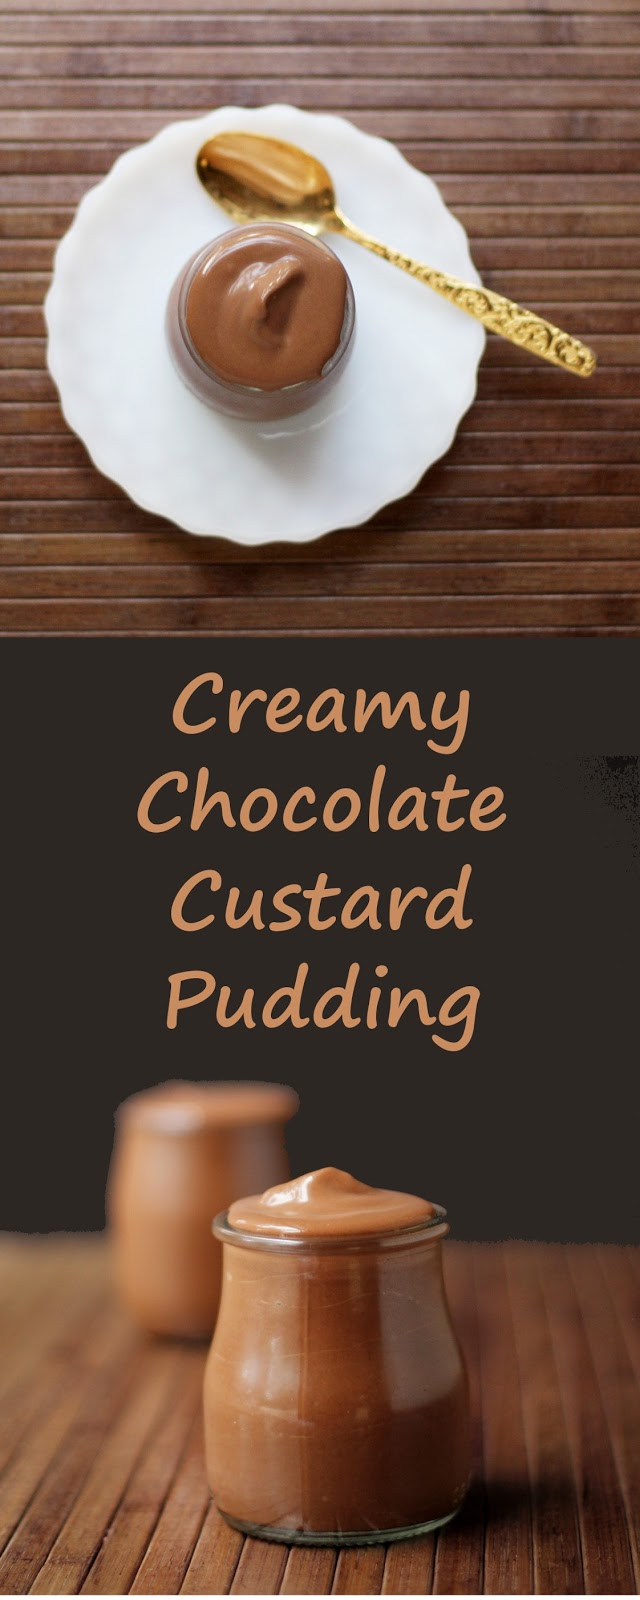
This was exactly what I was looking for. And then I found some cute little jars to serve it in.

This post is part of #Choctoberfest with Imperial Sugar where a bunch of food bloggers have joined together to post about chocolate all week. The sponsors provided products for a giveaway, (which is now over) and they also sent me products to work with.

Chocolate Custard Pudding

1 cup heavy cream
2 cups milk
3/4 cup Imperial sugar
1/2 cup natural cocoa powder
1 teaspoon espresso powder
1/2 teaspoon salt
1 3.5-ounce Lindt Excellence 85% cocoa dark chocolate bar, broken into pieces
6 egg yolks
1 tablespoon vanilla extract

Combine the cream, milk, sugar, cocoa powder, espresso powder, salt, and chocolate bar in a heavy-bottomed saucepan. Heat on medium, stirring or whisking, until the sugar and chocolate bar melt and the cocoa powder is well blended in the milk mixture.

Continue cooking until the mixture comes to a gentle simmer then turn off the heat.

Meanwhile, beat the egg yolks in a medium bowl.

When the mixture is simmering, it's time to temper the egg yolks. This means that you warm the yolks slowly so they don't cook too quickly and scramble. Chocolate custard is good. Scrambled chocolate eggs isn't a great idea.

Tempering isn't difficult, so don't worry. Just add some of the milk mixture to the eggs slowly while you whisk or stir those eggs. Add about a cup of the hot milk to the eggs. You can add more. It doesn't need to be precise.

Now, add the warmed eggs back to the saucepan while stirring. Turn the heat back on and continue cooking, stirring continuously, until the mixture thickens and just barely starts to bubble a bit.

Turn the heat off and add the vanilla extract and stir to combine.

Pour the custard pudding through a strainer into a storage container - a quart-sized container is perfect. The reason you need to strain is that no matter how careful you are, chances are that you'll get a few bits of egg, and particularly if there was any egg white with the yolks - and who can separate eggs that perfectly, right?

Chill the custard and serve cold.

Check out the recipes from all the participating bloggers. I think you'll love them!


Chocolate custard pudding - the ultimate comfort food dessert.
Yum

Friday, May 1, 2015

Frozen Vanilla Bean Custard

Ice cream season is upon us. The weather is warm enough that I've started making ice cream regularly. I have recipes that I like, and I also like creating my own recipes. But I also like trying new recipes from cookbooks.

When I got the book, The Perfect Egg, I realized that the frozen custard was perfect. It calls for a lot of egg yolks - a full dozen of them - which is exactly what I had after making a batch of macarons.

I've made plenty of ice creams that used egg yolks, but usually it's a lot less. Maybe four or even six. Never a dozen for this amount of ice cream. I wondered if it would be overkill. I wondered if the ice cream would taste "eggy."

I shouldn't have worried. The finished ice cream was definitely rich and had a lovely yellow color, but it didn't taste like eggs.

If you're looking for something with a little more flavor than a vanilla custard, there are eight other variations of the ice cream: Chocolate, Salted Caramel, Coffee, Matcha & Black Sesame, Cake Batter, Raspberry & Coconut, Stracciatella, and Blackberry & Merlot.

For more about The Perfect Egg, check out my review.

Frozen Vanilla Bean Custard
Adapted from The Perfect Egg by Teri Lyn Fisher and Jenny Park

2 cups cold heavy cream
1 cup cold half-and-half
1 cup superfine sugar, divided
1 vanilla bean, halved lengthwise
12 egg yolks
1/2 teaspoon salt

Combine the cream, half-a-half, and 1/2 cup of the sugar in a heavy-bottomed saucepan. Scrape the seeds from half of the vanilla bean using the back of a knife, and add the seeds and that half-bean to the saucepan. Heat on medium-low and cook, stirring constantly, until the sugar dissolved and bubbles start forming around the edge of the pan. Remove from the heat.

In a medium bowl, whisk the egg yolks, remaining 1/2 cup of sugar, and 1/2 teaspoon of salt until the eggs are pale yellow and fluffy.

Slowly pour about a cup of the hot cream into the egg mixture, while constantly whisking or stirring the eggs.

Add the now-warmed egg mixture to the cream mixture in the saucepan, while constantly stirring or whisking the cream mixture. Turn the heat back on to medium low, and cook, stirring or whisking constantly, until the custard is thick enough to coat the back of a spoon - this means that if you dip the spoon in the mixture and run your finger across the spoon, the line will hold.

Prepare an icebath with a bowl on top of a second bowl that's got ice and some cold water in it. Make sure the top bowl can't actually submerge in the water, even after the ice starts melting. Strain the hot custard through a fine-mesh sieve into the top bowl. Scrape the vanilla seeds from the second half of the vanilla pod and add the seeds and bean to the custard mixture.

Let the custard cool, stirring occasionally, until it's no longer warm. Cover the top of the custard with plastic wrap (to avoid the chance of it forming a skin). Refrigerate until fully chilled - 8 hours is good, but I usually leave it overnight.

Remove the vanilla bean and churn the mixture in the ice cream maker according to the manufacturer's instructions.

Transfer to a storage container and freeze until firm.

I received this book from the publisher at no cost to me.
Yum

Sunday, May 5, 2013

If Boston Cream Pie met Tiramisu and Cheesecake in a dark alley ...

Sometimes you just have to take an idea and run with it, right? I wanted a layered dessert. I knew that chocolate had to play a role. I thought about banana pudding as a layer, but I used my last banana in a smoothie. So forget the banana, but keep the creamy vanilla.

And then what?

I wanted different textures, too. So I went into the kitchen and got a little crazy. Because that's how I roll.

This has the vanilla and chocolate of Boston Cream Pie, But I was thinking about Tiramisu, too. I didn't add coffee, but I stole the ladyfinger concept and used Nilla Wafers instead. It's also a little reminiscent of cheesecake, with a graham cracker topping. And the secret ingredient is saltines, for that extra little salty crunchy "what is this?" taste.

Yeah, I'm a little mad. But it works for me.

This dessert is best made a day ahead, so the Nilla Wafers have time to soften to a cake-like consistency.

Boston Cre-amisu

For the bottom crust:
15 Oreos
2 tablespoons butter, melted
For assembly and topping:
4 Honey Maid graham crackers
8 Premium saltines
25 Nilla Wafers
For the vanilla cream:
2 cups whole milk
1/2 cup sugar, divided
1/2 teaspoon salt
4 large egg yolks
1/2 cup cornstarch
2 tablespoons vanilla extract

Put the Oreos in your food processor and process until the cookies are fine crumbs. Add the butter and continue processing until the crumbs hold together if pressed. It's possible to over-process and turn the Oreos into a paste - so keep an eye on them. You want them to stick together, but still be crumbly. Dump the mixture into a 8-inch square pan and press down to make a firm crust. (You can use a round pan or different size, if you prefer, but you might need a different number of Nilla Wafers.

Remove the Oreo crumbs from the food processor (or, if you don't mind a few chocolate crumbs in your topping, leave them be.) Add the graham crackers and saltines to the food processor and process until you have fine crumbs. Set aside.

In a heavy-bottomed saucepan, combine the milk, 1/4 cup sugar, and salt. Heat on medium heat, whisking as needed, until the sugar melts and the mixture comes to a simmer. Turn off the heat.

Meanwhile, combine the egg yolks, cornstarch, and the remaining 1/4 cup of sugar in a medium bowl. Whisk until combined. It will be a thick paste. 

A little bit at a time, add hot milk the the egg mixture, whisking as you go, until you've added about a cup of the hot milk to the eggs, then whisk the milk in the pan as you add the egg mixture to the pan. Bring the heat back to medium and whisk until the mixture thickens. Add the vanilla extract and whisk it in.

Pour the mixture through a find strainer to remove any lumps or curdled bits.

Pour about 1/3 of the mixture into the pan on top of the crushed Oreos, and smooth the mixture. Add a layer of the Nilla Wafers and press them down a bit so they're even. In the pan I used, they fit perfectly in 5 rows of 5 cookies.

Dollop the remaining vanilla mixture over the cookies (if you've taken your time, the mixture might be starting to set and may look lumpy when you stir it. Just whisk it smooth, then pour it over the cookies. Smooth the top (a small offset spatula is a great tool for this) then sprinkle the graham cracker-saltine crumbs over the top.

Refrigerate until the vanilla cream has set and the Nilla Wafers have softened. Overnight is great. This is also good while the Nilla Wafers are still a little crunchy, but it's harder to cut and serve.

If you like, garnish with some whipped cream and/or chocolate shavings.

This post was written for a little competition for SnackWorks, which represents the brands mentioned. I did not receive any compensation or products from them.
Yum

Wednesday, March 27, 2013

Peanut Butter Cup Magic Cake

I decided to try one more adaption of the ever-popular magic cake. Last time I added hazelnut flour, which is more like finely chopped nuts than like a powdery flour. It formed its own layer n the cake.

This time I decided to add peanut butter. And then to gild the lily, I added mini chocolate chips.

I figured the peanut butter would mix in, but the chocolate chips were the wild card. Would they sink or float? Would they melt? What would happen???

It turns out that the chocolate chips sunk to the bottom of the pan. I sort of suspected that. When I made this, I mixed the chips into the batter, But I'd suggest sprinkling them over the top after you've poured the batter into the pan so you can get even distribution of the chips along the bottom. (I've adjusted the recipe with that instruction.)

Peanut Butter Cup Magic Cake
Adapted from Pasteles de Colores
Recipe adaptation © by www.cookistry.com. Do not republish without permission.
4 room temperature eggs, separated
1 tablespoon water
150 g sugar (2/3 cup granulated or 1 1/5 cups confectioner's sugar)
1/2 teaspoon salt
1/4 cup creamy peanut butter
1 stick unsalted butter. melted and somewhat cooled (not hot)
4 ounces flour (about one cup, measured lightly)
2 cups milk at room temperature
1 tablespoon vanilla extract
1/8 teaspoon white vinegar
1/3 cup mini chocolate chips

Preheat your oven to 325 degrees and spray an 8-inch square pan with baking spray. Pyrex is recommended.

In a medium bowl, beat the egg yolks, water, sugar and salt until the mixture is light in color and thickened. Add the peanut butter and beat until combined. Add the butter and beat until combined.

Add the flour in two or three additions, beating it in well each time.

Add the milk and vanilla extract. The mixture will get loose and sloppy. That's fine. Beat it until it's smooth.

In a very clean bowl with very clean beaters (the tiniest bit of yolk or fat will thwart your efforts to get those eggs beaten properly), beat the egg whites and the vinegar to stiff peaks.

Add the whites to the yolk mixture in several additions using with a whisk or one of the beaters from the mixer. You don't want to beat it in, just break up the whites gently while not deflating them.

The source blog has a video for what it looks like, if you need help.

This isn't be like a cake batter. It's pretty wet. Pour the mixture into the prepared pan and sprinkle the chocolate chips evenly over the top. They'll sink, but this will ensure that they're evenly distributed over the bottom of the pan.

Bake for 1 hour or until the top is browned and the cake is jiggly but not sloshy.

Let the cake cool COMPLETELY. Give it three bours, or let it cool, them  refrigerate. I don't suggest trying to turn this out of the pan, but if you cut it into squares you should be able to take neat squares out of the pan. Sprinkle with powdered sugar right before serving.

Since this is more custard than cake, you want to store this in the refrigerator. I thought it tasted best when it was cold, or at least chilly.
Yum

Tuesday, March 26, 2013

Magic Cake: All the cool kids are doing it! (the nuttier version)

It's magic.

But is it SAFE? Magic could be dangerous.

How can it not be safe? It's CAKE. No one's going to turn into a frog.

And all the cool kids are doing it!

And I wanna do it too! Just like the cool kids!

Well, okay, then.

I'd been seeing photos and posts about something called "Magic Cake" and I have to tell ya, I was intrigued. You mix a bunch of stuff, toss it in a pan, and it separates into different layers all by itself. Whoo hoo! Magic Cake!

Sort of like those old Bisquick recipes, but without the Bisquick. Okay, maybe more science than magic going on. But it's still pretty cool.

I made a slight tactical error by getting the recipe from a blog other than the original source blog. The one I chose probably wasn't the best version. It still worked, but now that I've made it once, I can see how important the technique is. That's where the other blog steered me just little bit wrong.

The other problem was that my large eggs looked more like medium eggs. I checked the box and they were supposed to be large, but they were a little ... medium-ish. But still, the recipe worked.

And then, I decided to shake things up a bit. I added some hazelnut flour. I knew it wouldn't affect the :formula, so it wasn't all that risky. I was curious where the nuts would end up in the finished cake. Would they spread throughout the cake, or would they show up in just one layer?

It turns out that the nuts ended up mostly in a layer between the custardy layer and the cakey top layer. A few bits were scattered around, but more of them were in that layer.

And since I used nuts, I used almond extract instead of vanilla.

I have a few ideas for tweaking this recipe, but meanwhile, here's my ingredients, along with what I think is the correct technique based on the video on the original site. You really ought to watch the video before you make this, so you can see exactly what this is supposed to look like at each stage.

Almond meal would also work in this, but it wouldn't be quite as visible, if that matters.

Magic Cake, the Nuttier Version
Adapted from Pasteles de Colores
Recipe adaptation © by www.cookistry.com. Do not republish without permission.
4 room temperature eggs, separated
1 tablespoon water
150 g sugar (2/3 cup granulated or 1 1/5 cups confectioner's sugar)
1/2 teaspoon salt
1 stick unsalted butter. melted and somewhat cooled (not hot)
4 ounces flour (about one cup, measured lightly)
1/2 cup hazelnut flour
2 cups milk at room temperature
1 teaspoon vanilla extract
1 teaspoon almond extract
1/8 teaspoon white vinegar

Preheat your oven to 325 degrees and spray an 8-inch square pan with baking spray. The video showed a glass pan.

In a medium bowl, beat the egg yolks, water, sugar and salt until the mixture is light in color and thickened. Add the butter and beat until combined.

Note: on the original page, the writer said she used icing sugar (confectioner's) instead of regular sugar, which suggests that she's following someone else's recipe that had called for the granulated sugar. I used regular granulated sugar. I might use confectioner's next time.

Add the flour in two or three additions, beating it in well each time. Beat in the hazelnut flour.

Add the milk and extracts. The mixture will get loose and sloppy. That's fine. Beat it until it's smooth.

In a very clean bowl with very clean beaters (the tiniest bit of yolk or fat will thwart your efforts to get those eggs beaten properly), beat the egg whites and the vinegar to stiff peaks.

Add the whites to the yolk mixture in several additions.

In the video, this was done with one of the beaters from the mixer. A whisk would also work. But gently. This is a point where watching the video is a good idea. Folding stiff egg whites into a wet mixture is sort of futile. Breaking those eggs up with a whisk or beater does the job much better. BUT you don't want to beat the whites into the mixture completely.

I'm thinking that next time I'll add some of the yolk mixture to the whites to loosen them up, then add the whites to the yolks. We'll see how that works. Or doesn't.

This isn't be like a cake batter. It's pretty wet. Pour the mixture into the prepared pan and bake for 1 hour or until the top is browned and the cake is jiggly but not sloshy.

Let the cake cool COMPLETELY. Give it three bours. I don't suggest trying to turn this out of the pan, but if you cut into squares you should be able to take neat squares out of the pan. Sprinkle with powdered sugar right before serving.

Since this cake is more custard than cake, I'm guessing it's best served refrigerated. And to be honest, I thought it tasted best when it was cold.
Yum