Showing posts with label sauce. Show all posts

Tuesday, February 19, 2019

Home Made Ponzu

The salad that started the search for ponzu.
I usually buy ponzu in a bottle, but recently I needed some to make a salad dressing recipe and even thought I clearly remembered a bottle of ponzu sitting on the lazy susan in the cabinet with similar items, I couldn't find it.

It wasn't hiding in the cabinet where oils and vinegars lurk. It wasn't on the lazy susan with unopened sauces. It wasn't in the refrigerator. It wasn't anywhere that an open bottle should be hiding.

And it wasn't on my grocery list, which is where it should have been if I actually finished off the last of that opened bottle and threw it away.

Bah, humbug. 

Then I realized that the book I was using (Japaneasy) had a recipe for home made ponzu. Hmmm. I'd never really thought about making it, but after I saw the recipe, I as stunned at how easy it was.

I may never buy ponzu again.

Or, to be clear, I may never buy ponzu again after I finish off the two bottles of unopened ponzu that I found a few days after I couldn't find the opened bottle I was sure I had.

Ponzu
From Japaneasy by Tim Anderson
Small batch makes about 1/3 cup. Large batch makes about 1 cup

Small batch
4 tablespoons soy sauce
1 1/2 tablespoons lemon or lime juice, or a combination
1 teaspoon sugar
1 teaspoon vinegar

Large batch
7 ounces soy sauce
4 tablespoons lemon or lime juice, or a combination
1 1/2 tablespoons sugar
1 1/2 tablespoons vinegar

Combine all ingredients in and stir to dissolve the sugar. Keep in an airtight container in the refrigerator for up to 1 month.

Monday, March 19, 2018

Some Green Sauce #AbramsDinnerParty

So, I was browsing through my most recent acquisition from #AbramsDinnerParty (where I get free cookbooks) and I ran across a recipe for a green sauce that's supposed to be much like That Green Sauce sold by the HEB food stores.

Wait, let me back up a bit.

The cookbook is The Austin Cookbook by Paula Forbes. It's all about recipes "from deep in the heart of Texas," so of course I expected a lot of beef, and some Tex-Mex. But when I saw that sauce recipe ... I kind of swooned.

You see, a while back, someone sent me a jar of That Green Sauce, and I put it on everything until the jar was empty. And then I kind of whimpered because that sauce isn't available here. Waaaah!

So I was pretty excited to see that recipe. And I was stunned to see how easy it is. Apparently this type of sauce is pretty popular around Austin, and the one sold by HEB is just one of many versions of that type of green sauce. But ... the HEB version was the first one of its kind that I tried, so it's the one that I wanted to find a recipe for.

Now that I've made it, I have a feeling I'll be making it again.

With variations. Many variations. Because now that I know how it's made, I can adjust the heat, add spices or herbs, and just generally mess around with the recipe. I might even order some of That Green Sauce so I can do some taste tests and see how close I can get to the original.

And now you can make it, too!

The Green Sauce

Adapted from The Austin Cookbook by Paula Forbes

Store-bought green salsa or Salsa Macha Verde (recipe follows)
Vegetable oil
Yeah, that's it. Just two ingredients.

Puree the salsa in a food processor or blender until it's almost completely smooth, then start slowly drizzling vegetable oil into the salsa while the processor is running.

You'll add about one cup of oil for the Salsa Macha Verde, which made just about a pint of salsa.

Continue adding the oil until you have a creamy but runny sauce - it should not be as thick as mayonnaise. And it will thicken just a little when you refrigerate it. Not a lot, but a little.

And there ya go. The oil makes the sauce creamy, which is why a lot of people think it has avocado in it.

Needless to say, the sauce will taste like your salsa, except creamier and perhaps a little milder.

Salsa Macha Verde
Adapted from The Austin Cookbook by Paula Forbes

6 large jalapenos
2 garlic cloves
Salt
Juice of 1 large lime

Grill, roast, or toast the jalapenos until you have grill marks or they've acquired some black spots (I used a roti grill). Remove the stems and put the jalapenos in a food processor or blender.

Add the garlic, a couple pinches of salt, 1 tablespoon of water, and the lime juice. Process or blend until it's as smooth as you like.

Now just carry on to make THE GREEN SAUCE.

Note: Since I used my Vitamix blender, the jalapeno seeds were blended to smithereens ... and this also helped to make the sauce rather spicy. If you prefer a less spicy version, remove the seeds - some or all - along with the inside ribs. This will help to make the sauce less spicy.

Another recipe that I thought was interesting - and that wasn't at all Tex-Mex - was the mustard and brown sugar crusted steak that was first cooked, then rubbed with a butter and mustard mixture, and then sprinkled with brown sugar, and then broiled to get the sugar caramelized. I've never had a steak quite like it. And then I made another one just like it the next day.

I'll just leave this here for you.


In case my statement at the top wasn't totally clear, I got this cookbook for free from the publisher.

Tuesday, April 19, 2016

Three-ingredient blue cheese dressing

Blue cheese dressing seems so fancy, but it's really pretty simple. The flavor is mostly from the cheese, so you want to let that shine.

This dressing has only three ingredients, and it takes just a few minutes to prepare. I think the flavor is better after it's been refrigerated for a while - the blue cheese flavor seems to infuse the creamy dressing rather than just being bits of blue. But it's not a bad thing that it improves with age. If you're making this for a party or event, you can make it the day before, so it's one less thing to do on party day.

I was tempted to add herbs or other flavorings to this - a pinch of hot pepper or perhaps some other spice. But then I realized that additions would just take away from the blue cheese flavor. And if I wanted something else, I could simply add those flavors to my salad. Some fresh chopped parsley, perhaps?

You can make this as smooth or as chunky as you like. Just blend longer for a smoother dressing. But I do like the little pops of blue cheese, so I left it a little bit lumpy. The dressing gets thicker when you refrigerate, and the thickness depends a little on how this your Greek yogurt is. If it's too thick, just mix in some milk or buttermilk to thin it - or you could even add water to thin it. Or, you can leave it thick and use it as a dip for vegetables.

Blue Cheese Dressing

1 cup Greek-style yogurt
1/2 cup mayonnaise mayonnaise
4 ounces blue cheese, cut into chunks

Blend the yogurt and mayonnaise in your blender until combined. (You could also do this in a food processor, or by hand, but a blender makes it sooo easy.)

Add the blue cheese and pulse until the blue cheese is in bits as small as you like. Or keep blending until it's smooth, if that's what you prefer.

Taste and add salt or pepper, if desired. I liked it the way it was, but, hey, it's your taste buds you need to please.

Transfer to a container and refrigerate until needed.

Wednesday, November 4, 2015

Rigatoni "Lasagna"

Note: This is a sponsored post for a pasta sauce, but the words and recipe and photos are all mine.

I still remember - vividly - the first time I tasted lasagna. I was about 9 years old, and my mom and I, along with my mom's lady friend, had been invited to dinner at the apartment of a single fellow who happened to own the local grocery store.

He was making lasagna. I'd never heard of it before, but I was pretty much interested in any kind of Italian food. So I was more than happy to be there.

The truth was that mom's friend was the one who was invited to dinner, but it wasn't proper for a lady to visit a man's apartment by herself, so mom and I tagged along. I realize that now. Back then, we were just going to dinner.

I have no recollection of what else was served, but when that lasagna hit my plate with the beautiful layers, I was intrigued. When I took my first bite, I might have heard angels singing. I know I had a second helping. Perhaps a third.

I might have eaten more than any adult at the table, and if I could have figured out a way to run out the door with the leftovers, I might have done that, too. I was in love.

As far as I know, that was mom's first experience with lasagna, too. Although I begged her to make it for us, she never did. I don't know if it was simply too much trouble or if it was that she had no idea how to make it.

But every single time I saw lasagna on a restaurant menu, that's what I ordered. And I knew that when I was old enough, I was going to make lasagna.

Eventually, I did learn how to make lasagna. I tweaked the recipe and I made giant batches, enough to feed entire neighborhoods, because it really was a project. If I was going to make it, I might as well make a whole lot of it. Some to eat, some to freeze.

These days, my lasagna-making is usually reserved for special occasions, but that doesn't mean I've abandoned it entirely. This layered rigatoni dish has the flavors of lasagna, but it's simple. Very simple. And by using jarred Ragu sauce, it takes very little time.

Just look at the layers!

My mom used Ragu Pasta Sauce quite often, and like many other things that I grew up with, I didn't think a whole lot about the history of the product. It was just there. I probably never would have looked it up, but I got the info as part of this sponsorship.

The company was founded by a woman named Assunta Cantisano, who came to the US in 1914 - just a little bit before my mom was born. Later, during the depression, Assunta started selling her home-made tomato sauce to her neighbors, and pretty soon that turned into the company we know as Ragu. By the time I was born, Ragu was everywhere. Even my mom's kitchen.

Back then, there were a lot fewer flavor choices in the Ragu brand. Now there are a lot of different options, including chunky, smooth, meaty, and a whole lot of others. Do you use Ragu? Which ones do you like?

Oh! If you're worried about what's in a jar of sauce, Ragu has no artificial flavors and no HFCS.

Ah, but there's MORE.

There's a contest running on Food.com called Ready. Set. Cook! They're asking you to create new and unique recipes featuring Ragu sauce and using a set list of other ingredients. Go check it out and maybe you can win something. I like it when my readers win stuff!

Rigatoni Lasagna
aka Layered Rigatoni with Cheese

1/2 pound dry rigatoni or similar pasta
1 jar Ragu Super Chunky Mushroom
1 pound ricotta cheese
2 eggs
2 cups shredded mozzarella (or to taste)
Grated parmesan or romano cheese (optional)

Heat the oven to 350 degrees and have an 8- or 9-inch baking dish standing by.

Cook the pasta in boiling salted water until al dente.

While you're cooking the pasta, combine the ricotta and eggs in a small bowl. Mix until well blended.

When the pasta is done, drain the water and stir in the Ragu. (Note: I used to Super Chunky Mushroom because I'm a bit of a mushroom fiend, but this would work equally well with any of the other flavors or varieties.)

Mix until well combined. It might be a little soupy - that's fine, the pasta will absorb some of the sauce as it bakes.

Put half of the sauced pasta in the baking dish. There should be enough to cover the entire bottom of the dish.

Add the ricotta mixture to the baking dish in an even layer. Top with the remaining pasta and sauce.

Sprinkle the cheese on top of the pasta in an even layer. You can add more or less, to taste. If you like, sprinkle some parmesan or romano cheese on top.

Bake the pasta at 350 degrees until the cheese is melted and brown in spots, and the sauce is bubbling around the edges, about 30 minutes.

Remove the baking pan from the oven and place it on a trivet or folded kitchen towel (it's hot!).

Let the pasta rest for 5 minutes or so before serving.

Giveaway is over.

Wednesday, August 12, 2015

Fresh Tomatillo Salsa

Tomatoes are one of the things that I look forward to every summer - the winter ones just aren't that good. But tomatillos are also very much a summer fruit. It's not that they're not as tasty in winter - it's that they're hard to find.

Tomatillos can be used raw or cooked, just like tomatoes, but my favorite way to use them is in raw salsas, to take advantage of the wonderful fresh flavor and the lively green color. They also make a great cooked sauce for tacos or enchiladas.

This fresh sauce is great with chips, but I also like it with eggs. Or on tacos. Or on cooked meats. I might even have used is to add some flavor to some cottage cheese. But I'm not sure I really want to admit that.

Speaking of cheese, though, a little smear of cream cheese on a cracker, topped with a bit of salsa, would be a great appetizer or snack.

The easy way to make this salsa is in a food processor or blender, pulsing to chop the vegetables finely and evenly, without making it too smooth. Well, unless you want a smooth salsa. I don't judge. You can also dice it all with your favorite knife.


Tomatillo Salsa
Makes about 1 quart

5 large tomatillos (about 1 1/4 pounds)
1 medium onion, peeled
1 small purple* bell pepper
1/4 cup pickled** sliced jalapeno peppers
1 teaspoon salt (or to taste)
Juice of one lime
Several generous grinds of black pepper
1/2 teaspoon of Garlic Gold*** or 1/4 teaspoon garlic powder
Kernels from 1 ear cooked corn

Cut the tomatillos, onion, and bell pepper into chunks and add them to your food processor or blender along with the jalapenos, salt, lime juice, pepper, and garlic gold.

Pulse until you have small pieces. Add the corn and pulse a few more times.

Taste and adjust seasonings, if desired.

Transfer to a storage container. This can be used immediately, but I like it better after it has had  a little time to rest and for the flavors to mingle.

* I used a purple bell pepper because I wanted to add an unusual color to the salsa, but any color will do. If you don't have a fresh bell pepper lurking around, you could also use a few pieces of jarred, fire-roasted red pepper.

** You can use fresh jalapeno, if you like. Two will be fine. Leave the seeds in if you want the salsa spicier, or take the seeds out if you want a milder salsa.

*** You can find Garlic Gold with the rest of the dried spices or online. It's dried crunchy granules that are milder and less harsh than garlic powder.
Fresh Tomatillo Salsa

Friday, July 17, 2015

Roasted Red Pepper Spread for Can-It-Forward Day

Roasted Red Pepper Spread - great on sandwiches, pasta, and in recipes. Try it on pizza instead of tomato sauce!I'm by no means an expert canner, but I'm pretty adept with pickles and jams and things involving tomatoes.

But I don't fly solo - canning is a science, and you need the right level of acid and salt so the canned products don't go bad.

My go-to book for most recipes is the Ball Blue Book. And this year, there's a new version (the 37th edition!), with a whole new section called Meal Creations as well as individual new and updated recipes.

It's worth looking into if you plan on doing any canning. And, I have a copy of the newest book for one lucky reader, plus an extra bonus!

Giveaway is over.

Here are the covers from all 37 issues - the large one at the bottom is the new edition.

Covers from 37 editions of the Ball Blue Book

I actually have a few different editions, and I still use them. How many do you have?

So the point of this post - besides sharing a delicious recipe, is to let you know that for the fifth year in a row, Jarden Home Brands will host Can-It-Forward Day, this year on August 1, broadcast live at FreshPreserving.com from 11am to 4pm EST.

AND - If all goes well, technically, I'll be hosting the webcast here, as well. So you don't need to wander too far!

This is what Ball says about Can-It-Forward Day:

Can-It-Forward Day encourages gardeners & food enthusiasts across the country to celebrate what “Made From Here” means to them by fresh preserving their favorite local ingredients in peak season. The webcast will have an integrated chat function where consumers can submit their home canning questions to be answered in real time. New this year, there will also be an exciting celebrity mason jar auction unveiled during the webcast!

But enough about that. Let's get to the recipe!

As I was paging through the book, I spotted a recipe for a roasted red pepper spread that sounded perfect. I love roasted red peppers on sandwiches and in recipes, so I figured the spread would be just as good.

But of course, I can't leave things be. I decided that I didn't want to make a full recipe, and I decided not to can it at all. The original recipe made 5 half-pints of spread, or about a quart-and-a-half. I figured that if I made half of a batch, I'd have no trouble using it in a short time.

So far, I've used it as a sauce on chicken ... in the place of tomato sauce for a chicken parmigiana dish. You can find the recipe for the chicken here.

Roasted red pepper spread on breaded chicken, topped with melted cheese.

And on a sandwich. This was Italian sausage, mushrooms, and onions on a soft bun.

Roasted red pepper spread on Italian sausage sandwiches.

I'm planning on using it as a sauce on pizza, and I'm thinking about making red pepper soup. And about that time, I'll need to make more.

Besides cutting the recipe in half, I made a few other adjustments. I accidentally used 1/4 cup of onions, but it really should have been just 2 tablespoons for half of the recipe. And the original recipe called for basil, which I didn't use. I knew that I could easily add basil later, and wanted the peppers to be star of the show.

If you make this from the book, I suggest weighing the peppers and tomatoes to make sure you have the right amounts, since product sizes can vary a lot. The book estimated 12 red peppers for 6 pounds, but I only needed 5 for 3 pounds. It estimated 10 roma tomatoes for one pound, but mine were pretty huge, so I only needed 2 for half of the recipe.

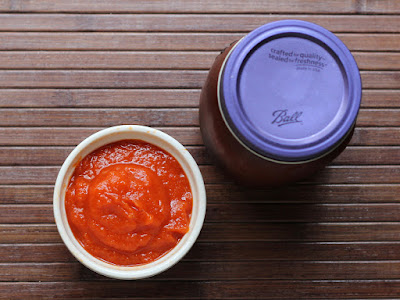
Roasted Red Pepper Spread
Adapted from the Ball Blue Book Guide to Preserving

Roasted Red Pepper Spread - so simple and so delicious!3 pounds red bell peppers
1/2 pound Roma tomatoes
1 large clove garlic, not peeled
1/4 tablespoons onion (after roasting)
1 1/2 teaspoons sugar
1/2 teaspoon salt (plus more, to taste, if needed)
1/4 cup red wine vinegar

Wash the bell peppers and tomatoes. put the peppers on a baking sheet. Place them under your broiler, and cook, turning as needed until the skins are blackened in spots on all sides. When the peppers are done, place them in a paper bag and close it or put them in a large bowl and cover the bowl. The steam from the peppers will make the skins easy to remove. Let them rest until they're cool enough to handle, then peel them, remove the cores and seeds, and put them in your food processor.

Meanwhile, place the tomatoes, garlic, and onion (you'll need about 1/2 of a medium onion) on another baking sheet and broil, turning as needed, until the tomato skins split and the garlic and onion have brown or black spots on the skin.

Place the tomatoes in a bag or bowl as you did with the peppers and let them cool until you can handle them.

Roasted red pepper spread from the latest edition of the Ball Blue Book.
Peel the garlic and chop it roughly and place the pieces in the food processor. Peel the onion, chop, and measure 1/4 to add to the food processor.

When the tomatoes are cool enough to handle, peel them, remove the core chop them roughly and add to the food processor.

Puree the ingredients in the food processor, then transfer the mixture to a heavy-bottomed saucepan. Add the sugar, salt, and vinegar.

Heat on medium until the mixture comes to a simmer and continue cooking until the mixture thickens. It needs to reduce a lot to become a spread. Taste for seasoning and add more salt. I thought it needed just a tiny bit more.

I stopped when I had 1 1/2 pints of product, and it was a thick sauce rather than a spread, but it was really tasty. Based on the original recipe amounts, I should have continued reducing until I had 1 1/4 pints. But then again, it was really good as a sauce, so I'm fine with it as it is. Next time I might continue reducing further.

Transfer to jars, cover, let them cool to room temperature, then refrigerate.

Thanks to Jarden for sponsoring this post! I will be mailing the cookbook to the winner; Ball will mail a coupon for the canning jars.
Ball Blue Book Roasted Red Pepper Spread

Friday, July 10, 2015

Magical Shell

You know that chocolate sauce that you buy at stores and pour on ice cream and it turns into hard shell? It's magical, right?

And now, I have the magic!

When I got my paws on the new cookbook, Big Gay Ice Cream by Bryan Petroff and Douglas Quint, I thought I was going to end up making ice cream, but I stopped at the chapter with the toppings, and got stuck there for a while.

First, I made the Whisky Walnuts, then I made the Magical Shell. I've seen recipes for Magic Shell clones online, but they all seem to use coconut oil, but I don't like coconut, so I've never been tempted to try them. this one uses olive oil, but it tastes like all chocolate.

Here's the thing, though. The recipe for Magical Shell in the book calls for THREE pounds of chocolate. It makes a LOT of syrup. If you're making it for a party, maybe you need that much. But if you're making it for home use, maybe you want to back off a bit and make a more sane amount.

I cut the recipe waaaaay back, and then re-thought it and upped the recipe by a little bit, which is what you have here. This adaptation is still a fairly small amount, but it's enough to let you decide if you want to make more, and then you can double or triple or quadruple the amounts.

According to the book, this keeps at room temperature for up to 6 weeks, but it's so simple to make, I'd rather make a smaller amount rather than have a jug of it sitting around.

Magical Shell
Adapted from Big Gay Ice Cream by Bryan Petroff and Douglas Quint

3 3/4 ounces (by volume) olive oil
6 ounces (by weight) bittersweet chocolate (chips or a bar cut into chunks)
1/2 teaspoon salt

Combine the olive oil and chocolate in a heavy-bottomed pan. Cook on low heat, stirring, until the chocolate melts and the mixture is smooth. Add the salt and continue stirring until the salt is completely incorporated.

Remove it from the heat and let it cool to room temperature before pouring or drizzling onto ice cream.

If you want to make a large quantity, the original amounts were 3 3/4 cups olive oil, 3 pounds bittersweet chocolate, and 4 teaspoons salt.

Storage:
This can be stored in an airtight container for up to 6 weeks. If it becomes too hard to pour, you can gently warm it by putting the container in warm water and stirring until it's pourable again.

And just to tease you a bit, here are the Whisky Walnuts. They're fantastic on ice cream, and I can just imagine how wonderful they'd be on top of cheesecake. Oh, yum!


For more about the book, check out my review on Munching on Books.
Magical Chocolate Shell

Friday, August 29, 2014

What the heck are tamarillos? A recipe for Tamarillo Sauce

When I got a bag of tamarillos from Frieda's Specialty Produce, I was both intrigued and confused. The were a bright magenta-red and they had long stems firmly attached. They were sort of football-shaped, but with rounder ends. Their nickname is "tree tomato." They can be eaten cooked or raw, but the skin allegedly tastes terrible.

Some recipes I found suggested that they be used sort of like tomatoes, while others suggested they were for dessert.

I decided to blanch and peel them, since that seemed easiest. The skin was thicker than what you'd find on a tomato or even a nectarine. More like a ... hmmm ... I'm not sure what. Thinner than a mango, but that's about as close as I can think of. They peeled easily once blanched and the inside was the color of the inside of a peach or apricot.

I tasted, and it was tart. Reminded me of citrus or maybe slightly underripe peaches. I took another sample, and the inside - the seedy part - definitely had essence of tomato.

Since my blanching had softened the fruit a lot, I decided to cook them. So I chucked them into a pot and made a sauce.

The fruit broke down really fast - faster than cooking tomatoes or apples. And it turned a magenta-red as the color of the interior of the fruit blotted out the peachy-orange of the outer flesh.

The flavor of the finished sauce was just as confusing as the raw fruit. The sugar I added balanced the acidity a bit, but it was still that mingled fruit-citrus-tomato flavor.

I asked my husband to taste it and tell me what it reminded him of. First he said plums, then he said it was more like tomatoes. Weird and weirder.

After the sauce was made, I brainstormed what to do with it, and I decided to try it as a marinade on chicken. I pounded some boneless, skinless chicken breasts until they were evenly flat, then put them in a plastic bag with a few large dollops of sauce and let them marinate for about 30 minutes.

I heated a pan, added some olive oil, and let the chicken brown a bit on one side, flipped it, and browned on the other. I continued cooking until it was done all the way through. The marinade added a nice sweet-tartness to the chicken. Now that I've tried it, this would be really good on pork, too.

But ... oops ... I didn't get photos of the chicken. Just imagine it, huh?

Tamarillo Sauce

8 tamarillos, blanched and peeled
1/2 cup water
1/4 cup sugar
1/4 teaspoon salt

Cut the peeled tamarillos into a few chunks and put them in a saucepan with the water, sugar, and salt. Cook until the fruit is completely softened.

Pass the puree through a strainer into a bowl to remove the seeds. Discard the seeds.

Taste the sauce, and add more sugar or salt, if needed. Mine was still pretty tart and I liked it that way, but if you want something on the sweet side, you might want more sugar.

Refrigerate the sauce until needed.

I received the tamarillos from Freida's Specialty Produce.

Tuesday, August 12, 2014

Barbecue Sauce #FromScratch and an Anolon cookware #Giveaway

Do you love my buns? The recipe is here.
When my friends at Anolon approached me and asked if I'd develop a recipe for them for their "Start from Scratch" campaign, I was all over it. I cook from scratch much more often than I cook from boxes, bags and mixes.

When I saw the list of suggested recipes, I chose barbecue.

This recipe is more from-scratch than the sauces that typically start with something like ketchup, or even canned tomato sauce. Oh, no. This sauce starts with fresh tomatoes.

It doesn't get any more from-scratch than that, unless you happened to grow the tomatoes yourself.

The sauce takes quite a bit of time to cook and reduce, but this is something you want to do slowly. Don't rush it ... good things take time. The resulting sauce is rich, deep, luxurious, with a sweet, tart, and savory all wrapped up in one bite.

And then I made it better by roasting some pork and making barbecue pork sandwiches. Seriously, you WANT one of these.

Hint: If you're avoiding wheat ... try barbecue nachos. Seriously. When I was a kid, barbecue at home usually came with potato chips (and I still tend to serve them with barbecue sandwiches. These days, I'm much more likely to have tortilla chips on hand rather than potato chips. So, I thought, why not serve those barbecue pork sandwiches with a side of tortilla chips and cole slaw?

Makes perfect sense to me.

This cookware is oven-safe.
As part of this campaign I was able to choose an Anolon pot to work with, and I chose the 5.5 quart covered braiser. Not only was it perfect for cooking the pork roast that ended up in the sandwiches, but it also was perfect for simmering and reducing my sauce. The wide, flat surface let the liquid reduce quickly, and the heavy bottom meant that it heated evenly.

The braiser has a round wire rack that can be used to keep food off the bottom of the pot - as when I used to to roast my pork. But if you don't use it in the pot, it makes a great trivet, too. Or a cooling rack.

Although it's not part of my barbecue recipe, the pot is also pretty nice for steaming corn on the cob. Steaming cooks faster, and less water means it heats faster. I also used the pot for steaming eggs. Which might sound a little crazy, but I ended up with perfect hard-boiled eggs.

The recipe for the barbecue sauce and for the pork roast are on Anolon's website. Co! Check them out! Then come back here! Yay! (Sorry ... I get a little excited about barbecue!)


One lucky reader can get a set of Anolon Advanced cookware that you can find at Macy's right now for $299, if you're in a buying mood. The set includes: 1.5 Qt. Covered Saucepan, 3 Qt. Covered Saucepan, 8 Qt. Covered Stockpot, 8.5" Skillet, 12" Covered Deep Skillet, 3 Qt. Covered Saute. Bonus Items are: 10" Open Skillet, 3 Qt. Covered Sauteuse with swing lid.

I own several pieces of Anolon cookware from different product lines, and I have to say that the Advanced line is pretty sweet. It's nonstick, but it's also safe for use with metal utensils. And, the color is classy, with the dark gray and silver. It just looks good on my stove, and it cleans up easily, both inside and out.

If you win this set, you're gonna love it! Or someone is gonna love you very much if you give it as a present. Christmas is coming.


The giveaway is now OVER.


And don't forget to check out my recipe, available at Anolon.com.


Because you really do want this pork sandwich in your life.

Or maybe these nachos.


Yeah, that's what I'm talking about!

About this campaign: Anolon sponsored the Start from Scratch campaign to encourage home cooks to consider making a wider range of foods from scratch. From August 13-31, Anolon’s Facebook, Twitter, and Pinterest social media sites will promote the campaign, with opportunities for you to win Anolon cookware prizes. There is also a special 20 percent off promotion on Anolon open stock items available at Macy’s. I am a paid participant in this campaign.