Thursday, July 3, 2014

Gadgets: Breville Waffle Maker

I have owned at least five waffle makers prior to testing this one - maybe more. Which is crazy, considering that I don't make a lot of waffles. But when I want waffles, I want good waffles.

My first waffle maker bit the dust when the non-stick coating flaked off. One other simply stopped working. But the major disappointment for all of them was the uneven cooking. I always ended up with uneven or spotty browning. I could do better with frozen waffles and a toaster.

The Breville Smart Waffle Maker ($199-$249) is the first waffle maker I've owned that can cook waffles evenly, from edge to edge and corner to corner and top to bottom. And to make it even easier, it has settings to control the lightness or darkness of the waffles, so there's no need to keep opening the waffle maker to see if the waffles are done.

If you happen to choose a setting that's too light, there's a button for "a bit more" to cook just a short time longer, but if you use the same recipe (or mix) on a regular basis, it's easy enough to figure out what setting you need.

A large moat surrounds the waffle-cooking area to catch any overflow. It's big enough that you'd have to vastly overfill the waffles to overflow the moat. But, to make things simple, each waffle uses a half-cup of batter, so portioning is easy.

I tried the waffle maker with a range of boxed (Krusteaz) and home made waffles and every batch was evenly browned and came out of the waffle maker with no sticking and very little cleanup. I cooked single waffles, pairs, and all four, and the browning was always consistent.

The messiest thing I cooked was a grilled cheese sandwich. It sounded like a good idea, but in reality, a lot of the cheese oozed out of the sandwich, so the cheese-to-bread ratio was a little thin on cheese.

But, I scooped the melted cheese out of the waffle-moat and had a little snack. So it wasn't a complete waste.

The grilled cheese experiment was more about testing cleanup than making an amazing lunch, and it wasn't nearly as bad as I expected. The cheese didn't stick to the surface at all, so I just needed to mop up some grease and get rid of a few errant bread crumbs.

The downside of this unit is that the waffle plates aren't removable for cleaning, but perhaps that's the trade-off for even browning. Unless you're cooking stupid stuff in the waffle maker like grilled cheese sandwiches, there's not much to clean up.

While the price is on the high end of the scale, this waffle maker is built like a piece of serious machinery and should last many, many years. If I had bought this instead of that first waffle maker - and all the subsequent ones - I would have spent less overall. As far as reliability, I have a Breville sandwich press that I've owned for 15+ years, and it's still going strong.

Wednesday, July 2, 2014

Chipotle-Pumpkin Sauce #PumpkinCan

This is a Sponsored post written by me on behalf of LIBBY’S Pumpkin. All opinions are 100% mine.

I make a lot of sauces and salsas and marinades and dressings. Usually, they're for a specific purpose. But when I made this sauce, I started using it on everything.

What couldn't I use it for?

Huh? Huh?

Okay, maybe not ice cream.

But ... hmmm ... given the bizarre ice cream flavors there are, maybe this could work. I'm not going to try it, but feel free to experiment on yourself.

For starters, I used this as a marinade for steak. Then I slathered it on a pork roast before it went into the oven.

I think my favorite use - and the one where it really showed off - was as a salsa substitute on tacos.

If pumpkin seems odd paired with a Mexican dish, think about this. The earliest pumpkin-related seeds were found in Mexico, and they dated back to between 7000 and 5500 B.C.

But this isn't just for use as-is. It makes a great base ingredient that you can build on.

Mixed with an equal portion of sour cream or Greek yogurt, it makes a great creamy-smoky-spicy dip for chips or vegetables. Add some mayonnaise, if you like.

Blend this sauce with cream cheese to make a cracker spread. Or add a spoon full to your favorite cheese ball recipe.

Mix it with more ketchup (or tomato sauce or paste) then add some allspice to make a smoky barbecue sauce for ribs.

Stir a spoon of this into soup or stew to kick up the flavor. Add a small dollop to your deviled egg, potato salad, or macaroni salad recipe.

Add a tiny bit to a salad dressing recipe, or toss some with hot pasta.

Add it to guacamole or salsa. Mix it with cooked vegetables.

Seriously, you're going to keep making this over and over and over, because it has so many uses.

And it's so simple.

Chipotle-Pumpkin Sauce

1 15-ounce can LIBBY's 100% Pure Pumpkin
1/4 cup canned chipotle in adobo
1/4 cup ketchup
Salt, to taste

Put the pumpkin, chipotles (and the sauce that goes with them), and the ketchup into your blender or food processor and blend until it's as smooth as it can get.

If you want a completely smooth sauce, without the pepper seeds and skin, strain it though a fine strainer. Taste and add salt as desired.

Refrigerate until needed.

For more ideas on what #PumpkinCan be used for (get it, pumkin can ... canned pumpkin?) check out the website or LIBBY’S Pumpkin on Facebook or LIBBY’S Pumpkin on Twitter or LIBBY’S Pumpkin on Pinterest ... or check out the pasta I made, or the peanut butter and pumpkin cookies or the pumpkin and vegetable pancakes.

Excuse me now, while I go contemplate pi. Or maybe pie.

Visit Sponsor's Site

Tuesday, July 1, 2014

Peanut Butter Ice Cream #ICTScoopAdventures

I love making ice cream. In the summer, there are always a few flavors available, and I like to mix things up a bit. But when I made this ice cream from the book Scoop Adventures for the first time, I immediately made another batch.

And then another. And more.

It's that good.

Oh, and I have a copy of this book to GIVE AWAY. Check the end of this post for details!

The recipe calls for unsalted natural peanut butter, but I used plain old Skippy, because it's what I have around here. I'd suggest using whatever peanut butter you like - and it would probably be great with other butters, too, like cashew butter or pecan butter. Or even sunflower or pumpkin seed butter for folks who can't have nuts.

I alos didn't use the jelly this recipe calls for. I was the weird kid who liked plain peanut butter on white bread or jelly on toast - but not the combo. I don't actually hate it, but I don't love it, either. So, I skipped the jelly in this recipe.

I did, however, experiment with using a bit of chocolate sauce as a topping. It was pretty darned good.

But if you're a PB&J fan, go ahead and add the jelly as the recipe suggests.

And - here's a little tip. I found that mixing the peanut butter and the ice cream base went a lot faster when I used my stick blender to do the mixing. The mixture was perfectly smooth, as was the ice cream.

Peanut Butter and Jelly Ice Cream
Recipe from Scoop Adventures by Lindsay Clendaniel (Page Street Publishing; March 2014) Printed with permission.
Makes 1 generous quart

1 1/2 cups whole milk, divided
1 tablespoon cornstarch
1/2 cup peanut butter (I used Skippy)
1/2 teaspoon salt
1 3/4 cups  heavy cream
2/3 cup sugar
3/4 cup grape or strawberry jam (I skipped this)

Fill a large bowl with ice water. In a small bowl, combine 2 tablespoons (30ml) of the milk with the cornstarch, whisk and set aside. Whisk the peanut butter and salt in a medium bowl and set aside.

Combine the remaining milk with the heavy cream and sugar in a medium saucepan and place over medium heat. Bring the milk mixture to a low boil. Cook until the sugar dissolves, 3 minutes.

Remove from the heat and gradually whisk in the cornstarch mixture.

Return to a boil and cook over moderately high heat until the mixture is slightly thickened, about 1 minute.

Pour into the bowl with the peanut butter and whisk until smooth. Set the bowl in the ice water bath to cool, 20 minutes, whisking occasionally. Cover and refrigerate until well chilled, at least 4 hours or overnight.

Once chilled, pour the ice cream base into an ice cream maker and churn according to the manufacturer’s instructions.
Spoon a small layer of jam into a freezer-safe container and lightly spoon a layer of ice cream on top.

Continue to alternate layers of jam and ice cream until the container is full, gently swirling with a spoon (careful not to muddy the ice cream).

Freeze until firm, at least 4 hours.

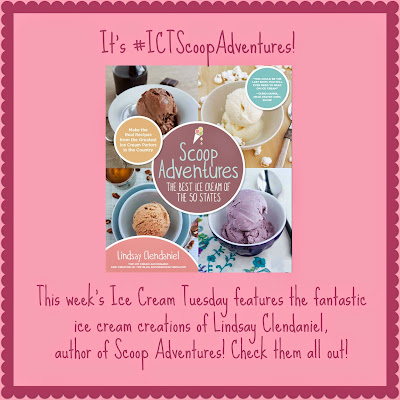
This post is part of Ice Cream Tuesday, created by Jenni from Pastry Chef Online. This week, bloggers are all making ice cream from the same author (from her book or blog), so make sure you check out all the participating blogs - and enter to win your own copy of Scoop Adventures, below.

Check out more amazing ice creams on Pinterest.


IceCreamTuesday

Visit the other bloggers!!!
Giveaway is now OVER.