Saturday, August 30, 2014

Oatmeal Fudge Chocolate Chip Cookies - allergen-free

I don't have any food allergies that I know about, but I'm always interested in trying recipes designed for restricted diets, because I think it's interesting to see how people work around the restrictions.

So, when my buddies at 37 Cooks tossed a copy of Sweet Debbie's Organic Treats at me, I knew I'd find something fun to make.

Besides focusing on organic, the recipes are also allergen-free and vegan. So, no gluten, nuts, dairy ... all those things that I bake with all the time.

Many of the recipes used coconut oil and coconut nectar, including the one I chose. I happened to have a jar of coconut oil, so that was good. I didn't have coconut nectar, and after some shopping, I couldn't find it anywhere. I did some reading and found that agave nectar and honey were both acceptable substitutes.

I had plenty of honey, so I chose to use that. Afterwards, I remembered that honey isn't a vegan product. But I wasn't planning on feeding any vegans, so I figured it would be fine - at least from a "will this recipe work" standpoint.

The recipe also called for 3/8 teaspoon of stevia powder, which I also didn't have. Since stevia is a sweetener and I had plenty of honey in the recipe, I decided to skip it. Many sources I looked at said that honey was sweeter than coconut nectar, so I figured I would be fine.

I didn't have guar gum and couldn't find it when I went shopping, but the book suggested that xanthan gum is an acceptable alternative, so I used that.

I was pretty happy with these cookies. I'm not a big fan of coconut, so I wasn't shoveling these into my mouth with wild abandon, but the chocolate flavor was definitely prominent.

For the gluten-free flour mix, I used the all purpose baking mix from King Arthur Flour; the book also has a recipe from making your own flour mix. For the chips, I used Nestle's, even though I'm pretty sure they're not organic.

You might be wondering about the gluten free oats. Here's the deal. Oats themselves don't have any gluten, but many oats are processed in facilities that process other grain products that do contain gluten. Because of that, they can't be labeled gluten free. So if you're cooking for someone who needs to avoid all gluten, you need to buy oats that are processed in a facility that's gluten free.

The book has recipes for making your own dark chocolate chips, if you prefer to do that, and you need to control absolutely every ingredient in your baking.

Oatmeal Fudge Chocolate Chip Cookies

Adapted from Sweet Debbie's Organic Treats by Debbie Adler

1 cup all-purpose gluten-free flour mix
1 cup cocoa powder
1/2 teaspoon baking soda
1/2 teaspoon xanthan gum
1/4 teaspoon salt
1/4 cup coconut oil
1/4 cup coconut nectar (I used honey)
2 teaspoons vanilla extract
3/8 teaspoon stevia powder (I omitted this)
1/2 cup water
1 1/4 cups gluten-free rolled oats (I used Hodgson Mill)
3/4 cups chocolate chips

Preheat the oven to 325 degrees and line one or two baking sheets with parchment paper. These don't spread much, so you might be able to squeeze all the cookies on one sheet, but I found it was easier to just use a second sheet.

In a medium bowl, whisk together the flour mix, cocoa powder, baking soda, xanthan gum, and salt.

Put the coconut oil and nectar (or honey or agave) in a microwave-safe measuring cup or small bowl and heat for 20-30 seconds. Add the vanilla extract and the stevia (if you're using it) and stir well. The coconut oil should melt.

Add the coconut oil mixture to the flour mixture, along with the water. Stir until all the liquid is absorbed and the mixture is evenly wet. Add the oats and the chocolate chips and stir to combine.

Portion the cookie dough onto the prepared baking sheets. I made about 20 cookies. Flatten the cookies with your palm or with the bottom of a measuring cup or glass.

Bake at 325 degrees until the cookies are set and the oats look dry, about 13 minutes. If you're baking more than one sheet at a time, or if your oven doesn't bake evenly, rotate the pans in the oven partway through the baking time.

Transfer the pan to a cooling rack and let the cookies cool for about 10 mintues before removing them from the pan and letting them cool completely on a rack.

Disclaimer: I received this book from the publisher through 37 Cooks.
Yum

Friday, August 29, 2014

What the heck are tamarillos? A recipe for Tamarillo Sauce

When I got a bag of tamarillos from Frieda's Specialty Produce, I was both intrigued and confused. The were a bright magenta-red and they had long stems firmly attached. They were sort of football-shaped, but with rounder ends. Their nickname is "tree tomato." They can be eaten cooked or raw, but the skin allegedly tastes terrible.

Some recipes I found suggested that they be used sort of like tomatoes, while others suggested they were for dessert.

I decided to blanch and peel them, since that seemed easiest. The skin was thicker than what you'd find on a tomato or even a nectarine. More like a ... hmmm ... I'm not sure what. Thinner than a mango, but that's about as close as I can think of. They peeled easily once blanched and the inside was the color of the inside of a peach or apricot.

I tasted, and it was tart. Reminded me of citrus or maybe slightly underripe peaches. I took another sample, and the inside - the seedy part - definitely had essence of tomato.

Since my blanching had softened the fruit a lot, I decided to cook them. So I chucked them into a pot and made a sauce.

The fruit broke down really fast - faster than cooking tomatoes or apples. And it turned a magenta-red as the color of the interior of the fruit blotted out the peachy-orange of the outer flesh.

The flavor of the finished sauce was just as confusing as the raw fruit. The sugar I added balanced the acidity a bit, but it was still that mingled fruit-citrus-tomato flavor.

I asked my husband to taste it and tell me what it reminded him of. First he said plums, then he said it was more like tomatoes. Weird and weirder.

After the sauce was made, I brainstormed what to do with it, and I decided to try it as a marinade on chicken. I pounded some boneless, skinless chicken breasts until they were evenly flat, then put them in a plastic bag with a few large dollops of sauce and let them marinate for about 30 minutes.

I heated a pan, added some olive oil, and let the chicken brown a bit on one side, flipped it, and browned on the other. I continued cooking until it was done all the way through. The marinade added a nice sweet-tartness to the chicken. Now that I've tried it, this would be really good on pork, too.

But ... oops ... I didn't get photos of the chicken. Just imagine it, huh?

Tamarillo Sauce

8 tamarillos, blanched and peeled
1/2 cup water
1/4 cup sugar
1/4 teaspoon salt

Cut the peeled tamarillos into a few chunks and put them in a saucepan with the water, sugar, and salt. Cook until the fruit is completely softened.

Pass the puree through a strainer into a bowl to remove the seeds. Discard the seeds.

Taste the sauce, and add more sugar or salt, if needed. Mine was still pretty tart and I liked it that way, but if you want something on the sweet side, you might want more sugar.

Refrigerate the sauce until needed.

I received the tamarillos from Freida's Specialty Produce.
Yum

Thursday, August 28, 2014

When are crackers not crackers? When they're Animal Cracker Cookies

Whoever named animal crackers must have been a marketing genius. Kids know they're cookies, but parents see the word "crackers" and think they're probably better than those cookies right next to them.

I remember loving animal crackers, and the box with the string was an added bonus. I could carry it around like a little purse.

Did you know ... that originally that string was on the box for ...

Heh. I'll let you think about that. Answer at the end of the post.

Maybe it was my fascination with animal crackers that fueled my adult love for cookie cutters, and recently my obsession is with the more elaborate cutters that emboss designs or that let you assemble 3-D cookies, like the birdhouse cookies I made a while back.

When I saw these animal cookie cutters, I had to have them. And when my buddies at 37 Cooks announced a challenge featuring Bob's Red Mill products, I decided that these cookies would be a perfect way to show off both the all purpose flour and the whole wheat.

The recipe here is perfect for cookie cutter creations, since the cookies don't rise or spread much at all, so you don't lose the shape or the embossed design.

Shortbread Cookies with a little Whole Wheat
Makes 2-3 dozen very small cookies

1 stick (8 tablespoons) unsalted butter at room temperature
2 tablespoons granulated sugar
1/2 teaspoon salt
2 teaspoons vanilla extract
1 cup all purpose flour
1/2 cup whole wheat flour

In a medium bowl, cream the butter, sugar and salt. Add the vanilla extract and continue beating until combined.

Add the flours and mix until combined. Gather the dough into a ball, flatten to a disk, and refrigerate until chilled – or for several days, if desired.

Preheat the oven to 350 degrees, lightly flour your work surface, and have baking sheets standing by.

Working with portions of the dough at a time, roll the dough to about 1/4 inch and cut with cookie cutters as desired. Right out of the refrigerator, this dough tends to be a little brittle and tends to crack apart, but as it warms slightly, it's easier to roll. If it does break apart, you can just gather up the pieces and mash them together.

Place the cookies on a cookie sheet. Parchment paper is fine, but you don't need a greased cookie sheet.

You can re-roll the dough scraps and cut more cookies, but if the dough gets too soft, it can be hard to work with as it sticks to your work surface and flops about when you try to pick up a cookie. If that's the case, just refrigerate it for 10 minutes or so, to let it firm up, then continue rolling and cutting.

Bake the cookies at 350 degrees until lightly browned on the edges, about 14 minutes.

Let the cookies cool on the pan for a while before you transfer them to racks to cool completely. They're a little fragile when warm, but they'll firm up as the cool. These are still slightly delicate when completely cool, so don't plan on putting them in a box and shipping them across the country.

Warning: Don't store your predator cookies with the prey cookies.
And now for the answer you've been waiting for. The colorful Animal Cracker box with the handy string was intended so that you could hang the box ...

... wait for it ...

... on your Christmas tree. Yup, the box was like a free ornament for your tree.
Yum

Wednesday, August 27, 2014

72-Hour Braised Beef Short Ribs

Yes, you read it right. Seventy-two hours. That's three full days of cooking.

I found the recipe on the Modernist Cuisine site and figured I'd give it a try. I bought two small packages of beef short ribs, vacuum-sealed them in a bag, and put them into a very large pot with the sous vide set to cook for 72 hours at 144 degrees.

... toe tapping ... waiting ... waiting ... checking ... waiting ...

I was a little worried about how much water would evaporate, particularly overnight, so I used a big pot and filled it to the max line on the Anova sous vide device. Then I used aluminum foil to cover the pot.

I did replenish the water a couple times, when it had noticeably dropped, but I might have been able to cook it the whole time without refilling. It didn't evaporate all that fast. Probably because the temperature wasn't all that high, hmmmmm?

Okay, confession. These didn't actually cook 72 hours. They cooked for about 71 hours because I wasn't thinking quite straight when I started cooking, and at 71 hours it was dinner time and I didn't want to wait any longer. But I figure that the difference between 71 hours and 72 hours wouldn't have been that significant.

The short ribs were pretty amazing. They were incredibly tender - possibly even more tender than a traditional long-braised beef. And not stringy. Still pink inside. And even though I didn't add any salt or seasonings (because I wanted to see what the sous vide did for the flavor) they were incredibly flavorful.

If I never ever ever cooked anything else sous vide, it would be worth it to have the Anova just for this. Seriously.
Yum

Tuesday, August 26, 2014

Whole Wheat Sesame Loaf

Poor whole wheat. It's so often misunderstood. Some people think of whole wheat and assume it's got to be dense and chewy.

It doesn't have to be that way.

When my buddies at 37 Cooks hooked up with Bob's Red mill, we got two types of flour to work with - organic all purpose white, and organic whole wheat.

Of course I had to make at least one loaf of bread. And I figured I might as well make a whole wheat loaf.

If you want a seriously soft and fluffy whole wheat bread, this is the one for you. It's soft, it's fluffy, it's light, it's squishy. And it's nice for sandwiches or toast.

The dough is very loose and sticky, so I suggest kneading with a stand mixer, if you have one. If you knead by hand, the stickiness of the dough is going to make you want to add flour to keep it from sticking to the work surface and to your hands.

It wouldn't be awful if you added a tad more flour, but try not to add too much.

If you like, this is the type of dough you can knead in bowl using a large dough scraper to move it around. It really is that loose and goopy.

Whole Wheat Sesame Loaf

1 cup lukewarm water
2 1/4 teaspoons active dry yeast
1 cup Bob's Red Mill organic whole wheat flour
1 large egg
2 cups bread flour
1 teaspoon salt
2 tablespoons honey
2 tablespoons unsalted butter
Toasted sesame seeds, as needed

Put the water, yeast, and whole wheat flour in the bowl of your stand mixer and let it sit at room temperature for an hour. Yes, I'm serious. Let it sit and bubble.

Add the egg, bread flour, salt, honey and butter.

Knead with the dough hook until the dough is elastic. It will be sticky and very soft. Cover the bowl with plastic wrap and set aside for an hour. It should be doubled in size.

Spray a 9x5 loaf pan with baking spray. Use a dough scraper to transfer the dough to the loaf pan. Sprinkle sesame seeds on top (this will help keep the dough from sticking to your fingers) and use your fingers to press the dough into the pan so it fills it mostly evenly. It's fine if the dough doesn't fill completely into the corners.

Sprinkle more sesame seeds on top, if you like. Cover the pan with plastic wrap and let the dough rise until it reaches the top of the pan or slightly higher - about 30 minutes.

Meanwhile, preheat the oven to 350 degrees.

When the dough has risen, remove the plastic wrap and bake the loaf at 350 degrees until it's nicely browned and it reaches 200 degrees in the interior - about 40 minutes.

Remove the loaf from the pan and let it cool completely on a rack before slicing.

I received flour from Bob's Red Mill through 37 Cooks.
Yum

Monday, August 25, 2014

How to knead bread

A while back, I wrote a some columns for Serious Eats called Knead the Book where I reviewed bread-baking books and made some of the recipes. 

Scroll down to the bottom for a chance to WIN The Art of Baking Bread and four others that I think you'll like! (Giveaway is now over.)

Here's part of what I wrote, way back in 2012:

The Art of Baking Bread 
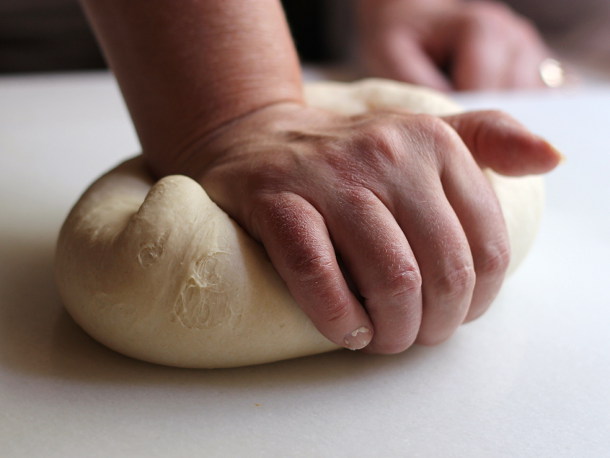
is the bread book I wish I had when I first started baking bread. Back then, most of the bread books were filled with recipes, which makes sense. But they assumed the reader would know how to knead or fold or shape.

And that makes sense, too. You wouldn’t expect a cookbook to explain how to stir soup or give detailed instructions on how to peel a carrot.

Handling bread dough isn’t difficult, but it takes some practice and you need to know some basics before you begin.

This book teaches those basics. Oh, sure, it has some recipes. But not a lot of them. Most of the book is about technique, and it goes into detail, dividing the process into eight steps.

That makes the few recipes a little difficult to follow because each step refers to instructions in another section of the book. But that’s only the first time you make a loaf. Once you’ve mastered the techniques, you won’t need to refer back to the details.

But it’s not just about basics. It’s also about options. Many techniques offer different methods. You can knead your bread using the standard method or the French method. There are several methods for folding dough. And the list goes on.

Along with the instructions, there are tips in each section, as well as comprehensive information about equipment and ingredients. It’s all written in plain language so it’s appropriate for a beginner. But at the same time, there’s plenty for the more experienced baker to think about as well.

How to Knead Bread
There are two methods of bread kneading described in The Art of Baking Bread. This is the conventional method. From The Art of Baking Bread by Matt Pellegrini. All rights reserved.

1. On an unfloured work surface, place the ball of dough directly in front of you with the heel of your hand on top of the dough.

2. With the heel of your hand, push the dough downward (toward the work surface) and forward with a smooth stroke. Make sure that your are pushing hare enough that the dough moves underneath your hand, but not so hard that the dough beings to tear. When you have pushed the dough so that the heal of your hand is at the front edge of the dough, remove your hand from the dough.

3. With your other hand, fold the dough in half and move the dough back to where it started before the first knead.

4. Repeat steps 1 through 4 until the dough becomes smooth and the gluten has been developed to the desired degree.

Conventional Kneading Tips
  • Work the dough as close to your body as possible to alleviate unnecessary pressure on your back.
  • Focus on pushing the dough, not rolling it or compressing it.
  • Resist the urge to add flour to the dough. The more you knead, the more air will be incorporated into the dough and the more the flour will absorb the water. Both will help to combat what appears to be excessive moisture.
  • If the dough sticks to your work surface, use the stiff bowl scraper (or bench knife if it won’t scratch your surface by doing so) to scrape the bits of dough from the surface and return them to the rest of the dough.
  • If you find that you are getting tired during the process, switch hands. It might take a little getting used to as far as coordination goes, but once you get the hang if it, you’ll be able to work through the kneading process that much easier.
  • As you knead the dough, you will notice that it transforms into something much smoother and more elastic. This means that the dough is developing precisely the way you want it to. So keep doing what you’re doing.
  • If you use the conventional method to knead dough with a greater hydration level, it is helpful to use the bowl scraper instead of your hand to gather the dough and fold it upon itself during the kneading process. If you use your hands, the dough sometimes sticks to them so much that it’s hard to keep the dough together.
  • If you decide to make larger batches of dough, be aware that the heavier weight of the dough takes more effort on your part. Keep that in mind so you don’t wear yourself out before the dough makes it to the oven!

Want to win an AUTOGRAPHED copy of this amazing book?

Sorry! Tbe giveaway is now OVER.
PLUS four other cooking-related books?

You want them, right?

Go to my new review/gadget/giveaway blog, Cookistry ... Reviews and enter to win ALL FIVE BOOKS:

The Art of Baking Bread
Betty Crocker Cookbook
Emeril's Potluck
Big Book of Pies and Tarts
A Short History of the American Stomach
Yum

Saturday, August 23, 2014

Triple Peach Ice Cream #IceCreamWeek

I love peaches, when they're ripe and juicy, but it's really hard to get that fresh-peach flavor into ice cream. If you add too much peach pulp to an ice cream base, it doesn't have enough fat, so it gets icy. If you cook the peaches, they taste cooked. Which isn't terrible, but it's a different sort of flavor.

But even cooked peaches don't add quite enough peach flavor to an ice cream base.

So, to get enough flavor, I added peaches three different ways - raw peach puree, cooked peaches, and a dash of peach flavoring.

This still isn't like biting into a fresh peach, because you only get that from a fresh peach. But this is a bright, fruity, rich, and peachy ice cream.

Welcome to Ice Cream Week 2014! 

You could win these!
This post is part of ICE CREAM WEEK which has been a whole lot of fun. And I've gone through a whole lot of heavy cream. Funny how that happens.

Today is the last day that all these great bloggers will be posting ice cream recipes. Woah, there have been a whole lot of them!

Have you been inspired to made ice cream this week? Have you thought about it at all? Stocked up on ingredients?

This year Ice Cream Week is hosted by Kim of Cravings of a Lunatic and Susan of  The Girl in the Little Red Kitchen.

We have teamed up with 25 amazing bloggers to bring you ice cream treats all week long. I hope you have as much fun as we did. Break out those stretchy pants and celebrate Ice Cream Week with us.

Our sponsors for the event have provided us with some great prizes.

A huge thanks to Cake BossAnolonMicroplaneWÜSTHOFPage Street Publishing and Quarry Spoon

Kim of Cravings of a Lunatic and Susan of The Girl in the Little Red Kitchen have tossed in a bonus prize of a Cuisinart Ice Cream Maker because they think everyone should own one!

Be sure to swing by all of today's Ice Cream Week Participants:


We would like to thank you all our readers for joining in the indulgence this week. Ice cream is always best eaten with friends.

Kim and Susan would like to thank all the participants and sponsors for joining in the fun. It's take a village to make this much ice cream!

See you all next year for Ice Cream Week 2015. Be sure to stay tuned for news about Cookie Week in November and Christmas Week in December. Susan and Kim are always up for fun and food. Chow!

Peach Ice Cream

3 large peaches (divided use)
2 cups heavy cream
3/4 cup sugar
2 tablespoons cornstarch
1/2 teaspoon salt
Milk (as needed, about 1/4 cup)
1/8 teaspoon peach flavoring* (optional)
2 tablespoons flavored** vodka

Peel the first peach, remove the pit, and cut into chunks. Place in a saucepan with about 1/2 cup of water. The water is there just to get the cooking started, so measuring doesn't need to be exact.

Cook on medium heat until the peach softens, then smash and mash the chunks until they're completely disintegrated.

Or, do it the easy way and use a stick blender, and blend until smooth.

Continue cooking, stirring as needed, until the puree is thicker than applesauce, but not quite jam. Turn off the heat.

Peel and pit the other two peaches and blend until smooth. Set aside. Pour into a measuring cup and add milk to reach 1 1/2 cups. I needed about 1/4 cup. You might need more or less, depending on how large your large peaches were.

Meanwhile, in another saucepan, combine the cream, sugar, cornstarch, and salt. Whisk to combine (the cornstarch will only blend into cold liquid, so don't turn the heat on and then start to stir. You will be sad.

Turn the heat to medium and cook, stirring often, until the mixture comes to a boil and thickens. Add the cooked peach puree and stir well.

Add the blended (uncooked) puree along with the peach flavoring and the vodka. Stir well, then pass this mixture through a find strainer into a storage container. The reason we're doing this is that any larger bits of peach in the mix are likely to become icy in the ice cream, and that's not so great. It's fine to press the mixture through the strainer to get as much as possible.

Chill this mixture thoroughly, then churn in your ice cream maker according to the manufacturer's instructions.

I think this is particularly nice served with some peach slices. But maybe that's just because I'm so peachy.

*I'm referring here to the super-concentrated flavorings. If you have a peach flavoring that's the strength of vanilla extract, you can add 1/2 to 1 teaspoon.

**Plain vodka is fine, but it's nice to add a little extra flavor, like whipped cream, cake-flavored, or a compatible fruit flavor. The alcohol in the vodka keeps the mixture from freezing quite as firmly, so there's less chance of encountering icy bits of peach in the smooth ice cream.
Yum

Friday, August 22, 2014

Maple Whisky Ice Cream v2 #IceCreamWeek

Prior to getting the book Scoop Adventures, my usual methods of making ice cream were to either make a custard base and cool it, or make an eggless, uncooked base.

Sometimes I made a cheater ice cream that used instant French vanilla pudding mix, but that was for one specific recipe.

The peanut butter and jelly ice cream from Scoop Adventures had another method - using cornstarch to slightly thicken the mixture - like a very loose pudding. (I left the jelly out of the PB&J ice cream recipe, but I was totally crazy about the peanut butter part.)

So I decided to give it a whirl with a version of one of my favorite ice cream flavors - Maple Whisky.

And then, while I was waiting for the ice cream base to cool, I had another thought. A lot of ice cream recipes suggest that you cool the base by immersing the bowl in an ice bath and stirring it to chill it. Which makes sense. It cools a lot faster. Others suggest letting it cool to room temperature, then refrigerating.

But then I thought, gee, what's going to cool my ice cream base faster than putting it in the ice cream machine? I mean, it's a cold place and it's constantly being stirred. So why not?

Obviously (or perhaps not-so-obviously) this method wouldn't work if you have a freezer-bowl style of ice cream maker. Probably not for the ice-cubes-and-salt style either, unless you replenished the ice and salt after the base was cold but not frozen. Otherwise, you'd lose the chilling power before the ice cream was solid.

But if you've got an ice cream maker with its own compressor, it doesn't lose its chill. It keeps chilling as long a you're churning.

So I gave it a try.

I don't know if it's okay to put a HOT ice cream base into an ice cream maker, but I added mine when it was warm rather than cool or cold, and everything seemed to work just fine. You might want to check your ice cream manual's instructions, and if there are dire warnings about not adding hot/warm liquids, then heed those warnings or proceed at your own risk.


Welcome to Ice Cream Week 2014! 

You could win these!
This post is part of ICE CREAM WEEK and it's a little bit sad that it's almost over. Ice cream is fun to make and fun to eat and fun to share, but there's one day left, with a lot more recipes to come.

And then you're on your own.

Remember, you can enter the giveaway through the end of the month.

This year the event is hosted by Kim of Cravings of a Lunatic and Susan of  The Girl in the Little Red Kitchen.

We have teamed up with 25 amazing bloggers to bring you ice cream treats all week long. I hope you have as much fun as we did. Break out those stretchy pants and celebrate Ice Cream Week with us.

Our sponsors for the event have provided us with some great prizes. Wow! Check out the great stuff!

A huge thanks to Cake BossAnolonMicroplaneWÜSTHOFPage Street Publishing and Quarry Spoon

Kim of Cravings of a Lunatic and Susan of The Girl in the Little Red Kitchen have tossed in a bonus prize of a Cuisinart Ice Cream Maker because they think everyone should own one!

Be sure to swing by all of today's Ice Cream Week Participants:


Maple Whisky Ice Cream

1 1/2 cups heavy cream
1 1/2 cups milk, divided
3/4 cup sugar
Pinch of salt
1/4 cup maple whisky
2 tablespoons cornstarch

Put the heavy cream, 1 cup of milk, sugar, and salt in a saucepan and heat to a vigorous simmer, stirring as needed to dissolve the sugar.

Meanwhile, combine the remaining 1/2 cup of milk, 1/4 cup maple whisky, and the 2 tablespoons of cornstarch.

When the milk has reached a simmer, whisk in the cornstarch mixture. Continue cooking, stirring, until the mixture returns to a hard simmer and the mixture thickens. You'll feel it thicken. Make sure you're scraping the bottom and sides of the pan.

Turn off the heat and let the mixture cool, stirring occasionally - or fill bowl with ice and put your pot into the bowl and stir to cool it faster. Then refrigerate until fully chilled, then churn according to your ice cream maker's instructions.

Transfer to a storage container and freeze.

Check out my previous Maple Whisky ice cream HERE.

And now for the GIVEAWAY!!!

More goodies to win!
The Ice Cream Week Giveaway is open to U.S. and Canada. It closes at midnight on 31st. It's ONE WINNER TAKES ALL!
The giveaway is now OVER.
Yum

Thursday, August 21, 2014

Chocolate with Buttercream Frosting ... Ice Cream! #IceCreamWeek

Yes, you heard that right. Frosting. Buttercream. In ice cream.

Yes, I've gone mad.

I made cupcakes and had extra frosting. I wasn't planning another cake immediately. I started brainstorming. Where could I use the frosting?

This time of year, many thoughts turn to ice cream, but after testing a dollop, I found out that it froze too hard to work in ice cream. So I added some vodka, and it was the perfect texture.

Depending on your buttercream mixture, you might need more or less "loosening." I suggest starting with a cup of buttercream, adding 1 tablespoon of vodka, then freezing a spoon full to see if you like the results. If it's still too hard, add more vodka.

As far as flavors, you really don't need a flavored version, but if you have one, you might as well use it. Cake flavor, whipped flavor, chocolate flavor ... use anything you think will be compatible.

Welcome to Ice Cream Week 2014! 

You could win these!
This post is part of ICE CREAM WEEK, and this is the fourth day of ice cream creations on this blog and a whole lot of others. Have you been following along? If not, you can always go back and see what you missed.

We're in the home stretch for ice cream now, and it's all deliciously downhill from here. Only a few more days to go.

This year the event is hosted by Kim of Cravings of a Lunatic and Susan of  The Girl in the Little Red Kitchen.

We have teamed up with 25 amazing bloggers to bring you ice cream treats all week long. I hope you have as much fun as we did. Break out those stretchy pants and celebrate Ice Cream Week with us.

Our sponsors for the event have provided us with some great prizes.

A huge thanks to Cake BossAnolonMicroplaneWÜSTHOFPage Street Publishing and Quarry Spoon

Kim of Cravings of a Lunatic and Susan of The Girl in the Little Red Kitchen have tossed in a bonus prize of a Cuisinart Ice Cream Maker because they think everyone should own one!

Be sure to swing by all of today's Ice Cream Week Participants:

Chocolate Ice Cream with Buttercream Frosting

For the ice cream base:
1 1/2 cups heavy cream
1 1/2 cups milk
1/2 cup chocolate syrup
1/2 cup sugar
1 package white chocolate* instant pudding mix
1 tablespoon vanilla extract
Pinch of salt

For the frosting swirl:
1 cup buttercream frosting
2 tablespoons flavored vodka

Combine the cream, milk, chocolate syrup, sugar, pudding mix, vanilla extract, and salt in a bowl. Whisk to combine - and until the sugar has dissolved and you don't have any unmixed bits of pudding mix floating about.

Hint - if you mix the sugar and pudding mix first, then add the liquid, it tends to combine easier. But you can also just throw it in a bowl and mix. It just takes a few more stirs to get the job done.

Chill the mixture, then churn according the the manufacturer's instructions.

Meanwhile, beat the frosting and vodka together until combined. Refrigerate until needed.

Churn the ice cream in your ice cream maker according to the manufacturer's instructions. As you're transferring it to a storage container, dollop in portions of the buttercream. If you like, give it a little stir/swirl - but don't mix too much - you want the buttercream to remain separate from the ice cream.

Freeze until firm.

I thought this was particularly good served on top of brownies, soft cookies, cupcakes, and other cake-like treats. Give it a try!

*Or any compatible flavor. Vanilla, French vanilla, or any version of chocolate would be fine.

And now for the GIVEAWAY!!!

More goodies to win!
The Ice Cream Week Giveaway is open to U.S. and Canada. It closes at midnight on 31st. It's ONE WINNER TAKES ALL!
Giveaway is now OVER.
Yum