Showing posts with label What's Cooking. Show all posts

Thursday, December 2, 2010

Holiday Crescent Cookies

I was first introduced to these cookies as a child when we'd visit relatives on Christmas Eve every year. These powdery delights were my favorite, and when I got old enough to be interested, I asked my aunt for the recipe. I was crushed when I found out they were bakery cookies, but eventually I found a recipe that was similar.

Then I found a lot of recipes, with a lot of names. These could be Mexican Wedding Cookies or they could be Snowballs, but when the winter holidays roll around, these become Crescent Cookies at my house.

It's easier to make a round ball and be done with it, but the familiar crescent shape reminds me of those long-ago holidays when the most pressing question was whether Santa made it to our house while we were out, or if he was working the late shift and would be stopping by after we were all asleep.

One trick to these cookies is rolling them in the powdered sugar at just the right time. If you do it when the cookies are warm, the sugar will melt and it will be a mess. Wait until the cookies are stone cold, and the sugar won't stick nearly as well. And we all know that the powdered sugar clinging to them is a critical part of the fun as it sprinkles down when you eat them.

Walnuts or pecans are my favorites in these cookies, but you could use any nut you like. Chop them finely, but don't let them turn completely into dust - you want some small bits and pieces in these cookies.

Holiday Crescent Cookies

1/2 cup (1 stick) butter
1/4 cup sugar
2 teaspoons vanilla
1 cup all purpose flour
1/2 cup finely chopped Marcona almonds

Cream the butter and sugar. Add the vanilla and beat in. Add the flour and nuts and blend well.

Gather the dough and wrap it in plastic wrap. Refrigerate for at least 4 hours or overnight.

When you're ready to bake, preheat the oven to 325 degrees and line a baking sheet with parchment paper.

Break off small balls of dough - about a tablespoon or so - and form them into crescent shapes.

Note: when the dough is right out of the refrigerator, it might be a bit too firm to form. It's fine to let it sit out for a short while to warm up.

Place them formed cookies on the baking sheet, leaving space between them. When you've used up all the dough (or the sheet is full) bake at 325 degrees for 20 minutes. The cookies will be lightly browned on the bottom and the edges, but otherwise still very pale.

Let the cookies cool on the baking sheet for a minute or two to firm up (they're crumbly while warm) then transfer to a rack to cool. Sprinkle with powdered sugar.
Yum

Wednesday, August 11, 2010

What's Cooking? Gluten Free!

This was originally published in the Left Hand Valley Courier in my "What's Cooking?" column.

If you spend any time in the baking, snack, pasta, or baked goods sections of the grocery store, you’ve probably seen plenty of gluten-free products for sale, from baking mixes to cereal products to spaghetti.

But what’s gluten, and why would you want to be free of it?

Simply put, gluten is a type of protein. It’s typically found in wheat flour, and it’s actually very important when making bread. Gluten is what forms the webby network that holds the bubbles that make the bread what it is. Bread flour has more gluten than all purpose, cake, or pastry flour because you want that webby structure in bread, but it can make your muffins or piecrust tough.

Bring up the topic of gluten-free food in any group of people, and you’re likely to get a variety of comments, from “It’s a fad; it’s the new Atkins,” to “That stuff is bad for you. Everyone should avoid it.”

The truth lies somewhere between those two sentiments. Gluten sensitivities are no more a fad than peanut allergies. We’re just hearing more about them now that people have become more aware and doctors are finding it easier to diagnose.

On the other hand, gluten isn’t bad for everyone. Just like any sensitivity, it’s only bad for the people who are sensitive to the item. And just like anything else, there are degrees of sensitivity. Some gluten-sensitive people can have a small amount of gluten with no ill effects, while others can become ill from trace amounts, which is why gluten-free products are produced and packed in facilities that are kept free of all gluten contamination.

Since wheat and other gluten-containing grains are so common in things like bread and baked goods, those used to be difficult for people with gluten sensitivities. Now there are bakeries that specialize in gluten-free goods, and you can find gluten-free baking mixes, if you’d prefer to make your own.

Although I don’t have gluten issues, I’m always interested in new products, just to see what they’re like. And to be prepared in case I ever need to cook for gluten-free guests.

Recently I tried King Arthur Flour’s gluten-free brownie mix. The directions were simple and the only things I needed to add were butter, water, and eggs. Since there were no high-altitude directions, I baked the brownies in a slightly larger pan, just in case they rose too much.
Yum

Friday, July 2, 2010

Golden Semolina Loaves

I use durum flour (or semolina) quite often when I make white bread, so this recipe interested me.

Instead of using a percentage of durum, this bread is all durum.

Durum and semolina are the same type of wheat, but semolina is a coarser grind. This recipe requires the finer-ground durum. If you can’t find it locally, you can order it from King Arthur Flour.

Like most of the recipes in Amy's Bread, this one has a lot of steps, but it was one of the simplest. I’ve simplified a little further, but the results are still exceptional.

Golden Italian Semolina Loaves
Adapted from Amy’s Bread by Amy Scherber and Toy Kim Dupree

1/4 cup very warm water
2 teaspoons active dry yeast
4 cups durum flour
1 tablespoon kosher salt
1 1/2 cups cool water (more if needed)

Mix the yeast and warm water and stir to dissolve the yeast. Set aside for three minutes.

Mix the flour and salt in a large bowl add the mixture and mix with your fingertips until it’s a shaggy mass.

Sprinkle some flour on your work surface and move the dough there. Knead for about four minutes. If the dough seems dry, knead in more water, a little at a time. The dough should be stretchy and feel smooth and supple.

Put the dough back into the mixing bowl, cover with oiled plastic wrap, and let it rest for 20 minutes.

Flour the work surface lightly again, and knead the dough for 5-7 minutes until it’s no longer sticky and is stretchy and supple.

Put the dough into a lightly oiled bowl, and cover with plastic wrap. Set aside to rise until doubled, about 60-90 minutes.

Preheat the oven to 425 degrees and sprinkle cornmeal on a baking sheet. Put an oven-safe metal pan on the bottom rack of your oven.

Lightly flour your work surface and divide your dough in half. Form it into two baguette shapes. Move the loaves to the baking sheet, cover with oiled plastic wrap, and set aside to rise until almost doubled, about 45-60 minutes.

About 10 minutes before the loaves are ready to go into the oven, boil about boil about a cup of water; this will be going into the pan in the oven to create moisture in the oven when you bake.

When the loaves have risen, make shallow slashes in the top of the dough, holding the knife at about a 30 degree angle. Mist the loaves with some water, Put the loaves in the oven and pour the boiling water into the pan. Close the oven door, wait about a minute, then mist the loaves with water again.

Bake for 15 minutes, then lower the heat to 400 degrees and bake another 25 minutes, until the loaves are golden brown and sound hollow when tapped on the bottom.

Remove the loaves from the oven and cool completely on a wire rack before cutting.

This has been submitted to Yeastspotting.
Yum

Sunday, May 2, 2010

Italian Braised Beef With Root Vegetables

When I saw that Michael Symon had a cookbook out, I was pretty excited. Although he’s an Iron Chef, to me he seemed like the kind of guy who would make homestyle dishes. When I saw the Italian braised beef recipe was his mother’s, I had to give it a try.

An ingredient in Symon’s beef recipe is his grandmother’s tomato sauce, but if you prefer, you can use your favorite tomato-based pasta sauce or even really good canned crushed tomatoes.

When I made this, though, I went all the way and used Symon’s sauce which simmers for 8 hours. It was definitely worth a try, and I ended up with enough sauce to freeze for later, after using what I needed for the beef.

When I made this recipe, I added more carrots and bought a large celery root. One carrot to three pounds of beef wasn’t quite enough vegetation for me.

Italian Braised Beef With Root Vegetables
Adapted from Michael Symon’s Live to Cook by Michael Symon

3-pound rump roast
Kosher salt
Freshly ground pepper
3 tablespoons olive oil
1 carrot, peeled and cut into 1-inch chunks
1 onion, coarsely chopped
1 small celery root, peeled and cut into 1-inch chunks
4 garlic cloves, minced
1 cup red wine
2 cups Yia Yia’s Sunday Sauce (or substitute)
2 bay leaves

Preheat the oven to 300 degrees.

Season the meat liberally with salt and pepper. Season it as much as a day in advance, if you like. Take the meat out of the fridge 30 minutes before you cook.

Heat the olive oil in a large Dutch oven, until it is nearly smoking. Sear the meat well on all sides then remove it to make room for the vegetables. Brown the vegetables, then add the garlic and cook a minute or two longer.

Add the wine, scrape up any brown bits on the bottom, then add the tomato sauce, 1 cup of water, and the bay leaves. Return the beef to the pot, bring the liquid to a simmer, and taste for seasoning, adding salt if necessary.

Cover the pot and place it in the oven. Cook for 3 hours (or up to 5 hours at local altitude), basting the meat once in a while during cooking.

Discard the bay leaves before serving. The meat can be cut or shredded. Or, as I did since it needed to cook so much longer than planned, let it cool then refrigerate overnight and cut it the next day before reheating it in the sauce. Serve over noodles or polenta.
Yum

Monday, March 29, 2010

Mocha Chocolate Chip Cheesecake

I like to bake, but my cake decorating skills are lacking. Some of the baking books I own have instructions for creating the sort of flourishes you see on wedding cakes, but that’s not really my style.

So when I got “The Whimsical Bakehouse,” I was pretty excited to see decorating styles that were more, well, whimsical. I started my adventure with the chapter titled “Simple Cakes” with something called Ode to Jackson Pollack.

Before I started on my decorating challenge, I needed a cake, and the Pollack instructions suggested three different cheesecake recipes. I went with the Mocha Chocolate Chip Cheesecake.

The base of the cake is a chocolate cookie crumb crust. Use any handy recipe for a chocolate cookie crumb crust, or take a look at my previous post here. Press the crumbs onto the bottom and halfway up the sides of a 10-inch pan.

The book specified a 10-inch cake pan, but I didn’t have one that large, so I used a 10-inch springform pan instead. And really, that’s a little less scary when it comes to unmolding a cheesecake.

If you do use a springform pan, cover the bottom and up the sides with aluminum foil to prevent water from seeping in during baking.

Ode to Jackson Pollack
Mocha Chocolate Chip Cheesecake
Adapted from “The Whimsical Bakehouse” by Kaye Hansen and Liv Hansen

All at room temperature:
2 12/ pounds cream cheese
1 1/2 cups sugar
1/2 cup heavy cream
4 teaspoons instant espresso powder
1 1/2 teaspoons vanilla extract
6 large eggs
1 1/4 cups mini semisweet chocolate chips

Beat cream cheese with an electric mixer until smooth. Gradually beat in sugar.

Simmer the cream, take off the heat, and add the espresso powder and vanilla. Stir until completely mixed.

Add the cream mixture to the cream cheese and beat on low speed until incorporated. Add eggs one at a time, at low speed. Beat just until the eggs are fully incorporated.

Pour mixture into the prepared pan. Scatter the chocolate chips over the top and swirl them into the filling with a small knife.

Place the pan into a larger pan and fill the larger pan with water to halfway up the sides of the cheesecake pan. Bake for 50 to 75 minutes, or until lightly golden and set.

When done, let the cheesecake sit at room temperature for an hour or two before trying to unmold it. Before unmolding, run a knife around the edge to loosen, being careful not to break the crust.

Unmold carefully and place the cake onto a cardboard round. Or, if you’ve used a springform pan, just use the springform botton. Freeze the cake until completely set, about 3 hours or overnight.

Chocolate Glaze:
1 1/2 pounds semisweet chocolate, in small pieces
1 pint heavy cream
5 ounces unsalted butter (3/4 stick)
1/4 cup light corn syrup

For Decorating:1 cup each dark and white chocolate, melted separately over simmering water

Melt the chocolate in a bowl over simmering water. Warm the cream, butter and corn syrup in a small saucepan over low heat, stirring until butter is melted, and continue heating until just before it comes to a boil. Slowly pour the hot liquid into the chocolate, whisking until smooth. Strain through a fine strainer. This can be cooled and stored in the refrigerator and heated gently before you need to use it.

Place the cake on a wire rack over a sheet pan. Pour the glaze over the sides of the cake first, then over the top. Use an offset spatula to smooth and even out the glaze. Shake the sheet pan to settle the glaze.

Now comes the fun part. Dip a fork into the melted white chocolate and flick it over the cake to create lines and spatters. Do the same with the dark chocolate. You don’t need to use all the chocolate; stop when you like the effect.

Lift the cake from the rack and clean off the bottom edge with a hot spatula. Let the cake chill for 1-3 hours until the chocolate is fully set. Meanwhile, clean the chocolate off all the surfaces where you flung it.

The leftover glaze and the drips on the baking sheet can be saved for later use. Just refrigerate and remelt gently.
Yum

Tuesday, February 2, 2010

Danish Pastry Dough

Danish braid with almond paste with a coffee-almond drizzle.
When I was a kid, my mom would get "coffee cakes" from a local bakery. They came in a long paper bag, and they were crisp on the outside, buttery and flaky inside, and filled with something that was sweet and nutty.

Mom called them coffee cakes, but they were really Danish pastries filled with almond paste.

There are a lot of different forms that a Danish can take - there the long, large pastries that mom used to buy, along with individual triangle-shaped turnovers, squares, or fancier shapes.

The pastry is flaky and buttery, something like sweet croissant. But then they're filled with interesting things, and usually drizzled with icing, and maybe sprinkled with almonds or pearl sugar

For years, I went hunted for coffee cake recipes that might turn out like the ones I remembered from my childhood. But they were always ... well ... cakes. When I discovered the recipe for Danish braids,  I figured I'd give it a try. When I tasted it and realized this was the "coffee cake" of my childhood, I was giddy happy.

Sour cherries in a Danish.
This is a pretty long recipe, so I've broken it up into several posts. It's not terribly difficult, though, if you take it one step at a time.

This first post is just for the pastry, the next step is in this post, which covers fillings, and then folding and baking. Then, in this post, you'll find instructions for making a Danish Braid, which is one of my favorite forms. And the braid looks impressive.

The photos here are some of the Danishes I've made, including those filled with almond paste, lemon curd, and sour pie cherries. I've also done peach, apple, chocolate, blueberry, and pineapple. Some included a pastry cream with the fruit.

The options are endless, limited only by your imagination and your taste.

The sugar in this dough makes it a little bit sweet, but it's not so sweet that you couldn't use this for a savory recipe. I've used it to make Reuben Danishes, filled with corned beef, sauerkraut, and Swiss cheese and drizzled with Thousand Island dressing.

Danish Dough
Adapted from a recipe by Beatrice Ojakangas in Baking with Julia written by Dorie Greenspan

Lemon curd-filled Danish.
1/4 cup warm water
2 1/4 teaspoons (one package) active dry yeast
1/2 cup room temperature milk
1 large egg at room temperature
1/4 cup sugar
1 teaspoon salt
2 1/2 cups (11 1/4 ounces) all purpose flour
2 sticks butter*

Put the water and yeast into a large bowl and let it sit for a few minutes to soften. Add the milk, egg, sugar and salt. Whisk to combine and set aside.

Put the flour into the work bowl of your food processor. Cut the butter into chunks – about 8 chunks per stick, and drop them into the food processor. Pulse until the butter is cut into pieces about 1/2 inch diameter. Don’t get carried away – you want fairly large pieces.

Empty the food processor into the bowl with the wet ingredients and fold gently with a rubber spatula, just until all the flour is moistened. Cover the bowl with plastic wrap and put it in the fridge. At this point, it can rest overnight or as long as four days.

Cherry danish with sliced almonds and a drizzle of icing.
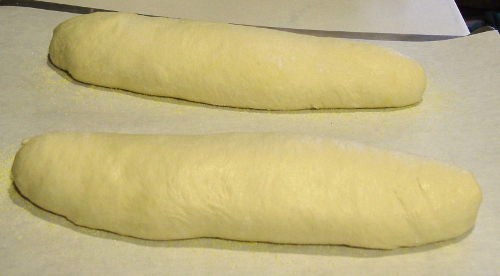
When you’re ready to work the dough, lightly flour your work surface and dump the dough out. Dust it with a little flour to keep it from sticking, and pat the dough into a rough square shape.

With your rolling pin, roll the dough into a square about 16 inches on each side. You don’t have to be precise, but if you get close to this size, the dough will be as thin as it needs to be, and that’s the key.

If you need to add more flour to the work surface or rolling pin, do so sparingly. Work quickly, but not frantically. If the room is warm and the dough gets too sticky or the butter seems to be getting soft, quit rolling, wrap it in plastic, and put it in the fridge for a little rest.

Fold the dough into thirds, like a business letter. Roll the dough again, into a rectangle about 10 inches by 24 inches.

Fold in thirds again. Roll to about a 20-inch square. Fold again, like a business letter.

One more time, roll into a long rectangle, about 10 inches by 24 inches. Fold in thirds, wrap it in plastic, and stash it in the fridge.

At this point, the dough should rest for at least 30 minutes before you shape it and bake it, or up to four days. Frozen, it will keep up to a month. Each batch of dough will make two Danish Braids or eight individual pastries.

Notes: 
I’ve sometimes added vanilla or almond extract to this dough, depending on what filling I have in mind.

*The original recipe calls for unsalted butter, but I prefer it with one stick of salted and one of unsalted.
Yum

Saturday, January 23, 2010

Basic Risotto - and variations

Mushroom and lobster risotto; not a great photo, but delicious.
If you think Italian food is all about pasta and tomato sauce, maybe it’s time for a change. How about some rice?

I’m talking, of course, about risotto, that creamy rice dish that seems so mysterious and complicated. You may have sampled it as an appetizer at a fancy Italian restaurant or seen Gordon Ramsey yelling about it on Hell’s Kitchen, but have you ever thought about making it at home?

At its essence, risotto is a simple dish. Few ingredients. Simple techniques. But like that little black dress, it can be accessorized to make it as fancy as you want it to be. It can be a first course, a side dish, or a meal.

The first thing you need for risotto is the right rice. You can bring out all the techniques in the world, but without a short-grained starch-releasing rice, you’ll never get the creaminess that makes risotto what it is.

The next thing you need is patience. Risotto takes time. It can’t be rushed. And if you go the traditional route, it also requires some attention. This isn’t a dish you can easily turn your back on, but it’s not terribly taxing and it doesn’t require fancy equipment. A sturdy pot and a wooden spoon are just fine.

You can find cookware made specifically for risotto, but that isn’t necessary. A cast iron Dutch oven is perfect, but any heavy-bottomed pan will do.

Basic Risotto
Adapted from Lidia’s Family Table by Lidia Bastianich

5-7 cups water or broth
1/4 cup extra virgin olive oil
2 cups finely chopped onion
1 teaspoon salt, divided
2 cups short-grained Italian rice
1 cup white wine
2 tablespoons butter (or additional olive oil)
1/2 to 1 1/2 cups grated Parmigiano-Reggiano
Freshly ground black pepper, to taste

Pour the water or broth into a medium-sized saucepan and bring it almost to a boil.

Cover the pot and lower the heat to keep it warm. You’ll be adding this to the rice throughout the cooking process, and it needs to stay hot.

Put the oil, onions, and 1/2 teaspoon of the salt into a large, heavy bottomed pan over medium heat. Cook the onions slowly, stirring often, until they are soft and golden, but not browned. Ladle about 1/2 cup of the hot liquid from the saucepan onto the onions, stir, and let them cook until all the liquid has evaporated.

Add the rice to the onions and cook, stirring constantly, for about 3 minutes. Add the wine to the rice and cook, stirring constantly, until the wine has evaporated.

Ladle in about 2 cups of the hot liquid, just enough to barely cover the rice. Stir it in, then add the remaining 1/2 teaspoon of salt and stir well. Lower the heat to maintain a gentle simmer.

Stir the mixture frequently, and then constantly as the liquid disappears and the mixture thickens. You don’t want the starch emerging from the rice to brown or burn on the bottom of the pan.

When the liquid has all been absorbed, add another cup of the hot liquid. Cook again, stirring as before, until all the liquid has been absorbed. Keep adding liquid and stirring until you’ve used up at least 5 cups of the liquid.

At this point, you can taste the risotto and see if the rice is cooked to your liking. Add more liquid and continue cooking and stirring to reach the consistency that you prefer.

When the rice is done, turn off the heat and add the butter or additional olive oil, black pepper to taste, and the cheese, to taste. Serve immediately.

Notes:
Most risotto recipes are more complicated, and include vegetables, meats, sauces, seafood or spices. But you don’t need to follow a recipe once you’ve mastered the basic technique.

If you have a leftover pasta sauce, Bastianich recommends adding 1-2 cups of that sauce to a full recipe of risotto, right after the first addition of hot liquid has been absorbed.

Leftover cooked vegetables, fast-cooking veggies like frozen peas, and cooked meats can be added near the end of cooking. Or cook mushrooms, shallots, or other aromatic vegetables along with the onions.
Yum

Friday, January 22, 2010

What's Cooking? Gifts for Cooks

This was first published in the December, 2009 edition of the Left Hand Valley Courier.

Gifts For Cooks

I still remember the look of horror the first time I asked my husband for a kitchen tool for Christmas. He’d heard the stories about husbands who bought vacuum cleaners for their wives and spent the next three months sleeping in the garage.

It took a long time to convince him that cooking implements – at least for me – are like new toys. Vacuum cleaners and leaf blowers are still off limits.

A basket of flours (yes, I spelled that right) would be an interesting gift for the baker in your life. For the bread baker, King Arthur’s organic bread flour has just been introduced, adding to the ridiculous range of flours they sell. Some are available at the local grocery stores, but if you’re looking for Italian or French-style flours or more unusual grains and blends, you’ll probably need to shop online.

If your baker is more interested in the sweet side, how about some unusual pans for cakes, cupcakes and muffins? Nordicware has an amazing array of Bundt pans ranging from the traditional shapes to cottages and sports arenas.

For smaller cakes, the Backyard Bug Pan bakes up bugs and butterflies in a pan that’s shaped like a leaf. The underside has decorative veins on the leaf that would make it an interesting decorative piece when it’s not in the oven.

Did I mention that Nordicware pans are nonstick and heavy enough to bake evenly? And if you don’t like bugs or Bundt pans, the company makes a huge variety of pans to fit anyone’s personality or party needs.

On the savory end, how about a cookbook and some unusual cookware to go with it? Before there was nonstick and before stainless steel, there was clay. While modern metals are a wonderful thing, sometimes you can’t replicate a traditional dish without using a traditional cooking vessel.

In Mediterranean Clay Pot Cooking, Paula Wolfert explores the use of a variety of clay pots, and includes both traditional and modern recipes. While it’s unlikely you’ll want to invest in every clay pot mentioned, for most recipes Wolfert gives several options. One of the most common is the Spanish cazuela, a round, straight-sided earthenware vessel that can be used in the oven or on a stovetop. Besides using it for the recipes in this book, it makes a nice serving dish or baking dish for any of your other recipes.

The book and a cazuela would be a great combo gift for your adventurous cook. But beware. Not all the recipes in the book recommend a cazuela, so expect to find other earthenware pots on next year’s shopping list.

How about a few stocking stuffers? Microplane has a variety of graters and zesters to fill any cook’s stocking. Or is your cook a little clumsy when it comes to grated knuckles? Microplane also makes a cut-proof glove that makes grating a more fearless experience. It’s also great when using a mandoline.

Not sure what tools your favorite cook needs? How about unusual spices or spice blends, colored sugars, vanilla and other flavorings, vinegars, olive oils, jams and jellies, or exotic coffees, teas and hot chocolate blends? Avoid the temptation to buy a pre-packaged, shrink-wrapped box at the mall. Instead, shop locally, buy some odd and interesting things, and put it all in an interesting cake pan, basket, serving bowl or baking dish for a unique gift that the cook in your life will love.

Fast And Easy Dip

For a fast holiday nosh, this dip tastes much more complex than you’d guess from its short ingredient list.

Take two parts Greek yogurt (I like Fage Total) to one part finely grated cucumber. Drain the liquid from the grated cukes before you add it to the yogurt.

Add a tiny bit of grated onion, to taste. For two seven-ounce containers of Fage, start with about a teaspoon of the grated onion and work up from there. Add salt, to taste.

Note: This dip can be used immediately, or let it sit in the fridge overnight so the flavors can meld. To make the dip match the theme of other dishes, add herbs or flavorings, as desired.

After publication notes: The dip mentioned above was something I whipped up when I was doing a demo of the Microplane box grater. I also served a carrot cake, which went over well, but I was astounded at how many people were amazed at the dip that I served with pita chips.

I really didn't think the dip was anything special, but since I got so many requests for the recipe, I figured it was worth publishing in the newspaper.

While I usually make my own yogurt, for the demo I didn't want to have to launch into that explanation, so I went with my favorite commercial brand that's now available in most of our local stores.

If Fage isn't available where you live, try another Greek-style yogurt, or just strain any plain commercial yogurt through a coffee strainer or a very fine-mesh metal strainer. When you're starting with a thicker yogurt, you can add ingredients that are a little more watery, and still not end up with soup.

Personally, I like the Fage Total (the full-fat variety) rather than the 0, 1, or 2 percent versions, but feel free to substitute whichever you prefer. But it seems to me that you're using yogurt in place of what might normally be sour cream, so the full-fat version is already a giant step lower in fat. And then you're adding cutting it by adding cukes. So for a dip, it's pretty healthy, even with the full-fat yogurt.

Since publishing this, I've made a few recipes from the Mediterranean Clay Pot Cooking cookbook, and I recently bought a Chinese Sand Pot, which I've tested with plain old rice. Pretty soon, I'm be venturing into some more interesting recipes with that pot.
Yum

Thursday, January 21, 2010

Classic French Bread and all about a baker's couche

Loaves on the left are better formed after rising in a couche.
I'm always experimenting with bread recipes and techniques, trying to see how the bread reacts, and this time I was experimenting with a baker's couche.

It seems like such a simple thing; it's just a linen cloth that the bread rests on during rising.

I baked some breads using one of Reinhart's recipes and let two rise on a cookie sheet and two on the couche to see what the differences were.

On the downside, transferring the puffy risen dough from the couche to a peel to a stone in the oven takes a little finesse. But it does make a difference in the final product, compared to breads that are left to rise on a cookie sheet and baked on that same sheet.

Here's what I wrote for a newspaper article about the couche:

Let The Games Begin

Ah, fall…the bounty of the harvest…the feeding frenzy that starts with Halloween, followed by the Thanksgiving feast, and ends with cooking, cookies, and cakes in December.

I’ve often said that cooking is my sport, and Thanksgiving is my Olympics. In the weeks leading up to the big event I’ll look for interesting twists on old favorites, try out unique ingredients, and bring out the fancy cooking equipment.

This year, I’ve got at least one innovative new ingredient to play with. King Arthur Flour has just introduced an unbleached cake flour which seems simple and obvious, given today’s trend towards natural ingredients.

The unbleached cake flour has been formulated so it behaves like bleached flour, but without the need for extra processing and chemicals. The unbleached flour isn’t as bright white, but you’re unlikely to notice the difference in a finished cake. Why did it take this long for someone to come up with this idea?

Speaking of flour, while bread-baking is a year-round event at my house, Thanksgiving bread-baking starts a few days early when I bake bread for the stuffing. Yes, I’m that fanatic.

When Thanksgiving is over and the turkey has become soup, what’s better than some crusty baguettes to dunk in the hot soup? Taking those baguettes to the next level is the latest device in my baking arsenal, the baker’s couche.

No, this isn’t where I nap while the bread bakes. A baker’s couche is a heavy cloth that’s used for proofing loaves of bread. The dough is laid onto the floured cloth and the fabric is bunched between the loaves to separate them.

The couche supports the dough so it rises up instead of spreading sideways. While a couche isn’t required, it gives bread a more professional result. The perfect test of it was this recipe.

Classic French Bread
Adapted from Peter Reinhart’s Artisan Breads Every Day by Peter Reinhart
Reinhart is one of the gurus of bread. This book is aimed at the home cook, with faster, easier techniques than in some of his other books.

Dough rising in a baker's couche.
5 1/3 cups unbleached bread flour
1 tablespoon kosher salt
2 1/2 teaspoons instant yeast
2 cups lukewarm water

Combine all ingredients in a bowl and mix for one minute by hand or with the paddle attachment of a stand mixer. Let rest, uncovered, for five minutes.

Knead two minutes by hand or with the dough hook of a stand mixer. The dough should be smooth, supple and tacky, but not sticky. Adjust flour/water as needed.

Knead by hand for another minute on a lightly floured surface, then put the dough into a clean, lightly oiled bowl. Cover bowl with plastic wrap and refrigerate overnight, or up to four days.

About two hours before baking, remove the dough from the refrigerator and divide dough and shape as desired.

Note: To test the results of the couche, I formed four long thin loaves, and proofed two on a baking sheet and two using the couche.

Mist the top of the dough with spray oil, loosely cover with plastic wrap, and let rise at room temperature for 1 1/2 hours.

About 45 minutes before baking, preheat the oven to 550 degrees. Put an ovenproof pan on the bottom rack of the oven – a cast iron frying pan works well.

About 15 minutes before baking, remove the plastic wrap from the loaves.

Just prior to baking, slash the loaves with a sharp knife. Transfer the loaves to the oven, and pour one cup of hot water into the pan on the bottom rack. Lower the temperature to 450 degrees. Bake 12 minutes, then rotate the bread and bake another 15 to 25 minutes, until done.

Note: If you can’t find unbleached cake flour locally, it’s available at the King Arthur Flour website, http://www.kingarthurflour.com/. Don’t blame me if you get carried away with the amazing array of other flours, including the French and Italian flours and the new organic unbleached bread flour. Yes, it does make a difference. Try a few and see.
Yum

Tuesday, January 19, 2010

Old-Fashioned Carrot Cake

I love carrot cake for so many reasons. It's not too sweet, it's moist, it's filling, and it's not terribly bad for you.

However, this carrot cake did not want to pose for photos that would work well in the newspaper where this recipe originally appeared.

Not only is newsprint not a great medium for detailed photos, but I never know if the pictures will be in color or black and white. And I don't know what size the photos will be, or how they will be cropped, so I'm never sure how much detail will show up.

And carrot cake is decidedly brown. Flecks of orange appear, but it's still a lot of brown. And the more I looked at it, the more I realized that in the newspaper it would probably look like meatloaf. Which is tasty and all, but not when you're writing about carrot cake.

When I made a second cake using more whole wheat flour and darker sugars, the cake turned out a deep brown. It was pretty, and the powdered sugar design on top was decorative, but the slices looked like chocolate cake.

So trust me when I say that the photos here are both carrot cakes made from this recipe, and they were both absolutely delicious. Not only did I serve it to friends and family, but I also served to strangers at Cayenne Kitchen, where I was doing a demo of a Microplane box grater and cut-proof glove.

Here's the column:

Food, History, Food

You probably wouldn’t be surprised to know I have lots of cookbooks. On a lazy day, I might browse through those books for hours, just for fun.

I also like books about food. Which comes in handy when someone asks a question about an odd ingredient and I explain the history of it. Yeah, I’m a food geek.

So I had to pick up “An Edible History of Humanity” by Tom Standage. It an interesting twist on world history, discussing the role that different foods played in shaping humans and their world – and at the same time, how humans changed the food.

What Standage makes clear from the very beginning of the book is that humans starting shaping crops even before they had any idea they were doing so. Early humans modified corn in the Americas so much that in a short time the new plants couldn’t survive in the wild. Humans were required for it to grow. In other parts of the world, rice and wheat were undergoing the same changes.

Later, food traveled from continent to continent, shaping politics while politics shaped food. Through wars and shifts in political power, food played some interesting roles.

What this book shows, over and over again, is that with each change in food technology, some things get better while others get worse. Early farmers grew crops they needed, but were tied to the land and couldn’t travel as far to hunt.

Recently, chemical fertilizers seemed like an answer to feeding the world’s population, but overuse of the fertilizers caused other problems. Now, farmers are looking to other methods to keep us well-fed and healthy.

While Standage’s book wasn’t particularly tasty – no recipes to be found – it is food for thought. And when I think about food, I have to cook. Since we’re talking about historical food, an old-fashioned recipe seems appropriate.

Old-Fashioned Carrot Cake
As an homage to somebody’s grandmother, this recipe relies on ingredients and equipment that grandma would recognize.

Terrible photo; great carrot cake.
1 1/2 cups vegetable oil4 eggs
1 cup white sugar
1 cup packed brown sugar
2 cups whole wheat flour
1 tablespoon cinnamon
1 1/2 teaspoons baking soda
1 teaspoon salt
3 cups grated carrots

Preheat oven to 350 degrees. Lightly grease and flour a Bundt (or similar) pan or use that newfangled baking spray, if you’re feeling modern.

Mix the flour, cinnamon, baking soda and salt together and set aside.

Beat the oil and eggs until they are light. An electric mixer would be handy for this, but feel free to use a whisk or an egg beater. Beat in the sugar a little at a time.

Gently add the dry ingredients to the wet, then fold in the carrots.

Pour the batter into the pan and bake for 45-55 minutes, or until a toothpick comes out clean.

Notes: 
Cream cheese icing is traditional on carrot cake, but this is tasty plain. A decorative dusting of powdered sugar is nice.

Grate the carrots any way you choose. Coarser carrots will be more visible. Or grate in zucchini or apples to make up for the fact that you only have 2 cups of grated carrots and you don’t want to go shopping.

You can substitute white flour or white whole wheat flour, if you prefer.
Yum

Monday, January 18, 2010

Bread and Butter Pickles

If you think pickling and canning died out with hoop skirts, think again. People are becoming more interested in knowing what’s in their food, and many are trying to avoid high fructose corn syrup, chemicals and preservatives. If you make your own pickles, you know what’s in the jar.

When I was a kid, bread and butter pickles were one of my favorites, and they still are. While most pickle recipes require pickling cucumbers, I’ve found that bread and butter pickles are acceptable using regular cukes. But since pickling cukes are being harvested now, you can make enough of these pickles now, to last you until next season.

These pickles, from Ball’s Complete Book of Home Preserving, are very close to the pickles my mother used to make. The recipe makes about five pint jars of pickles, but you can easily double it. Besides pickles, this book has instructions for preserving just about anything you can imagine.

For pickling instructions, why not go to the experts - the company that has been making canning jars and lids almost since caveman days? Well, maybe not that long. But long enough.

Bread and Butter Pickles
Adapted from Ball’s Complete Book of Home Preserving edited by Judi Kingry and Lauren Devine

10 cups sliced and trimmed pickling cucumbers
4 medium onions, thinly sliced
1/2 cup pickling or canning salt
3 cups white vinegar
2 cups granulated sugar
2 tablespoons mustard seeds
1 teaspoon celery seeds
1 teaspoon ground turmeric

In a nonreactive bowl, combine cukes, onions and salt. Mix well, cover with cold water, and let stand at room temp for two hours. Drain, rinse well with cool running water, and drain again.

Meanwhile, prepare your canner, jars and lids (check the instructions that came with your canner, or look online for basic instructions if you aren’t familiar with water-bath canning)

In a large stainless steel saucepan, combine vinegar, sugar, and spices. Bring to a boil over medium-high heat, stirring to dissolve sugar. Stir in the cukes and onions and return to a boil.

Pack the pickles into hot jars to within a generous half-inch of the top. Ladle the pickling liquid into the jars to cover the pickles, leaving a half-inch of space at the top. Remove air bubbles in the jars and add pickling liquid, if needed.

Wipe the rims, put the lids on top and screw the bands down, fingertip-tight.

Place jars in canner, ensuring that they’re completely covered with water. Bring to a boil and process for 20 minutes here at high altitude, or 10 minutes if you happen to give the recipe to a friend at sea level.

Remove the lid from the canner, wait 5 minutes, then remove the jars and allow them to cool, undisturbed.

Note: If all the pickles don’t fit into your five jars, just put the extra into a handy container and pop it into the fridge. They’ll be ready to eat as soon as they are cooled.

Substitutions: For flavor variations, you can substitute cider vinegar for some or all of the white vinegar, and/or brown sugar in place of the white. Other suggested variations include ginger or horseradish for some extra zing. They’re your pickles – make them the way you like them.
Yum

Saturday, January 16, 2010

How the "Unseen Been" Roasts Coffee

Coffee aficionados will tell you that fresh coffee is best. Drink the coffee right after it’s brewed, brew it quickly after grinding and grind it soon after roasting. Luckily for those of us near Vicinity, fresh coffee is nearby.

Drive east of Main on 9th Ave. in Longmont, and you might smell the aroma of coffee. The scent is certainly appealing, but the origin is a little mysterious.

A little investigation reveals that tucked in a warehouse along the tracks is the Unseen Bean, Longmont’s own coffee roaster. The tagline “Blind Roasted Coffee” is also a mystery until you realize that master roaster Gerry Leary, is blind.

Leary was blind from birth, but that didn’t slow him down. He was working as an auto mechanic when he happened upon a San Francisco restaurant that roasted its own coffee. He was intrigued.
No one would take Leary on as a coffee roasting apprentice, so he went to seminars. His first roasting machine would handle only a quarter-pound of coffee at a time.

Leary’s first big order was for 90 pounds of coffee. It took him three weeks to roast that many beans. When he got paid for the beans, he thought, “That’ll buy me some more coffee.” He hasn’t stopped since.

Leary still has the small roaster, along with a larger machine that can handle 25 pounds of beans at a time. The roaster turns the beans constantly, something like a cement mixer. During the roast, the beans go through two “cracks” where they sound like popcorn popping. It’s a fast process that has to be closely monitored.

Cathy Miller, Leary’s long-time friend, works with him at the Unseen Bean. “I’m the ‘sight’ manager,” she said with a laugh.

But Leary has everything organized so he can work without help. He pointed out Braille labels on the bins of green coffee. He has voice readers for his roaster’s thermometer, his computer and the scales for weighing the coffee. For getting around Vicinity (and beyond) he has a voice GPS.

Miller and Leary agree that it’s a great business to be in. Miller said, “It’s like being on a coffee break all day.” Indeed, with every batch that’s roasted, Leary grinds some beans and brews a pot of coffee for a taste test. That’s fresh coffee.

That’s not the only benefit. Leary said, “The nice thing is that this is a business where people smile when they pay.” He explained that as a mechanic, he knew people weren’t happy when they spent money on repairs, but they enjoy buying good coffee.

Have you ever noticed the round devices on the front of whole-bean coffee bags? Leary explained that those are one-way valves that let air out of the bags, but don’t let it back in. Freshly roasted coffee beans give off gas, and if those valves weren’t there, the bags might burst. Once coffee beans are stale, they quit giving off gas. Makes you think about those cans of ground coffee, doesn’t it?

The Unseen Bean has about 20 different types of green coffee beans ready to roast, including some decaf beans. There are also five standard blends. Leary said that when possible, he buys only “organic, shade-tree grown, free trade beans.”

Leary said, “We’re more expensive,” noting the cost of the raw beans. But his website invites, “taste the passion in blind-roasted coffee,” and he’s serious about that passion.

Since I wrote this article, the Unseen Bean has expanded its operation and now has a coffeeshop in Boulder, Colorado, and sells beans at a variety of locations. You can also order online at http://www.theunseenbean.com/.

This was an interesting article for write, for a variety of reasons. For one thing, Leary is so comfortable with his blindness and is so aware of his surroundings that I kept forgetting that he couldn't see, and I ended up becoming a hazard for him as he worked. At one point while trying to take a creative photo, I caused him to spill some green beans into finished beans, which then had to be sorted. He was quite forgiving about it, but I insisted on getting the beans sorted so he didn't lose the whole batch because of me.

Also, Leary samples each batch of coffee after he roasts it, and during the course of watching him roast several batches, I sampled right along with him. He brews a strong pot of coffee. I'd already had a cup or two that morning before I left the house, but I couldn't resist that incredibly fresh coffee. By the time I left his shop, I had a bit of a caffeine buzz going.
Yum

Saturday, January 9, 2010

Home made lemon curd AND Hungarian goulash

Home Made Lemon Curd
Kids are headed back to school, but what about you? Are you thinking about dusting off the summer cobwebs and learning something new? How about dabbling in a foreign language while learning some new skills with tools?

Yes, I’m talking about culinary school, where you can learn French names for simple tasks and learn to wield a knife like the best Iron Chef. Does that sound like fun? But is it too much time and expense, if you aren’t planning a career in cooking?

The super-cheap alternative is to spend a few days ensconced in someone else’s cooking school adventures. Katherine Darling’s “Under the Table” will give you just that opportunity, in a book that’s light reading with just enough meat to give you a bit of a message. Plus, there are 24 recipes to tempt you into the kitchen.

The most important lesson in the book, though, may be this: “My old habit of rushing through recipes, taking shortcuts whenever possible, began to melt away as I understood that there was a reason for every single step, and that the final product would taste infinitely better if I spent the time to do everything properly, with care.”

In a cooking landscape littered with quick-and-easy, 5-ingredient-or-less recipes that guarantee a family meal on the table in less than 30 minutes, it’s good to consider that sometimes the extra five minutes, the extra dirty bowl or the extra pinch of spice can make a huge difference.

If Darling’s book isn’t enough culinary school for you, why not get serious? I first looked at “On Cooking” when someone told me it was their favorite cookbook, but it’s more than just a cookbook – it’s a textbook used in culinary schools. Sure, there are recipes, but there are also detailed explanations, techniques, definitions and historical notes.

At over 1400 pages, with 37 chapters and a multitude of recipes, it’s a complete cooking class, from simple sauces to elegant presentation. But the recipes aren’t out of place in a home kitchen. For example:

Hungarian Goulash
Adapted from On Cooking by Sarah R. Labensky and Alan M. Hause

2 lbs. onions, medium dice
2 oz. lard or vegetable oil
4 tablespoons Hungarian paprika
1 tablespoon chopped garlic
1/2 teaspoon caraway seeds
1/2 teaspoon black pepper
Salt, to taste
1 quart white stock (see note)
4 oz tomato paste
5 lbs beef stew in 1 1/2” cubes

Sauté the onions in the oil or lard until lightly browned. Add paprika, garlic, caraway, salt and pepper; mix well. Add the stock and tomato paste, bring to a boil, then reduce to a simmer. Add the meat simmer until tender, approximately 1 1/2 hours.

Note: a white stock is a made from beef, chicken or veal bones that have not been browned or roasted first, resulting in a light-colored stock. You’re not really in cooking school, so use any good-quality homemade or store-bought stock that you like.

“On Cooking” includes chapters on baked goods, but if you want to skip cooking school and head right into the pastry kitchen, the companion book, “On Baking” might be for you. Besides cakes, pies and breads, there are candies, fillings and mousses to tempt your sweet tooth. And while the results are professional, you might be surprised at how easy some are to make at home.

One-Step Lemon Curd
Adapted from On Baking by Sarah R. Labensky, Priscilla Martel, and Eddy Van Damme
This recipe makes enough lemon curd to fill an 8” pie shell

12 eggs
4 egg yolks
2 lbs. granulated sugar
1 lb. unsalted butter, cubed
1 oz. lemon zest, grated
12 oz. fresh lemon juice

Whisk all ingredients together in a large bowl. Place the bowl over a pan of simmering water and cook, stirring frequently, until very thick – approximately 20 to 25 minutes. Strain, cover, and chill completely.

Class is over. Now, get cooking!
Yum

Friday, January 8, 2010

Rustic Mini Peach Pies with Brown Butter Ice Cream

What’s better than a juicy summer peach?

How about personal peach pies topped with a ridiculously decadent scoop of ice cream? It’s the perfect end to a summer dinner, and the pies could serve as breakfast the next day.

Just don’t tell anyone I said that.

The recipe for the mini peach pies is from the book The Sweeter Side of Amy's Bread, from the folks who run the famous New York bakery, Amy’s Bread. An earlier book focused on bread recipes; this one is about the sweets.

I've never been to the bakery, but the book has produced a number of winners in my kitchen. The recipes include both volume and weight (grams and ounces) measurements, but I’ll go with volume here, for the scale-less cooks.

The ice cream recipe is from an interesting cookbook called Fat, with the subtitle “An appreciation of a misunderstood ingredient, with recipes.” Yes, it’s a cookbook, but it also discusses the pros and cons and histories of the various types of fat.

It’s also larded with quotations, definitions and sayings like “Fine words butter no parsnips.”

I've made a number of variations of the brown butter ice cream, and every one of them has been a winner.

Rustic Mini Peach Pies
Adapted from The Sweeter Side of Amy’s Bread by Amy Scherber

For the pie crust:
3/4 cup butter, in 1/4 inch dice
2 1/4 cup flour
2 tablespoons sugar
3/4 teaspoon kosher salt
6-8 tablespoons ice water
1/2 cup vegetable shortening

For the pie filling:
4-5 medium peaches
1/3 cup light brown sugar
2 tablespoons brown sugar
1/2 teaspoon cinnamon
1/2 teaspoon lemon juice
1/8 teaspoon lemon zest
1/8 teaspoon kosher salt
1 tablespoon sugar

Freeze the diced butter for at least 15 minutes. In a large bowl, whisk together flour, sugar, sugar and salt. Add diced butter to the mixture and toss to coat. Add shortening and toss briefly. With a pastry blender or two knives, cut butter and shortening into the flour until the fat is in pea-sized pieces.

Add six tablespoons of the water and try to gather the dough together. If it’s too dry, add more water until you can gather the dough into a ball and there are no dry bits of flour.

Wrap the dough in plastic wrap and flatten it into a 3/4-inch thick disk, and refrigerate for up to 2 days, or put it in the freezer for up to an hour if you’re going to make the pie immediately.

Preheat oven to 450 degrees, and line two baking sheets with parchment.

Wash peaches, cut in half, remove pits, and cut each half into 4 wedges. (Note: I peeled mine.) Put sugar, cornstarch, cinnamon, lemon juice and zest and salt into a medium bowl and whisk to combine. Add peaches, stir, and let stand for 10 minutes.

On a lightly floured surface, roll dough 1/8 to 1/4 inch thick. Cut six 6-inch circles from the dough. If you need to, gather and re-roll scraps to make the six circles. Put three circles on each baking sheet.

Sprinkle the dough circles lightly with sugar, then distribute the peach filling on the circles – about 6 slices on each circle, leaving a 1 1/2 border of dough around the fruit. Fold the dough border up over the filling.

Bake for 14 minutes, rotate the pans, then lower the heat to 350 and bake 11-14 minutes longer, until the crust is brown and the filling is bubbling.

Put the finished pies on a wire rack to cool a bit. They can be served warm or cool.

Brown Butter Ice Cream
Adapted from Fat by Jennifer McLagan

1 cup whole milk
1 cup whipping cream
1/2 cup sugar
1/2 cup butter, diced
1/2 teaspoon freshly squeezed lemon juice
3 egg yolks
1/8 teaspoon fine sea salt

Combine milk and cream in a saucepan and add about half the sugar. Bring to a boil over medium heat, then remove pan from heat and set aside.

In another saucepan, melt butter over low heat, then increase heat to medium. When the milk solids at the bottom of the pan turn brown and the butter smells nutty, remove the pan from the heat, add the lemon juice, and transfer to a bowl to cool.

In a large bowl, whisk the egg yolks with the remaining sugar and salt until light in color and thick. Add the cooled brown butter slowly whisking vigorously so the mixture is emulsified. Then slowly whisk in the cream/milk mixture.

Pour the mixture into a clean pan and cook over medium heat, stirring constantly, until the mixture thickens and coats the back of a spoon. Strain the mixture into bowl and cool quickly by placing the bowl into a larger bowl filled with ice water.

Stir the mixture often while cooling. When it is completely cool, cover and refrigerate overnight. The next day, churn the mixture in an ice cream machine following the manufacturer’s instructions.
Yum

Home Made Cheese: Queso Blanco

Queso Blanco or “white cheese,” is a mild, non-melting cheese that’s simple to make and tasty on crackers, in tacos, or crumbled on top of a salad.

This recipe asks for a cheese press, which can be purchased online.

For a cheap, easy, home made press, cut the top and bottom lids out of a 28-ounce can, clean and dry the can and lids thoroughly, and you have a simple press.

To use your press, put one lid on several layers of paper towels on a flat surface, and position the can on top of it. Put the cheese curds into the can and distribute them so they’re even, and put the second lid over the curds. Use a smaller can or fill a suitably-sized glass jar with water and use that as a weight on top of the lid and curds.

If you start making a lot of cheese, a more sturdy (and non-rusting) plastic press makes sense. They're not terribly expensive.

Queso Blanco
Adapted from Jam It, Pickle It, Cure It And Other Cooking Projects by Karen Solomon

8 cups whole milk
1/4 cup apple cider vinegar
2 teaspoons kosher salt

Heat the milk slowly, stirring occasionally, until the temperature reaches 185 – 190 degrees, then slowly add the vinegar, stirring gently to distribute it evenly. Shut off the heat and let it pot sit undisturbed for about 10 minutes.

The milk will form curds, which will separate from the clear whey. Scoop the curds into a fine mesh strainer set over a bowl. Let the curds drain a few minutes, discard the collected whey, and put the curds into the bowl and toss them with the salt.

Move the curds to the center of a clean kitchen towel (not the fuzzy kind) or multiple layers of cheesecloth and tie up the cloth with the curds inside, Give the cheese a gentle squeeze to release more moisture, then hang the cloth-enclosed curds over a bowl or over the kitchen sink where it can continue to drain for 30-45 minutes.

Transfer the curds to a cheese press and weight the cheese for 3 – 4 hours until the cheese is firm. Release it from the press, and it’s ready to eat.

Yogurt Cheese

An even easier cheese in this book, with just one ingredient – yogurt – results in a soft, spreadable cheese. Depending on the brand of yogurt you start with, the result can be similar to cream cheese, or something much more tangy.

Suggested variations on the plain cheese include adding lemon, garlic, or dried cranberries and green onions, but with a little imagination, the variations could be endless.

More about the book
When I first saw this book, I thought it might be all about pickling and preserving. While it does include those sorts of recipes, the subtitle, “And Other Cooking Projects,” really tells the tale. These aren’t the sorts of things that you’ll be making for dinner tonight, but really are projects, in the good sense of the word.

Besides pickles, cheeses, bacon (yes, you can make homemade bacon), and jams, there are recipes for candies, beverages, and even toaster pastries. Some of these would make ideal gifts, while others would be fun projects with kids or friends.
Yum

The Easiest 100-Percent Whole Grain Bread Ever


A selection of whole grain breads
In honor of Mother’s Day, a fitting tribute might be to eat food that’s good for you, as moms often urge their children. 

While yesterday’s health food might be today’s junk food, one thing that’s undeniable is that whole grains have a place in a healthy diet. Well, there's paleo ... but still, many folks feel that whole grains can be part of a normal diet.

Like many things that are good for you, whole grains have a reputation for not being as tasty as their white, de-hulled, polished and branless counterparts. That doesn’t have to be the case.

One of the easiest ways to introduce whole grains to the family table is to start using white whole wheat flour, available at most supermarkets. White whole wheat is lighter in color and flavor than traditional whole wheat, and can be substituted for white flour in most recipes. Much of the time, no one will notice the difference.

But that’s just a first step. Why not use recipes created for whole grains so they really shine? This recipe does just that, resulting in a loaf that’s dark, moist, and a little bit sweet from the molasses. And it really is easy.

Peter Reinhart's Whole Grain Breads

A little more of a challenge was bread I made from a recipe in Peter Reinhart’s Whole Grain Breads. If you’re into bread baking, you may be familiar with Reinhart’s earlier books. This new one focuses specifically on whole grains. Reinhart’s theory of whole grain baking often involves multiple steps over a few days. Day one usually involves making two simple doughs, and then letting them rest.

The next day, the two doughs are combined, and other ingredients are added to make the final dough. Reinhart calls this the epoxy method, because the combination of the two doughs creates something that’s better than either would be alone.

A recipe in this book can run three or four pages and also refer to other pages for shaping or baking instructions – more words than this whole column. He also expects that readers will be familiar with baking terms like the windowpane test.

Also, measurements are precise and sometimes odd amounts. For example. the Transitional Whole Wheat Sandwich Bread that I most recently baked requires 5/8 teaspoons of one ingredient and 3 1/4 tablespoons of another. However, those measurements are also given in weight, so it’s easy if you have a good scale.

While Reinhart doesn’t dumb-down his recipes, the instructions are clear and easy to follow. And although you can’t decide to bake a loaf today and eat it tonight, the results are well worth waiting for.

So, if whole grain baking is in your future, you don’t have to rely on the few recipes you might find in older cookbooks and you don’t have to feel like you’re punishing yourself every time you eat. New ingredients and new recipes do make a difference.


The Easiest 100% Whole Wheat Bread Ever
Adapted from King Arthur Flour’s Whole Grain Baking
Many of the bread recipes in this book include orange juice, which is said to counteract some of the bitter taste some people find in whole wheat. Water could be used instead.

11/4 cups lukewarm water
1/4 cup orange juice
3 tablespoons molasses
3 cups whole wheat flour
1/4 cup nonfat dry milk
11/4 teaspoons salt
2 teaspoons instant yeast

Grease an 8 1/2 x 4 1/2 bread pan. Combine all ingredients in a large bowl and beat the mixture vigorously for about 3 minutes by hand or with an electric mixer on medium-high speed.

Pour batter into the prepared pan, cover with plastic wrap and let the dough rise for 1 hour. This dough won’t fill the pan and it will remain flat on top during baking. Meanwhile, preheat the oven to 350 degrees.

Remove the plastic wrap and bake the bread for about 45 minutes, tenting it with foil after 20 minutes. When done, the bread will be browned on top and will be 190 degrees in the center if you check with an instant-read thermometer.

Remove the bread from the oven and let it rest for five minutes before turning it out on a rack to cool. You may need to run a knife around the edges to loosen it. Let it cool at least 30 minutes before cutting.
Yum

Thursday, January 7, 2010

Faux Food: Ideas for April Fools Foolery


The photo may look like eggs on toast, but really it’s yellow tomatoes and mozzarella cheese on toast.

When April Fool’s Day rolls around, many people turn into jokesters, and the kitchen is just one place where practical jokes run amok. I may never forget the fateful April Fool’s Day when my mother decided to put salt in the sugar bowl to fool my father when he drank his coffee.

I was at an age when I hadn’t yet tasted coffee, and for sure I didn’t understand the significance of putting two teaspoons of salt into a cup of coffee. I thought my father would laugh, but when the first sip of coffee got spewed all over and the cursing began, I learned a valuable lesson.

There’s a difference between playing around with food and making it inedible. Salt in the sugar bowl is a bad idea. Decorating a cake to look like a hamburger is cute and playful.

Not everyone’s got the artistic skills to pull off a major cake decorating endeavor, and it’s not necessary to fool the recipients of the faux food – the illusions can be obvious and still be fun.

And while some faux food projects are strictly kid stuff, others are suitable for family dinners or for adults with a sense of humor.
  • One of the easiest things to do is to use round cake pans to mold meatloaf. Cook it as usual, but then stack the meatcakes and frost with mashed potatoes. A meatloaf layer cake can have mashed potatoes as the filling, or use cooked veggies instead. Carrots would look pretty and wouldn’t get smashed by the weight of the meatcake. 
  • For an extra festive touch, use ketchup to write a message on the top of the meatloaf cake. If you’re really creative, use your vegetable carving skills on radishes or carrots, or turn a spiral of tomato skin into a rose.
  • A bundt pan or ring mold could also be used as the mold for the meat, then frost with the mashed potatoes or other root vegetables. If your family likes them, this would be a good place for mashed rutabagas or winter squash, either on their own or mixed with potatoes.
  • For decoration, a sprinkling of shredded white cheese could simulate shredded coconut, while cherry tomatoes could represent cherries and mushroom caps could represent chocolate truffles.
  • Want pie instead of cake? Make a shepherd’s pie, but instead of using mashed potatoes on top, use slices of potato cut to look like apple wedges to simulate an apple pie. You could bake your shepherd’s pie in a pie shell or in a round casserole dish.
  • For a dessert, toast a piece of pound cake and top it with a flat, round blob of sweetened mascarpone cheese. Top that with half of an apricot, peeled. Squint a bit, and it will look like a sunnyside-up egg on a piece of toast.
  • For the same effect as an appetizer, toast some bread and top it with a circle of mozzarella cheese or any other white cheese that melts easily. Melt it gently in a microwave or under a broiler until it is just barely melted, to simulate the white part of the egg. For the yolk, find appropriately-sized yellow or orange tomatoes. Peel them, and cut in half, and place the tomato half on the cheese, cut side down. Drizzle a little olive oil on the tomato to make it shiny and to simulate melted butter. Sprinkle with a little salt and pepper.
  • Dessert pizza could be made with a sweet dough crust or even a giant sugar cookie. Use raspberry or strawberry preserves for the sauce and top with shredded white chocolate. Use round chocolate candies for meatballs.
The possibilities are endless. Just make sure that your creations are as pleasing to the palate as to the eye.
Yum