Showing posts with label mushrooms. Show all posts

Wednesday, March 14, 2018

Cream of Mushroom Soup (Pressure cooker or not)

Okay, you don't need to cook this in the pressure cooker - it's perfectly fine on the stove, simmering in a pot, but the pressure cooker speeds up the process of getting the soup tasting more like mushrooms and less like mushrooms floating in chicken stock.

The pinch of salt here is to help the vegetables release their moisture. Don't add too much, particularly if your stock has salt in it. I don't add salt to my homemade stock, but store-bought can be salty, depending on the brand.

The wine is also optional if you don't happen to have any on hand, but it does add a little something extra. Sherry is particularly nice, but a white wine would be fine, too. Red could work, but I'm not sure what it would do to the color of the soup.

You don't actually need the Better than Bouillon, but it adds more mushroom flavor to the soup. If you omit it, there's no need to add a substitute. Just carry on.

Cream of Mushroom Soup

1 tablespoon butter
1 shallot diced
1 pound crimini or button mushrooms (or your favorite), cleaned and sliced
Tiny pinch of salt
Generous grinds of black pepper
1/4 cup wine (white is nice; sherry is awesome)
1 tablespoon Better than Bouillon mushroom stock (optional)
1 quart chicken or vegetable stock (home made is best, but packaged is fine)
Leaves from 1 sprig of thyme
1 cup heavy cream

Melt the butter in the electric pressure cooker (Instant Pot or other brand), then add the shallots, salt, and pepper. Cook, stirring often, until the shallots are soft.

Add the mushrooms and cook, stirring as needed, until they're soft and they've given up liquid and they're simmering.

Add the wine and mushroom stock and continue cooking until most of the liquid is gone, stirring as needed.

Add the vegetable stock and thyme and give the soup a stir. Put the lid on and switch to high pressure. Set the timer for 15 minutes. When the time is up, release the pressure. Stir in the cream, taste for seasoning, and add more salt or pepper, if desired. Serve hot.

Note: The leftovers will separate into layers of stock and cream, but don't fret. Just stir it, and it will come back together, just like it was before.

Friday, February 10, 2017

Chicken and Mushrooms

When I got the book Stacy Lyn's Harvest Cookbook, I saw a lot of recipes I wanted to make. But, like many books that celebrate harvests, it called for a lot of fresh ingredients that aren't particularly wonderful at the grocery store in February. While I probably could have bought strawberries, I know they would have been sub-par, and that's not fair to the recipe or to the rest of the ingredients.

I paged through the book until I saw the Chicken and Mushrooms over Cheesy Grits. It sounded good, and the ingredients all made sense at this time of year. But the grits. Sigh. I adore grits, but I had just made a batch of rice with saffron. So I skipped the grits (waaaah, I love grits) and I served the chicken with the rice.

I followed the recipe pretty closely except that when I grabbed the chicken stock, it was actually turkey stock. Oops.

Oh! And I used all crimini (aka baby bella) mushrooms. I'm not fond of shitaki mushrooms enough to want to buy them. So, instead of 1/2 pound of crimini, 1/4 of button, and 1/4 pound of shitaki, I used all crimini.

The other adjustment I made was that after the chicken was done, I thought the sauce was too thin, so I removed the chicken, removed the lid, and continued cooking the rest until the sauce was reduced and it had thickened more. The instructions called for cooking it "partially covered" which is open to interpretation. I guess mine was more covered than it should have been.

I think if I make it again, I'll cook uncovered at first and cover it if I think it needs to be covered. While it didn't look like it was going to be too liquidy when I first assembled it, the mushrooms exuded a lot of liquid during cooking. But some folks might prefer more liquid, so it's not a fault with the recipe, it's just a preference.

Chicken and Mushrooms
Adapted from Stacy Lyn's Harvest Cookbook by Stacy Lyn Harris

4 skinless, boneless chicken thighs
1/2 teaspoon salt
1/4 teaspoon ground pepper
1/4 cup flour
1 tablespoon olive oil
2 large onions, cut into 1-inch pieces
3 garlic cloves, minced
2 large carrots cut into 1-inch pieces (I had small carrots, so I used 4)
1 pound crimini mushrooms
1 tablespoons rosemary, chopped
1 1/2 cups chicken stock

Combine the flour, salt, and pepper in a shallow dish, then coat the chicken with the flour. Save about 1 tablespoon of the flour remaining in the plate.

Put the oil in a large pot and heat over medium-high heat. When the oil is shimmering, add the chicken and cook until brown on all sides. Remove the chicken from the pan.

Reduce the heat to medium, add the onions, and cook for 2 minutes (I cooked mine a bit longer, until the onions were softened a bit). Add the garlic and cook for 30 seconds, then add the flour and cook for one more minute, stirring.

Add the broth, carrots, mushrooms, and rosemary. Return the chicken to the pan, along with any juices that came out of the chicken. Bring the liquid to a boil, then partially cover the pot and lower the heat so it simmers. Cook for 25-30 minutes, or until the chicken is no longer pink in the middle and the vegetables are tender.

At this point, I removed the chicken so it wouldn't overcook, and I removed the lid and increased the heat to thicken and reduce the sauce. You might or might not need to do this.

Serve over rice, grits, or whatever you prefer.

About the book: There are a lot of recipes here that I'll try when there are more fresh fruits and vegetables in season. My one quibble about the book isn't the recipes, but the printing. It's a pretty book, no doubt, but a lot of the recipes are printed on pages that have colored, patterned backgrounds. It's certainly lovely to look at, but it makes the text harder to read. Not impossible, but not as easy to read at a glance as if the page had black ink on plain white paper.

I received the book from the publisher at no cost to me.

Wednesday, November 4, 2015

Rigatoni "Lasagna"

Note: This is a sponsored post for a pasta sauce, but the words and recipe and photos are all mine.

I still remember - vividly - the first time I tasted lasagna. I was about 9 years old, and my mom and I, along with my mom's lady friend, had been invited to dinner at the apartment of a single fellow who happened to own the local grocery store.

He was making lasagna. I'd never heard of it before, but I was pretty much interested in any kind of Italian food. So I was more than happy to be there.

The truth was that mom's friend was the one who was invited to dinner, but it wasn't proper for a lady to visit a man's apartment by herself, so mom and I tagged along. I realize that now. Back then, we were just going to dinner.

I have no recollection of what else was served, but when that lasagna hit my plate with the beautiful layers, I was intrigued. When I took my first bite, I might have heard angels singing. I know I had a second helping. Perhaps a third.

I might have eaten more than any adult at the table, and if I could have figured out a way to run out the door with the leftovers, I might have done that, too. I was in love.

As far as I know, that was mom's first experience with lasagna, too. Although I begged her to make it for us, she never did. I don't know if it was simply too much trouble or if it was that she had no idea how to make it.

But every single time I saw lasagna on a restaurant menu, that's what I ordered. And I knew that when I was old enough, I was going to make lasagna.

Eventually, I did learn how to make lasagna. I tweaked the recipe and I made giant batches, enough to feed entire neighborhoods, because it really was a project. If I was going to make it, I might as well make a whole lot of it. Some to eat, some to freeze.

These days, my lasagna-making is usually reserved for special occasions, but that doesn't mean I've abandoned it entirely. This layered rigatoni dish has the flavors of lasagna, but it's simple. Very simple. And by using jarred Ragu sauce, it takes very little time.

Just look at the layers!

My mom used Ragu Pasta Sauce quite often, and like many other things that I grew up with, I didn't think a whole lot about the history of the product. It was just there. I probably never would have looked it up, but I got the info as part of this sponsorship.

The company was founded by a woman named Assunta Cantisano, who came to the US in 1914 - just a little bit before my mom was born. Later, during the depression, Assunta started selling her home-made tomato sauce to her neighbors, and pretty soon that turned into the company we know as Ragu. By the time I was born, Ragu was everywhere. Even my mom's kitchen.

Back then, there were a lot fewer flavor choices in the Ragu brand. Now there are a lot of different options, including chunky, smooth, meaty, and a whole lot of others. Do you use Ragu? Which ones do you like?

Oh! If you're worried about what's in a jar of sauce, Ragu has no artificial flavors and no HFCS.

Ah, but there's MORE.

There's a contest running on Food.com called Ready. Set. Cook! They're asking you to create new and unique recipes featuring Ragu sauce and using a set list of other ingredients. Go check it out and maybe you can win something. I like it when my readers win stuff!

Rigatoni Lasagna
aka Layered Rigatoni with Cheese

1/2 pound dry rigatoni or similar pasta
1 jar Ragu Super Chunky Mushroom
1 pound ricotta cheese
2 eggs
2 cups shredded mozzarella (or to taste)
Grated parmesan or romano cheese (optional)

Heat the oven to 350 degrees and have an 8- or 9-inch baking dish standing by.

Cook the pasta in boiling salted water until al dente.

While you're cooking the pasta, combine the ricotta and eggs in a small bowl. Mix until well blended.

When the pasta is done, drain the water and stir in the Ragu. (Note: I used to Super Chunky Mushroom because I'm a bit of a mushroom fiend, but this would work equally well with any of the other flavors or varieties.)

Mix until well combined. It might be a little soupy - that's fine, the pasta will absorb some of the sauce as it bakes.

Put half of the sauced pasta in the baking dish. There should be enough to cover the entire bottom of the dish.

Add the ricotta mixture to the baking dish in an even layer. Top with the remaining pasta and sauce.

Sprinkle the cheese on top of the pasta in an even layer. You can add more or less, to taste. If you like, sprinkle some parmesan or romano cheese on top.

Bake the pasta at 350 degrees until the cheese is melted and brown in spots, and the sauce is bubbling around the edges, about 30 minutes.

Remove the baking pan from the oven and place it on a trivet or folded kitchen towel (it's hot!).

Let the pasta rest for 5 minutes or so before serving.

Giveaway is over.

Friday, October 30, 2015

Arancini Patties

I'm learning this new thing called dinner for one. It's an interesting way of cooking. Sometimes it's worthwhile or necessary to make more than one portion of something, which is great when it reheats well and I want to eat it for lunch or dinner the next day.

But sometimes one portion is exactly enough.

I had a batch of risotto that I made (adapted from the book Le French Oven, which I highly recommend) and I didn't mind having leftovers ... but then I started thinking about arancini. They're fried balls of risotto, usually stuffed with cheese. A local restaurant stuffs them with chili.

I had the leftover risotto and started looking at arancini recipes and finally decided I didn't want to deal with the fuss of making balls and stuffing them. The risotto I made had a lot of cheese in it to begin with. And I didn't have anything else on hand that I thought would be good for stuffing.

AND! The risotto had slices of mushrooms in it. Trying to work around those to make balls didn't sound like it would be fun. Another good reason for not making traditional arancini was that I didn't want to make a big batch of them. I wanted just enough for one meal, and I figured that a flat patty would be easier to fry than a few round balls.

In the end, it was a good idea, and I'll probably do this again. If I really wanted to stuff an arancini, I'd make a round ball. But otherwise, I might just do patties.

Arancini Patties

That's a salad plate - it's not a giant patty!
Risotto, cooled, enough for 1 serving
Bread crumbs
Oil, for frying
Tomato sauce, for serving, if desired

Form the chilled risotto into a patty. Coat with bread crumbs. I used panko, but I'm sure that regular bread crumbs would be just fine.

Add enough oil to a small saute pan so it's about 1/8 inch deep covering the bottom of the pan.

A little more or less oil is fine, you just want to make sure you're frying the patties in a layer of oil and not in a dry pan.

And yes, a small pan is better if you're making one serving, because you won't need as much oil.

When the oil is hot, gently place the prepared patty in the pan. You should hear it sizzle and bubble. You can check the heat by dipping an edge of the patty in the oil, if you're not sure.

Cook until the patty is browned on one side, flip and cook on the second side until it is browned.

Remove the patty from the pan and let it drain for a few seconds on a paper towel to remove any excess grease.

Serve hot.

Friday, November 28, 2014

Stuffed Mushrooms for #HolidayHosting with Anolon

This is my third post for Anolon's Holiday Hosting promotion, and the theme this week was small bites. So I decided to go stuff some small mushrooms.

I adore mushrooms. I've loved them since I was a kid. So this happened.


Are they cute? Those are mushrooms stuffed with sausage and topped with cheese.


You want one, don't you?


It's not your usual dense chewy sausage. Those sausage meatballs are light and fluffy. Perfect little appetizer bites. You'll find the entire recipe over on Anolon's website. It's waiting for you RIGHT HERE.

Oh, but that's not all! I have a MEGA-GIVEAWAY for you.

Over the course of six weeks, I'll be developing six different recipes specifically for the Anolon products. We're halfway there. This is the third recipe and there are three more to go.

And I have ALL SIX Anolon items to give away. The same ones I got. And I'm giving all six to ONE PERSON. Isn't that AWESOME???

I'm pretty excited about this, because I LOVE Anolon products - I've already got some of their cookware, and I use it all the time, and I'm super-excited about the new stoneware and cast iron items.

And Anolon is having their own giveaways, so be sure to stalk them during this 6-week promotion!


The six items I am giving away are:

Anolon Advanced Pie Pan
I used this for the pie recipe, here.

Anolon Vesta Stoneware 9x13” Baker in Paprika Red
I used this for my bread pudding stuffing, here.


Anolon Nouvelle Copper Hard Anodized 10” Covered Skillet 
And this is the pan I used for the mushrooms.


There are three more recipes to come, using these products:


and


Yes, ALL of that to ONE LUCKY WINNER!

The giveaway starts when this post goes live and will end on December 26 at midnight, mountain time. US winners only. The giveaway widget will post with each week's recipe, and I will add NEW ways to enter each week related to the week's new post, like new tweets and new pins. So make sure you come back every week and see what I've made, and ENTER TO WIN!


Want more Anolon in your life?

Like Anolon on Facebook
Follow Anolon on Twitter at @Anolon
Follow Anolon on Pinterest.
Follow Anolon on Instagram.

This post is sponsored by Anolon. They supplied products for my use as well as compensation for recipe creation. They are also providing the prizes for the contest winner. Although I was paid to create a recipe, all words and ideas are my own.

Saturday, November 15, 2014

Mushoom Toasts (with red wine!)

Mushrooms and wine are a natural pair, so when Holland House sent me some of their cooking wines in order to do a couple of sponsored posts, I knew mushrooms would have to be involved.

This simple mushroom dish works well as a topping toasted bread with melted cheese, but it would also be great on top of a steak or burger, mixed with pasta, or served on top of some polenta. Or, if you're me, just pile them on my plate and eat them like a vegetable side dish.

This uses the red cooking wine from Holland House. If you're curious why cooking wine can be sold at a grocery store that can't sell liquor - and why it can be sold to minors - it's because the wine has enough salt added so that you wouldn't want to drink it. On the other hand, that level of salt it just fine when you're using the wine for cooking.

I like to think these tarts are both rustic and elegant. Maybe we need a new word - rustigant? Maybe the difference is the way you cut the bread, but in the end it's all about the taste. And these taste pretty darned good.

These would be a great appetizer for the holidays, whether it's a comfy-cozy casual family affair, or something a little more upscale. If you like, you can make the mushrooms ahead of time and reheat them on the bread while you're melting the cheese.

Mushroom Toasts

For the mushrooms:
2 tablespoons butter
1 large onion, diced
1 pound sliced mushrooms
1/2 teaspoon dry thyme
General grinds black pepper
1/2 cup Holland House red cooking wine

For serving:
Sliced toasted bread, rounds of French bread, or flatbreads
Cheese, as needed

To cook the mushrooms:
Melt the butter in a saute pan and add the onions. Cook, stirring for a minute or two until the onions start looking looking translucent, then add the mushrooms, pepper, thyme and wine.

Cook, stirring often, until all of the liquid is gone. You'll hear the sound of the cooking change from a simmering sound to a frying sound.

Cook for just a little longer, until some of the mushrooms get a little bit of browning. At this point, you don't want to stir often - you need to let the vegetables sit in one place long enough to brown a bit before stirring.

To make the toasts:
Choose a cheese that melts well - I chose a white colby cheese - and use as much as you like. I suggest a light touch, since the mushrooms are the star of the dish.

Top the breads with grated cheese and cook under a broiler just long enough to melt the cheese. Cut the bread into serving-sized pieces, then top each piece with some of the mushroom onion mixture. Serve warm or at room temperature.

Thank you to Holland House who supplied product for my use and compensation for recipe creation. All words and ideas in this post are mine.

Want to get friendlier with Holland House? Look for them on Facebook.

Thursday, October 9, 2014

Mushrooms with Eggs in Tomato Sauce from SHROOM!!!

I have always loved mushrooms. Always. With mad passion.

When I was a little kid, if you asked me what my favorite food was, I wouldn't have said chocolate or potato chips or peanut butter.

Nope. I would have said mushrooms. Pizza was good, because it came with mushrooms. Spaghetti sauce had mushrooms. Mushrooms were good all by themselves, cooked or raw.

Back then, all mushrooms were white button mushrooms ... well, except the odd ones in the Chinese take-out. But otherwise, they were all the same.

Now, I know that there are a lot of different mushrooms, each with their own fun-guy personalities. And I love all of them.

So when I got the book Shroom by Becky Selengut, I had about half of the recipes bookmarked. I wanted to make ALL of the recipes. But I had to decide which one to make first. That's always the tough choice.
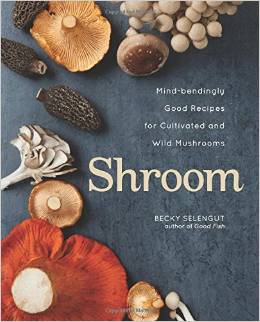
The book is organized by the type of mushroom, but for some recipes, you could certainly substitute one for the other. The one I kept coming back to was Portobello Shakshuka with Baked Eggs and Israeli Feta.

The idea was that you had a tomato based sauce with big mushroom caps holding eggs that baked to an over-easy consistency. I had really good intentions about buying the exact ingredients I needed. Really I did.

But then I had leftover pasta sauce, and I had mushrooms ... and I always have eggs. So I figured I'd whip up my own version of it.

My mushrooms were a little small, so the egg didn't stay in the first cap I tried. I needed bigger shrooms or caps that were more cupped. The next caps, I cooked in ramekins, so the eggs couldn't spread.

But the presentation wasn't a big deal. It tasted good. And the yolk blended with the sauce in a really interesting way, making it seem creamier.

I'm thinking this egg-in-a-mushroom thing could work for other things, too. Like a bed of rice, and then mushrooms topped with the egg sitting on the bed of rice. Or mushrooms over a nest of bean sprouts and shredded zucchini. Nice, right?

Anyway, if you want the original recipe from the book, just go to Amazon and do a search in the book for Shakshuka and you'll see it. Or, you know, buy the book.

But here's my recipe:

Mushrooms with Eggs in Tomato Sauce
Inspired by Shroom by Becky Selengut

2 cups prepared marinara or other tomato sauce
4 portobello mushrooms, stem removed
4 large eggs

Clean the mushrooms. Cook in the sauce in a saute pan until they're as done as you like.

Arrange the mushrooms with the gill-side up. Crack an egg into each mushroom cap. Cover the pan and continue cooking until the eggs are as done as you like.

Serve the mushrooms with the sauce.

Do ahead: Cook the mushrooms and sauce ahead of time, then refrigerate. When you're ready to serve, cook the eggs in the mushroom caps in the sauce. The sauce and shroom will reheat in the time it takes for the egg to cook.

I received the book from the publisher.

Friday, July 18, 2014

Mushrooms with Rave Reviews

I cook with liquor quite often, so when I heard that a company called Rave Review! had created a line of spirits with cooking in mind, I had to try them. I knocked on their (virtual) door and they very graciously sent me some samples.

The different liquors are blended with flavors and spices, and the company said that they're specially blended to hold up when cooked. So, okay then.

And, if you want to mix a cocktail with them, that's fine, too.

Me, I wanted to set something on fire. I mean, why not?

I haven't tried all the products yet, but I'm working my way through them. Besides the bourbon that I used for this recipe, they also have brandy, rum, and hops. So far, so good.

Have you tried these? What do you think? I have ideas for the brandy and rum, but I'm a little stumped on the hops. What would you do with that one?

Mushrooms with Rave Review! Bourbon

1 tablespoon butter
1 pound button mushrooms, sliced
Salt and pepper, to taste
Splash of Rave Review! bourbon
Sour cream or creme fraiche, to taste

Yeah, this recipe is a little sketchy in terms of amounts, but it's all about your taste. So, have fun with it.

Melt the butter in a skillet large enough to hold all of those mushrooms. Add the mushooms along with a pinch of salt and a few grinds of pepper.

Cook, stirring or tossing (I've been flipping and tossing everything lately, but stirring is fine) until the mushroom lose their liquid and then most of it evaporates and you see that some of the mushrooms are browning a bit.

Take the pan off of the heat and add a splash of the bourbon. Just a splash. Not a big glug. If you insist on measurements, then a tablespoon or two will be fine.

Return the pan to the heat and tilt it a bit and the vapors should catch fire.

WHeee! Fire!!! Whooo Hoo! We have FLAMBEEd!

Let the flames burn themselves out. It won't take long.

Now, wasn't that fun?

Add a dollop of the sour cream or creme fraiche and stir it in. You can add as much as you like. You can opt to barely coat the mushrooms, or let them swim in some sauciness. Stir/toss to combine and serve warm.

Disclaimer: I was sent products at no cost. A post was not required.

Wednesday, February 26, 2014

Pickled Mushrooms

I adore mushrooms, and that includes the pickled ones (or I guess you could call them marinated) that show up on olive bars in grocery stores. Every time I pass by those, I'm tempted to fill a container. Sometimes I do.

And then I'm tempted to snack on them every time I open the refrigerator.

Once in a while, I make my own. These are pretty great - not sweet, but not too hugely tart. Lemon and wine vinegar add their own personality. There's just enough red pepper to give them a little pop, but not so much that they've got bite.

Oh - and check out the cool green jar - these are the latest special edition canning jars from Ball.

Pickled Mushrooms

1 pound button mushrooms
1 small onion
2 cloves garlic
2 tablespoons sugar
1 teaspoon salt
1/2 teaspoon oregano
Pinch of red pepper flakes
3/4 cup wine vinegar
1 1/4 cups water
1 tablespoon lemon juice

Clean the mushrooms. If they're small, leave them whole. Otherwise halve, quarter, or slice them - whatever you choose.

Peel the onion, quarter, and cut into 1/4 inch slices.

Drop the garlic into a quart canning jar, then layer the mushrooms and onions in. You might have a few mushrooms left over - it depends on how well you pack.

Combine the sugar, salt, oregano, pepper flakes, vinegar, and water in a saucepan. Bring to a boil, stirring a bit to make sure the sugar and salt dissolve. Pour this over the mushrooms in the jar. Add the lemon juice.

Put the lid on the jar, and let it cool to room temperature, then refrigerate.

These are good as soon as they're cool, but they improve over the next few days.

Friday, November 1, 2013

The Most Decadent Mashed Potatoes and Gravy ...

When people talk about comfort food, one of the first things I think of is mashed potatoes and gravy. If no one was looking, I could make a meal from mashed potatoes and gravy.

But just because it's comfort food, it doesn't mean you can't up-scale it a bit. Porcini mushrooms and a bit of truffle add that magical touch to this recipe. Meanwhile, the mushrooms take center stage, so there's no need for meat - this is a vegetarian gravy.

The truffle oil is used to finish the dish - and a little goes a long way. A few drops per serving is more than enough. If you prefer a more subtle truffle flavor, porcini and truffle-flavored oil is a nice option.

For very smooth potatoes, use a ricer or food mill rather than mashing. If you don't have either of those tools, you can still get smooth potatoes with a regular potato masher. Make sure the potatoes are fully cooked, and then mash them on their own, before you add butter or other additions.

Some folks like to use an electric mixer to beat their potatoes, but I'm not one of them. Over-mixing can lead to gluey potatoes, and that's not something I want to risk - I'd rather find a few bits of un-mashed potato.

Also, beating potatoes with an electric mixer brings back the horrifying vision of the green-flecked mashed potatoes I made when I was a kid. I used mom's electric hand-held mixer to beat the potatoes in the same pot she cooked them in. Unfortunately, it was a teflon-coated pan. Thus, the green flecks. It took us a while to figure out what happened, and it's not something I ever care to repeat.

Decadent Mashed Potatoes and Mushroom Gravy

For the gravy
1 ounce dried porcini mushrooms
2 tablespoons unsalted butter
1/2 pound baby portabella mushrooms, sliced
2 tablespoons flour
1/2 teaspoon fresh thyme leaves
Salt, as needed
Truffle oil

For the potatoes:
2 pounds yukon gold potatoes
4 tablespoons unsalted butter
1/4 cup sour cream
1/4 cup heavy cream
1/4 teaspoon freshly ground white pepper
Salt, to taste
Milk, as needed

To make the gravy:
Put the dried porcini mushrooms in a saucepan with water just to cover. Bring to a boil, then lower to a simmer and cook for 20 minutes. Add more water, if needed, to keep the mushrooms barely covered.

Strain the liquid through a coffee filter or through a paper towel in a strainer. Reserve the liquid. Rinse the mushrooms and chop finely.

Meanwhile, melt the butter in a saute pan. Add the sliced portabella mushrooms and a pinch of salt. Cook until the mushrooms begin to lose their water. Add the diced porcini mushrooms and cook, stirring as needed, until all the liquid is gone. Add the flour and stir until you don't see any dry bits of flour.

Add the reserved mushroom cooking liquid, plus water to equal two cups. Stir well. Bring to a boil, then lower to a simmer. Cook for at least 10 minutes to cook out the raw flour taste, stirring as needed. Continue cooking until the gravy has thickened to your desired consistency. Keep in mind that it will be thinner when it's simmering than it will be once it's off the heat. If you need to thin the mixture, add water as needed.

Add the thyme leaves and stir to combine. Taste for seasoning and add more salt, if desired.

To make the potatoes:
Peel the potatoes and cut into cubes. Add to saucepan with cold water to cover. Add 2 teaspoons salt. Bring to a boil, then lower to a simmer. Cook until the potatoes are tender, then drain well.

Pass the potatoes through a ricer or food mill, or mash with a potato masher. Add the butter, sour cream, cream, and pepper, and stir to combine. Different potatoes will absorb liquid differently, so if the potatoes still seem dry, add milk, a little at a time, until you get to the consistency you desire. If you add a little too much liquid, heat the potatoes gently, stirring, to thicken the potatoes again.

Serve the potatoes with the gravy. Add a few drops of the truffle oil to finish each serving. Or, if you're passing the potatoes and gravy separately you can drizzle the oil into the gravy before serving.

Friday, September 13, 2013

Mushroom "Stroganoff"

My first run-in with beef stroganoff came when I was in my later years of grade school, and I was reading one of those teen novels.

The protagonist was a high school freshman (Ooooh! High school! How adult!!!) and at some point she met a guy. (OOOOOHHHH!!!! Boyfriend!!!)

She decided that she wanted to invite him over for dinner and cook him a fancy adult-style meal. So she decided to cook Beef Stroganoff, since that was very fancy.

Well, it was pretty darned fancy to me, because I'd never heard of it.

And then someone in the book convinced her to make meatballs stroganoff, because it was easier. And I thought, gee, if you like this guy and want to impress him, why would you go to all the bother of cooking for him, and then make something easy?

See, I was like that even when I was a kid.

So she makes her stroganoff, and ... I have no idea what happened. I remember the stroganoff reference, but I have no idea if the meal was a success or not.

My next run-in with beef stroganoff was at some restaurant. Somewhere.

I was not terribly impressed. Meat and noodles and gravy, yippee. Further introductions to stroganoff were even worse. Buffet-style cafeteria food or noodles-in-a-box.

Well, the 50s are over and stroganoff is out of fashion. It's never on restaurant menus, right?

But that doesn't stop me from making an occasional noodles-and-gravy dish that resembles stroganoff. Sort of.

And this one is even a little farther from the norm, since it includes Kary's Roux. You see, the nice folks at Kary's teamed up with my friends at 37 Cooks, and we're all having fun taking roux where roux has never gone before.

I'll tell ya, when I heard we were working with roux for this challenge, I was like, roo? Like kanga? Well ... okay, but I've never cooked it.

And then I was like, rue? The medicinal herb? But that's not generally edible, is it?

Finally, I was like, yeah, I'm just kidding. I know what roux is ... it's what I make with flour and water before I make gravy.

So, why would anyone buy a roux, you ask? The "original" wet roux from Kary's is a dark roux. Like the color of mahogany, maybe. Just short of burned.

Making a roux that dark is time-consuming. It involves a lot of stirring and watching and stirring and stirring and stirring and (yawn, I'm tired of standing here) and watching and stirring (I need a glass of water) and OH DAMN, I BURNED THE ROUX.

And then you start all over.

So I was more than happy to get a jar of dark roux to play with rather than stand at the stove for half a day cursing and fanning the smoke detector.

So, stroganoff, meet roux. Roux, meet mushrooms. Because I decided to make a meat-free version, using mushrooms at the major player. This isn't a vegetarian dish because I used beef stock. Mostly because I happened to have it on hand. But if you want to go vegetarian, you could use a vegetable stock. Or water.

For the noodles - does this ever happen to you?  - you go to the store with the idea of one type of pasta in mind, and then you leave the store with something else?

I was thinking something fettuccine-like would be good, but then I found these other noodles that were about the width of fettuccine, but had a name I'd never heard of. Fresine.


And they had that rough exterior texture that meant a sauce would cling really well.

So I bought them. Weird noodles, sort of.


If you look at them head-on, they're an oval shape, rather than flat like fettuccine. They took a little longer to cook than fettuccine would have, but no big deal.

Mushroomz and Noodlez
an ode to zhtroganoff

2 tablespoons unsalted butter
1 pound button or crimini mushrooms, sliced
1 medium onion, diced
1/2 pound fettuccine or other noodles
1 cup beef stock
2 tablespoons Kary's Original Roux
1/2 cup sour cream
Salt and pepper, to taste
Additional sour cream, for serving, if desired

Melt the butter in a heavy-bottomed frying pan (or saute pan, or whatever) and add the mushrooms and onions.

Cook until the mushrooms lose their water, then continue cooking until all that water is reabsorbed or it evaporates and you've got mushrooms and onions skidding around a mostly-dry pan. If some of the mushrooms brown a little bit, that's a plus.

This mushroom-cooking will take a while. Be patient.

Meanwhile, boil those noodles in salted water, until they're just al dente.

Add the beef stock (or vegetable stock, or water) to the mushrooms along with the wet roux. Cook and stir until the mixture thickens a bit.

When the pasta is done cooking, add it to the mushrooms and sauce. Add a bit of the cooking water and cook until the noodles are nicely coated with sauce and the sauce has thickened so it's coating the noodles rather than having the noodles swim in thin liquid.

Add the sour cream and stir it in.

Taste for seasoning and add salt and some generous grinds of pepper, as needed. Since the noodles were cooked in salted water and the beef stock might have been salty, you might not need salt - which is why we didn't add salt until now.

If you prefer a creamier sauce, you can add more sour cream, or pass it at the table for people to stir into their own portions.

Serve with a little dollop of sour cream on top, if you like.

If you've got something green - parsley, chives, scallions - you can garnish with that as well. All I had on hand was dill - which would have worked, actually - but I was saving that for pickles.

If you have leftovers, you'll probably need to add some extra water when you reheat, since the noodles will absorb some of the liquid.

Friday, January 4, 2013

Mushroom Ris-Oat-O

Yes, I'm back on the savory oatmeal bandwagon again. Last time, I made a fairly simple preparation with some parmesan cheese on top. This time, I decided to amp up the flavors a little bit, and go even a little further into savory land with mushrooms.

This could be made with chicken stock, but I decided to use one of my pantry staples, instead - Better than Bouillon. It's a thick paste rather than a powder, and it comes in a lot of stock-like flavors. I use the chicken most often. Like regular bouillon, it's salty, so you need to watch that. You'll note that I didn't add much salt to this.

As usual, I made this in my rice cooker.

This reheats well, but you'll need to add a bit of water when you reheat to thin the ris-oat-o a little bit.

Mushroom Ris-Oat-O

1 rice-cooker-cup steel cut oats (I used Flahavan's)
Water to "porridge" line on rice cooker
1 teaspoon Better than Bouillon chicken flavor
1/2 teaspoon salt
Pinch of saffron
1 tablespoon butter
1/2 pound mushrooms, sliced
Cheese, grated, as needed - I suggest parmesan or Gruyere
Creme Fraiche

Put the oats in the rice cooker, then add the water to the proper line. Add the Better than Bouillon, salt, and saffron.

Melt the butter in a small saute pan. Cook the mushrooms until the lose their water, then reabsorb it, and then the mushrooms brown a little bit. Add the mushrooms to the rice cooker pot and give the mixture a stir.

Set the rice cooker for brown rice, soft. Press the button and wait, tapping toe impatiently.

Serve with the grated cheese on top, as desired. A dollop of creme fraiche is also very nice, if you like. Some chopped fresh herbs would also be nice, in season. I'd choose thyme or chives.

Tuesday, October 30, 2012

Roasted Mushrooms

Guest Post by Maurita Plouff


I adore mushrooms, I'll confess that right now. They adorn my pizza, they lurk in my stews, they sometimes sneak their way into salads. Some folk do not have the lust for mushrooms that I do - and I feel vaguely sorry about that, while I gobble up their share. 

If you're like me, you need to cook these right away. But be warned! Even those who are generally indifferent to mushrooms find these mushrooms enticing, no, addicting. These mushrooms may change your life. 

They are everything that mushrooms should be - fragrant, delicious, sizzling. Roasted well, their texture firms; they are chewy. They go together quickly enough that they can be made on the spur of the moment, and they're dead easy besides, so they're a feature in my kitchen. And quite possibly soon, in yours.

Roasted Mushrooms with Garlic Butter
Adapted from gourmet.com

1 pound mushrooms, halved or even quartered if they are large
3 cloves garlic, minced finely
2 Tablespoons olive oil
1/8 tsp salt
several grinds of pepper
Tablespoons unsalted butter, cut in pieces
2 teaspoons fresh lemon juice [optional]
1/4 cup chopped fresh parsley

Heat oven to 450˚ with the rack in the middle. Toss mushrooms with oil, garlic, and salt and pepper in a 1 1/2 to 2 quart shallow baking dish. Dot the butter over the top.

Roast, stirring occasionally, until mushrooms are tender and golden, and a bubbly garlic sauce has formed in the bottom of the dish - this takes about 15 to 20 minutes. Stir in the lemon juice, if you like it and also the parsley.

Serve immediately, with crusty bread to sop up the juices, and be ready for squabbling about who got a bigger portion.