Showing posts with label sausage. Show all posts

Monday, June 22, 2015

Italian Sausage Sandwiches with Honey Balsamic Glazed Onions

I love Italian sausage, if it's the right kind. As an ex-Chicagoan, I want fennel seeds in my "sweet" Italian sausage.

It's not really sweet, like sugar, but the sweet designation lets you know that it's not hot sausage. Which is fine for some things. But not for my sausage sandwiches, or on pizza.

And, if you're from Chicago, you know at least one person who pronounces sausage as sah-sidge. If they're really hard-core, you might even hear about the ever-so-popular sah-sidge sangwidge.

Yes, I'm serious.

This isn't the traditional Italian sausage sandwich, though. Oh, it's got the traditional peppers and tomato sauce. But the secret ingredient this time is the honey balsamic glazed onions. They add a sweet-tart flavor that really complements the sausage and peppers.

The onions cook down a lot, and they might just become your new favorite condiment, so consider making extras for burgers, hot dogs, pizza, and panini sandwiches. I had to stop myself from "sampling" the onions until they disappeared. They're insanely good.

The vinegar came from Honey Ridge Farms, courtesy of the blog group 37 Cooks, where we cook up challenge recipes using fun ingredients.

Italian Sausage Sandwiches 
with Honey Balsamic Glazed Onions

For the onions:
2 teaspoons olive oil
2 medium onions, sliced into half-moons
Pinch of salt
Several grinds of black pepper
2 tablespoons Honey Ridge Farms Balsamic Honey Vinegar

For the peppers and sauce:
1 tablespoon olive oil
1 green bell pepper, cored and sliced into strips
1 red bell pepper, cored and sliced into strips
1 tablespoon dry oregano
Generous pinch of salt
Several grinds of black pepper
1/4 cup red wine
1 15-ounce can tomato sauce

For the sandwiches:
6 Sweet Italian sausages, grilled or pan-cooked
6 Buns

To make the onions:
Heat the olive oil in a medium saute pan. Add the onions, salt, and pepper. Cook on medium, stirring as needed, until the onions begin to soften. If they start browning, turn the heat down.

Add the balsamic honey vinegar and continue cooking, stirring once in a while, until the liquid is gone.

To make the peppers and sauce:
Heat the olive oil in a medium saute pan on medium heat. Add the peppers, oregano, and salt, and pepper. Cook for a minute or two, then add the wine. Let it come to a simmer, then add the tomato sauce.

Cook, stirring as needed, until the peppers are fork tender, but not mushy - or until they're cooked to your liking. If the sauce reduces too much, add water to keep it saucy.

To make the sandwich:
Put the sausage in the bun. Add the peppers and as much sauce as you like. Top with onions.


You should have enough toppings for at least six sandwiches, but it depends on how much you like the toppings. I've been known to make a sandwich with just the toppings, and maybe a bit of melted cheese inside the bun. Yes, I'm serious.
Yum

Monday, February 23, 2015

Chicken-Sausage Chicken-Thigh Chicken Noodle Soup

This time of year, there's pretty much always some kind of soup happening. I make enough to last a few days, and when that's gone, another soup makes its appearance. I like to vary the soups, so every new batch is significantly different from the one before.

So ... if the tomato noodle soup is nearly gone, the next one might be chicken and rice. That could be followed by ham and bean or cream of mushroom. Later, it might be beef barley or split pea. Some soups have meat in them, some have a meat (or poultry) base, and some are completely vegetarian.

There's a lot of soup around here.

So when my buddies at 37 Cooks hosted a challenge sponsored by Bilinksi's sausage and they sent chicken, kale, and balsamic sausage ... well, the first thing I thought of was soup.

I decided to amp up the chicken content by using chicken stock and chicken thighs along with the chicken sausage. There's no doubt at all that this is a chicken soup.

If you happen to have cooked chicken to add to the soup, you can skip cooking the thighs in the stock - the stock won't be quite as rich, but it will still be pretty terrific.

Chicken-Sausage Chicken-Thigh Chicken Noodle Soup

1 tablespoon olive oil
4 chicken thighs
1 quart chicken stock
6 carrots
1 onion
6 scallions
1 teaspoon poultry seasoning
1 tablespoon minced parsley
Salt, to taste
1 cup dry pasta (I used farfalle, but any shape is fine)
3/4 cup frozen peas
1/4 cup corn kernels
12 ounces Bilinski chicken sausage

Heat a Dutch oven or other heavy-bottomed pot on medium heat and add the olive oil. When the oil is hot, add the chicken thighs, skin-side down. Cook until the skin is nicely browned, then flip the pieces over and cook on the other side until browned.

Add the chicken stock. Cover and simmer until the chicken thighs are cooked through and tender - figure on 45 minutes to an hour.

Remove the chicken thighs and skim the fat off the top of the stock.

If you prefer, you can do this step ahead of time and refrigerate the stock, which makes it easier to peel off the solidified fat.

Remove the skin from the chicken thighs and remove the meat from the bones. Shred or chop the chicken meat and refrigerate until needed.

Add a quart of water to the stock.

Peel and slice the carrots into rounds. Add them to the stock. Peel and dice the onion and add the diced onion to the stock. Slice the scallions into rounds - using the white parts tender green parts - and add them to the stock. Add the poultry seasoning and parsley.

Taste for seasoning. If the stock was salted, you may not need more now, but if it was unsalted, add salt as needed.

Simmer the vegetables in the stock until they are tender.

Add the pasta and cook until al dente, then add the peas and corn.

Slice the chicken sausage into rounds - or slice on a slight bias to create ovals. Add the sausage and the reserved chicken thigh meat to the soup. Taste for seasoning again and add salt, if needed. Cook for another minute or two, just enough to warm the chicken sausage and meat.

Serve hot.

I received chicken sausage at no cost to me from Bilinski through 37 Cooks.
Yum

Friday, November 28, 2014

Stuffed Mushrooms for #HolidayHosting with Anolon

This is my third post for Anolon's Holiday Hosting promotion, and the theme this week was small bites. So I decided to go stuff some small mushrooms.

I adore mushrooms. I've loved them since I was a kid. So this happened.


Are they cute? Those are mushrooms stuffed with sausage and topped with cheese.


You want one, don't you?


It's not your usual dense chewy sausage. Those sausage meatballs are light and fluffy. Perfect little appetizer bites. You'll find the entire recipe over on Anolon's website. It's waiting for you RIGHT HERE.

Oh, but that's not all! I have a MEGA-GIVEAWAY for you.

Over the course of six weeks, I'll be developing six different recipes specifically for the Anolon products. We're halfway there. This is the third recipe and there are three more to go.

And I have ALL SIX Anolon items to give away. The same ones I got. And I'm giving all six to ONE PERSON. Isn't that AWESOME???

I'm pretty excited about this, because I LOVE Anolon products - I've already got some of their cookware, and I use it all the time, and I'm super-excited about the new stoneware and cast iron items.

And Anolon is having their own giveaways, so be sure to stalk them during this 6-week promotion!


The six items I am giving away are:

Anolon Advanced Pie Pan
I used this for the pie recipe, here.

Anolon Vesta Stoneware 9x13” Baker in Paprika Red
I used this for my bread pudding stuffing, here.


Anolon Nouvelle Copper Hard Anodized 10” Covered Skillet 
And this is the pan I used for the mushrooms.


There are three more recipes to come, using these products:


and


Yes, ALL of that to ONE LUCKY WINNER!

The giveaway starts when this post goes live and will end on December 26 at midnight, mountain time. US winners only. The giveaway widget will post with each week's recipe, and I will add NEW ways to enter each week related to the week's new post, like new tweets and new pins. So make sure you come back every week and see what I've made, and ENTER TO WIN!


Want more Anolon in your life?

Like Anolon on Facebook
Follow Anolon on Twitter at @Anolon
Follow Anolon on Pinterest.
Follow Anolon on Instagram.

This post is sponsored by Anolon. They supplied products for my use as well as compensation for recipe creation. They are also providing the prizes for the contest winner. Although I was paid to create a recipe, all words and ideas are my own.
Yum

Monday, June 30, 2014

Skillet Lasagna

Don't you love that pan? It's this.
Keepers is another book that's being passed around to the members of Cook My Book, and when I saw this recipe for skillet lasagna, I was intrigued. I love lasagna, but it's usually a pretty big production. And when I make it, I make a lot.

This recipe seemed like a more reasonable size, and it cooked on the stovetop, which made it much more summer-friendly than cranking up the oven for a long bake.

And it cooked relatively quickly, too. With all the prep and the resting time after - and time to take a couple photos - this was done in about an hour, with enough free time in the middle of cooking to make a side dish and salad dressing.

The original recipe in the book was twice this amount, but I cut in in half since there are only two of us, and we're not as hearty eaters as we used to be.

With some vegetables as a side dish, we only managed to eat about 1/4 of this for dinner. I'd imagine that for heartier eaters, this would feed three or four people.

This was pretty magical. It started out pretty soupy, but by the time it was done, it really was lasagna-like, with a thick sauce and layers of pasta.

The only thing it was missing was the browning of the cheese that you'd get from an oven-baked lasagna. But, if you really miss that browning, all you need to do is put the pan under the broiler for 30 seconds or so.

Skillet Lasagna
Adapted from Keepers by Kathy Brennan and Caroline Campion

1 tablespoon olive oil
1/2 pound sweet Italian sausage, remved from casings
1/2 small yellow onion, diced
2 garlic cloves, minced
Pinch of red pepper flakes
1/2 teasoon dry oregano
1 28-ounce can whole peeled tomatoes
1 sprig of basil
Small handfull basil leaves
Salt and pepper, to taste
1/2 of a 9-ounce package of no-boil lasagna noodles
2 ounces cream cheese
1/4 pound mozzarella, thinly sliced

In a 2-quart or larger saute pan with a lid, heat the olive oil on high heat until it shimmers. Add the sausage, and cook, stirring to break the meat into small chunks. until the meat is cooked through and browned.

Turn the heat to low. Using  slotted spoon, transfer the meat to a small bowl. Leave as much of the oil in the pan as possible.

Add the onions, garlic, and pepper flakes ad cook, stirring as needed, until the onion are softened - but watch carefully so the onions and garlic don't burn.

Add the oregano and tomatoes along with all the juice), crushing the tomatoes with your hands as you add them. Or, you can break up the tomatoes with a spoon or masher after you add them.

Add the meat and any juices that collected in the bowl. along with the oregano. Add salt and pepper to taste.

Cook gently for about 5 minutes, then taste for seasonings. It should be slightly salty - the noodles will need the seasoning. Discard the basil sprig.

Break the noodles in half crosswise. If smaller pieces break off, that's fine. Push half of the noodles down under the sausage and vegetables, distributing them through the pan as evenly as possible. Place the rest of the noodles in the pan, pressing them down so they're  under the sauce.

Cover the pan and cook at a gentle simmer until the noodles are tender, about 12 minutes. he sauce should be slightly thickened.

Put the cream cheese, in small spoon fulls, on top of the lasagna, then swirl it into the sauce as it melts. Place the mozzarella on top of the lasagna, then cover the pan again and cook until the cheese is melted, another 2 minutes.

Take the pan off the heat, remove the lid, and place the basil leaves on top of the lasagna. Let the lasagna rest, ucovered, for about 10 minutes before serving.
Yum

Sunday, June 1, 2014

Inspired by Haute Dogs

I recently published a recipe from the book Haute Dogs, but I had to pass along this little tidbit.


When I was a kid, sometimes my mom would sometimes spiral cut hot dogs, or more often she's cut diagonal slits in the dogs. Then she'd melt some cheese onto the dogs. I thought it was pretty darned fancy.

I've seen gadgets made specifically for spiral-cutting hot dogs, but I've always thought they were a little silly. I don't have a real need for a spiral cut dog. And I figured that if I wanted one, I could muddle through well enough with a knife.


But then I saw this in the book, Haute Dogs, and it made so much sense. So simple. Just put the hot dog on a skewer, and use the skewer as a guide for the knife. Then gently stretch the hot dog along the skewer before grilling it.


After it's cooked, the dog keeps its shape even after it's off the skewer. Ta daaaaa!
Yum

Friday, May 16, 2014

Summer's coming! Have some ... Haute Dogs! The El Completo Dog

Does anyone really need a whole book about hot dogs?

Well, maybe not. But then again, no one needs a shelf full of baking books, and I have that, too.

So, now I have Haute Dogs by Russell van Kraayenburg.

This isn't just a book about different toppings - although that's part of it - but it's also about different ways to cook hot dogs, different types of dogs and buns, and different regional and national styles of hot dogs.

The recipes aren't all about how to assemble the hot dog, either. There are recipes for making buns, condiments, and even hot dogs.

It's all there.

I picked El Completo from chile, partially because I had the ingredients on hand. And partially because they sounded so ... odd.

Avocado and sauerkraut? Have you ever even thought about that combination?

But even though it sounded weird, it tasted really good. I'm looking forward to making some condiments next, and I have a few other dogs bookmarked, for later.

I'll admit that no one really needs this book, but it's a fun, and it might inspire you to change up your hot dog routine. I could see having a hot dog tasting evening. trying different types of hot dogs with different toppings.

So now we have ...

El Completo
Adapted from Haute Dogs by Russell van Kraayenburg

Classic hot dog bun, toasted
Beef and pork hot dog. panfried
Sauerkraut
Mashed avocado
Chopped tomato
Mayonnaise

You know what to do. Put the dog on the bun, pile on the toppings, and serve.

I ended up adding a bit more of the avocado and sauerkraut after the first assembly, but of course, you can add the toppings to suit your own taste.

Okay, I'll admit it. The bun in that photo isn't toasted, as the recipe says. I was in a bit of a hurry to assemble the beast before I lost the light for photos.

And ... *sigh* ... I was hungry.

Go ahead and toast your buns. I think it's a good idea for this particular dog.

I received this book from the publisher. I was not required to write about it.
Yum

Thursday, December 19, 2013

Three lunch sandwiches made in a breakfast sandwich maker

After my last breakfast sandwich binge, I wanted to make some more ... lunchy sandwiches. So here they are!

English Muffin Pizza


This is a great use for leftover Italian sausage. Start with a generous smear of tomato caponata or some thick marinara or your favorite pizza sauce on the bottom half of an English muffin, then add some slices of cooked Italian sausage. Top with a nice melty cheese like mozzarella, or even jack. Heat in the sandwich maker until the cheese is melted.

Yes, I left this one topless. So you can make another sandwich from the other half of the muffin. Sneaky, yes?

Tuna Melt


I'm guessing that Tuna Melts are a love-hate thing, right? People either love them or say, "ewwwww, warm tuna salad!" But if they're done right, the tuna salad stays mostly cool while the cheese gets a little melty.

Instead of an English muffin, this time I used a bagel. To be honest, the bagels I bought were a tiny bit too large for the breakfast sandwich maker, but that was an easy fix. I just cut a wedge from the bagel, and pushed the cut ends together making a smaller circle and it fit perfectly. Sometimes you just have to improvise.

I started with a few slices of tomato on the bottom (which also helped keep the tuna salad from falling through the hole in the bagel!) then a generous portion of tuna salad, then some cheese. It was too tall to fit into the sandwich maker with the egg-cooking plate in place, so I just moved that aside and let it cook for about 3 minutes until the cheese was melty. Then I put the top part of the bagel on.

If I wanted that top part of the bagel toasted, I could have let that sit in the sandwich maker for a minute after I took the main part of the sandwich out, but I was fine with it untoasted.

Ta daaaa!

Veggie Delight


This little sandwich combines some of my all-time favorite foods. And the colors are really pretty together. The olives add a nice briny flavor to cut the richness of the avocado and cheese and the red pepper adds a bit of lightness.

For something meat-free, this is pretty filling and VERY satisfying.

On the bottom half of the English muffin, I spread some avocado. Okay, maybe it was a LOT of avocado. Then I added some pitted kalamata olives, sliced in half lengthwise. That went into the bottom half of the sandwich maker. I but a big slice of roasted red pepper on the egg-cooker part, then topped that with some mild cheddar cheese. I let that cook until the cheese was almost melted, then topped with the top half of the English muffin to let it get a little toasty. Another minute and I called it LUNCH.
Yum

Friday, August 30, 2013

Pizza-in-a-Burger

Stuffing something inside of something else seems awfully trendy these days. Pie inside a cake, or a cookie inside another cookie, or a chicken inside a duck inside a turkey.

People are mashing up foods right and left, like the croissant donut or the brownie tart. It's great if it works.

But the pizza burger isn't a new thing. Not at all.

When I was a teen, I'd go to a local mall with a girlfriend to do back-to-school shopping. Or any shopping, really. And in the corner of the mall - and let's be clear here - it was so long ago that it wasn't really a mall. It was a shopping plaza.

But I digress.

In the corner of the mall, there was a restaurant. And whenever we went to the mall, we treated ourselves by going to the restaurant. And for all the times over all the years that we went to that restaurant, I don't think I ever ordered anything except the pizza burger.

Basically, it was a burger topped with a pizza-like sauce with melted white cheese on top. It really wasn't a stellar sandwich. Barely even good. But it was the first fusion food I'd ever eaten. A burger that's like a pizza! Woah.

With this burger, I went one step further ... the burger itself is a common pizza ingredient - Italian sausage. Yup, it's a sausage burger filled with ingredients you'd find on a pizza - cheese, of course, and I chose provolone - and then mushrooms, onions, and green pepper. To give it a good punch of tomato flavor without being super-wet and sloppy, I used tomato paste.

It's a little messy, but it's really good.

This post originally included information about how to season a cast iron pan, but it made this post waaaay too long. I moved that information here.

Pizza-in-a-Burger

1 tablespoon olive oil
1 large green pepper, cored, seeded, medium dice
1 large onion, medium dice
1/2 pound mushrooms, sliced or roughly chopped
1 tablespoon Penzey's Pizza Seasoning*
1 12-ounce can tomato paste
Salt, to taste
2 pounds bulk Italian sausage**
Provolone cheese

To make the filling:
Heat the olive oil in a large skillet. Add the onion, green pepper, mushrooms, and pizza seasoning. Cook, stirring as needed, until the vegetables soften and lose their moisture, then continue cooking until the moisture is mostly gone and you have an almost-dry pan.

Add the tomato paste and stir to combine. Cook for another minute or two, then taste. Add more seasoning or salt, as desired.

Set aside until you need it. You can make this ahead of time, if you like, and refrigerate it until you need it. But if you fill your burger with a cold filling, it's going to take longer for the burger to cook all the way through and for that cheese to melt. Not a big problem, but keep in in mind, Or, heat the filling just a little before you stuff.

With the vegetables I used, this made about a quart of filling - your amount could be different, depending on how big your vegetables are.

This was waaaaaaaay more filling than I needed for the burgers I made, but it's a perfect topping for personal pizzas and English Muffin pizzas. You could also use it as a topping for regular burgers. Or just make a LOT more Italian sausage burgers.

To make the burgers:
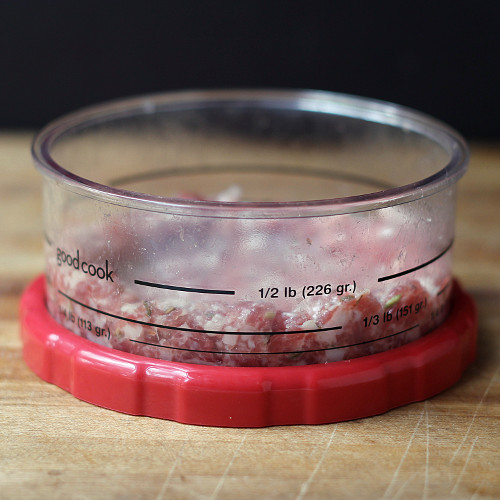
Divide the two pounds of sausage meat into four half-pound(ish) portions. you don't need to be exact, but try to get them to look about the same size. We'll be making half-pound burgers. Yes, they're big.

Take about 1/3 of one of those portions and form it into a flat patty using a burger press (you can also do this all by hand. Set that aside. That will be the top of the burger. Take the other 2/3rds of the portion and put that in the burger press. You want a little more meat here, because you're making the bottom of the burger, and the sides of the burger.


Flatten it like you did with the first piece, then use the other side of the pusher to create a well in the meat.
We're gonna fill that well with pizza-y goodness....
Fill with the well with the tomato-vegetable mixture. Hey, there should be a photo here of the filling on the middle of the meat. But I forgot to take a picture. Or maybe the camera ate it.

Imagine this filling right in the center of that meat inside the burger stuffer tool, filling it to just about the top of the well. You don't want to overfill, but you can be generous.

Here's the filling. But see how DARK my grill pan is?
Then top with slices of provolone cheese. I considered grating the cheese or making little cubes of it and mixing it into the filling, but I finally decided to make slices.

Try to keep the fillings away from the sides of the meat - you want to get a decent seal all the way around.


Put the top patty on top of the filling, then press the edges down around the outside to start to seal that edge. Remove the patty from the press and make sure the edge is completely sealed. You still might end up with a blowout or maybe a few little dribbles of cheese, but you don't want this separating into two patties. The goal is to have the filling enclosed completely. Mostly.

Heat your grill pan (or you can do this outdoors on a grill) on medium heat and brush it with a little bit of oil. When it's hot, add the burger. If you're not using a cast iron grill pan, you might need to turn up the heat a bit higher. You'll get a great sear on medium with a cast iron pan, whereas you might need to crank up to high for a stainless pan.

Burger in a grill pan. How much better can it be?
Cook on medium to sear both sides of the burger, then turn to low and continue cooking, flipping the burger as needed, until the burger is cooked all the way through. Since Italian sausage is made from pork, you want it cooked well, and you want the filling hot and the cheese melted. It's a little hard to tell by looking or touching. Even if you cut it open, it's a little difficult, because that red tomato sauce can fool you into thinking the meat is still red-raw.

Your best bet is to measure the temperature with a thermometer to make sure you're not serving undercooked pork sausage.

Look at it sizzling in that hot pan!
You might get a little seepage of cheese or tomato sauce through the burger - don't worry about that. When the burger is done, put it on a bun. Let it rest a minute or two before serving - that cheese and filling will be screaming hot.


Or, slice it to serve so no one accidentally bites into molten cheese.


*I don't usually use a lot of spice blends, but I got the Penzey's Pizza Seasoning as a free sample and I have to say that I really like the "tastes like pizza" flavor it imparts. If you don't have it, you can use any Italian blend you have.

The major flavor components in the seasoning are fennel, oregano, basil, garlic and a few types of pepper. And salt. So, if you want something similar, use 1 teaspoon dry oregano, 1 teaspoon dry basil, 1/2 teaspoon ground fennel, 1/4 teaspoon garlic powder, a few grinds of black pepper, and a pinch of cayenne or crushed red pepper flakes. You'll need a little more salt than if you didn't use a seasoning mix.

** If you can't find bulk (unstuffed) Italian sausage, you can buy regular sausage and remove it from its casing.
Yum

Sunday, April 7, 2013

Ponce - have you ever cooked it?

photo courtesy of Teet's Food Store with permission.
Maybe I should ask you if you know what ponce is. Do you?

First, let me tell you the story about how I got this particular food item. You see, a few months ago - or heck, it was more than that - I was sent some lovely Cajun meats from Teets Food Store through the blog group 37 Cooks. One of the things I received was smoked ponce.

Well, when I got that ponce, I was in the midst of my husband's health crisis. That hunk of ponce was pretty big for just me.

I thought about whacking off a bit and cooking just a little of it, but then I decided to save it so I could share the whole experience with my husband. He's always interested in trying new foods, and this was truly a new food for both of us.

You see, ponce is sort of like a smoked pork sausage, but it's stuffed into a pig stomach. Yep, that's what it is. It's no weirder than sausage stuffed into an intestine, but it does have an ... interesting ... shape.

But how the heck do you cook it?

Let me tell ya, there's not a huge array of recipes for cooking ponce, but I found a few suggestions. And then I figured, hey, it's not much different than other pork products I've worked with. I decided to make a really simple version so the ponce wouldn't be overwhelmed by other flavors.

On night one, I served the ponce simply sliced  with some rice on the side. And then I started using it in other recipes. More recipes will be coming along soon. Very soon.

Braised Ponce

Ponce, sliced
2 tablespoons olive oil
1 ponce (about 3 pounds)
1 medium onion, diced
2 cloves garlic, peeled and minced
2 cups water

Preheat the oven to 350 degrees.

Heat the oil in a Dutch oven or similar heavy pot on medium heat on the stove. Add the ponce and brown on all sides. Or, seriously, since this thing is so odd-shaped, brown it as well as you can.

Add the onion and garlic and cook, stirring, until they are fragrant and beginning to soften. Add the water, slap the lid on, and cook for 2 hours.

Since I had no idea what ponce was all about, I wasn't sure what to do with the "skin" I removed some string that was tying the openings shut, and then I sliced it. I could slice through the skin really easily, but it wasn't something I particularly wanted to chew on. So there ya go. Discard the skin, I guess.

Note: if you read the comments, you'll see that the casing is edible and some people say it's the best part, so we'll go with "personal preference" on that one. If it was more crisp, I would have liked it better, so maybe next time I'll either brown it more ahead of time or crisp it more after cooking.

The cooking liquid made a spicy, flavorful "gravy" to serve with the meat and rice.

The ponce I got was the "plain" version; Teet's also sells a cheese and jalapeno version. The one I got was a little bit spicy but not blazingly hot. Really tasty. Very versatile. Highly recommended.
Yum

Wednesday, October 31, 2012

Black Bean Soup with a Cajun Twist

I adore black bean soup with plenty of white rice, plus a garnish of some diced onion for a bit of crunch.

I've been known to add so much rice that I end up with something more like a stew, and other times, I leave it a little more soupy. Sometimes I'll add a little cilantro or sour cream or crumbled cheese as well. Like any soup, there are plenty of opportunities for customization and embellishments.

This recipe is so simple to make, it's almost cheating. Sure, you have to do a little slicing and dicing, but then it all goes into a slow cooker and there's nothing else to do until you're ready to serve.

The sausage I used here was from Teet's who partnered with the blog group 37 Cooks. It was a smoked garlic pork sausage - a spicier Cajun version of a typical smoked sausage. It added a nice amount of spice to the soup, but it wasn't at all what I'd consider spicy hot - just what I'm looking for in a black bean soup.

Black Bean Soup (with a Cajun twist)

2 cups dried black beans, rinsed and drained
1 cup diced onion
2 cups diced Teets smoked garlic pork sausage
1 teaspoon cumin
2 teaspoons salt
1 tomato, diced
1 fire roasted red pepper, diced
2 quarts water
2 cups rice, cooked
Diced onion, for garnish

Place the beans, 1 cup of onion, sausage, cumin, salt, tomato, pepper, and water in a slow cooker.

Set the cooker on low and cook until the beans are fully cooked. It took about 14 hours in my cooker, but the time will depend on your slow cooker. And I live at high altitude, and dried beans always take longer to cook.

If you prefer the soup with a little more body, you can use a fork or potato masher to smash some of the beans. If you prefer something even thicker, you can use a stick blender briefly to puree some of the beans.

Serve hot. Pass the rice and onions separately.
Yum

Wednesday, October 24, 2012

Sausage Scramble and a slight blog-turn

Cookistry has always focused on whatever I happen to be cooking. That's not going to change, but in the future, what I'm cooking is going to be just a little bit different. Just a little.

Not only am I cooking for one instead of two while my husband is in the hospital, but my lifestyle has changed as well. I no longer have long stretches of time at home to prep and cook dinner. Nowadays, I spend quite a bit of time at the hospital, I can bring my laptop and do some writing there, but I sure can't stir a pot of soup.

So instead of long-simmering stovetop meals, now I make quick meals that I can cook and eat when I get home from the hospital, or I cook things in the evening that I can reheat for dinner the next day, or I put things in my slow cooker so I have a hot meal when I get home.

I think that's how a lot of people cook. So this isn't all bad for my readers. It's just a change for me.

One example of a quick meal is this sausage scramble using smoked garlic pork sausage from Teets. I got hooked up with them through 37 Cooks. Along with the garlic sausage I got some ponce and some tasso. Recipes for those will be coming along later.

Some people might think this dish is breakfast food because of the eggs, but I seldom eat breakfast food for breakfast. Maybe it's because mom was seldom awake for breakfast when I was a kid. I like breakfast foods for dinner and if I eat in the morning, it's quite likely to be dinner leftovers. Or something simple like toast.

I ate this as-is, but it would be great on a sandwich, too - I'd probably stuff it into a hot dog bun. I garnished it with wedges of tomato - I love the combo of tomato and egg - but salsa would be another great choice.

Sausage Scramble

1/2 link of Teet's smoked garlic pork sausage, sliced
1/2 medium onion, quartered and sliced.
1 small green pepper, sliced in pieces similar to the onion
1/2 teaspoons salt (or to taste)
3 eggs
Tomato wedges, for garnish

Put the eggs into a saute pan and heat, stirring as needed, until the meat is warm and the fat renders. Teets sausage wasn't super-fatty, so if you're using a sausage that's really fatty, you might want to pour off extra grease.

Add the onions and pepper and cook, stirring as needed, until the vegetables have softened.

Beat the eggs lightly, add salt, as desired, and add to the pan. Cook, stirring, until the eggs are cooked the way you like them.

Serve with the tomatoes as garnish.
Yum