Showing posts with label chili. Show all posts

Friday, February 16, 2018

Blasphemous Chili - cooked in an electric pressure cooker!

When I was growing up, the only chili was chili mac. There was no Texas chili or Cincinnati chili.

Chili was ground beef, beans, and elbow mac in a tomato-y sauce. That's what my mom made, and that's what was served in the school cafeteria.

It was the only chili that existed in my universe.

It was the first "meal" that I cooked for the family, when I was trying to earn a Girl Scout badge. I waffled between chili and spaghetti, but chili seemed more complicated, so that's what I chose. Oyster crackers might have been involved, and I might have made a salad. Dinner was served.

My mother cried. Because it was the first meal she made for my dad when they were newlyweds. Which is completely ridiculous, because they were Polish and living in the midwest, where chili was not a big deal.

Polish cuisine is not known for spicy foods, although they do love their black pepper. But spicy peppers? Nah, those didn't exist. And midwest food wasn't particularly spicy at that time, either. We had plenty of bell peppers, but jalapenos were unknown in my neighborhood.

But she made chili mac for my dad, and I made chili mac for a badge.

I was a little disappointed that it was so simple. It took some time to make because she simmered the beans and meat for quite a while. But it was very very simple to assemble. You know, with canned kidney beans in the starring role.

Imagine my surprise when I found out that most chili didn't include the mac. And then my head nearly exploded when I found out about chili without beans! Whoa, nellie! And then (drumroll please), green chili was a whole new world of wonder.

Although my taste buds have grown up and I like spicy foods now, I still like the comfort foods of my childhood, and that includes (gasp!) Chili Mac.

Sorry about the weird kitchen lighting!
So, when I bought a pressure cooker cookbook put out by the folks at America's Test Kitchen, I decided to give the chili mac a try.

Although I've been using a pressure cooker for a long time, pasta is not something that I tend to cook in there. Pasta cooks fast enough. Why do I need to pressure cook it?

But still, I figured it would be a good test of the book, and the pressure cooker (I'm testing a new one.) So I plunged right in.

Unlike my mom's recipe, this didn't have beans. But it did have corn. And it's spicier than what mom made. I'd have to say that although it had the same comfort factor, it felt a little ... more modern. The corn, you know. Not what mom used.

Overall, I really liked this, and I certainly can't argue with the one-pot ease. The pasta was a little more cooked than I would have preferred, but it wasn't totally dead, and it was still fine when I reheated. So it wasn't overcooked. And ... since pressure cookers are not identical, some adjustments in cooking time are to be expected.

The flavor was good. Just enough spice so I wasn't tempted to add hot peppers, but not overly spicy. Of course, that can be controlled by adjusting the chili powder and the spice level of the canned peppers, so you can make it more or less hot to suit your own taste.

Other things can be easily adjusted, too. Add more onions, or different meats, or even add (gasp! puff! gasp!) some beans.

In any case, I'm keeping this as part of my lazy cooking repertoire, when I want something comforting and easy, and I don't want spaghetti.

Tex Mex Chili Mac
Recipe from America's Test Kitchen Pressure Cooker Perfection
I made this in an electric pressure cooker, so that's the instructions I'm including.

1 tablespoon vegetable oil
1 onion, chopped fine (I left mine a little larger than fine)
1 green pepper, stemmed, seeded, and cut into 1/2 inch pieces (I cut mine a little smaller)
3 garlic cloves, minced
2 tablespoons chili powder
1/8 teaspoon cayenne pepper
1 pound 85 percent lean ground beef
2 cups water
1 15-ounce can tomato sauce (I had 2 8-ounce cans, so mine had just a little more)
8 ounces (2 cups by volume) elbow macaroni
1 cup frozen corn
1 4.5 ounce can chopped green chiles (these are available in mild, medium, and hot, so you can control the heat)
2 tablespoons minced fresh cilantro
Salt and pepper
4 ounces shredded cheese, for serving

Heat the oil in your pressure cooker until it's shimmering. Add the onion and bell pepper and cook until softened, stirring as needed.

Add the garlic, chili powder, and cayenne and cook for another 30 seconds.

Stir in the ground beef. Cook, stirring to break up the meat, until you no longer see any pink.

Add the water, tomato sauce, and macaroni.

Put the lid on the pressure cooker and make sure the vent is closed.

Pressure cook on high pressure for 5 minutes, then quick-release the pressure. (I'm going to try 4 minutes next time, to see if I like the texture of the pasta better. If it's not quite done, I can always cook a little longer after the pressure is released.) Remove the lid.

Stir in the corn and chiles and simmer until the corn is tender and the pasta is cooked to your liking. Taste for seasoning and add salt and/or pepper as desired.

Serve with a sprinkle of grated cheese. I've also been known to stir in a little sour cream or yogurt, as well.

Check out the book here:


Yum

Tuesday, October 18, 2016

Chili, Four Ways

Four servings of chili, all a little different, cooked at the same time. Ideal for families where people have allergies, preferences, or tastes.So, what do you do if you need to cook for people who have different likes and dislikes that simply aren't compatible?

What if you want to make a batch of chili and one person won't eat meat, one can't have dairy, and another can't have gluten?

Or maybe it's different levels of spice. Sure, you can add the heat at the end, but that's not the same as when you cook the peppers right into the chili.

Well, that's not my house, but I thought it could be a fun experiment to make a bunch of different chilis all at the same time. And the nice folks at Brod & Taylor made it easy for me when they sent me their latest folding proofer.

A proofer, if you don't know it, is a warm, cozy place where you set your bowl of bread dough to let it rise. Or you put the formed bread in there for a final rise before baking. And there's a little tray included that fits under the rack so you can add water to proof dough in a moist environment.

Folding proofer

The "folding" part refers to the fact that the proofer folds down flat for storage.

Folding proofer

I reviewed one of their previous proofers, but this one has a nifty new function - it has precise temperature control so you can use it as a slow cooker. You can also use it for making yogurt or creme fraiche. Or for cooking sous vide ... the water in your pot wouldn't circulate, but you could keep it at a nice even temperature.

I don't mean that you can dump food right into the proofer. That would be really messy. But you can put food into a pot and put the pot into the proofer and set a temperature and let it cook. Or put your yogurt in jars. Or put whatever food into whatever container it is you want to use.

Folding Proofer.

In my case, I made 4 little pots of chili - each one just about a cup. The pots I used are made from cast iron and hold about a cup, but of course you could use larger little pots. Or little ceramic dutch ovens. Or little ramekins. As long as the containers are heatproof, you're good to go. You should have a lid, but foil would be fine on a ramekin.

Four servings of chili, all a little different, cooked at the same time. Ideal for families where people have allergies, preferences, or tastes.

Here's how it went.

4-Way Chili

Four servings of chili, all a little different, cooked at the same time. Ideal for families where people have allergies, preferences, or tastes.1/2 medium onion, diced
1 can pinto beans, drained
1 boneless, skinless chicken thigh, diced
1 teaspoon chili powder (or to taste)
1/2 teaspoon salt, or to taste
2 tablespoons small pasta (I used small shells)
4 tablespoons shredded cheddar cheese
Tomato juice (as needed, about a cup)
1 teaspoon olive oil (optional)

Line up four 1-cup cast iron dutch ovens with covers. Or you could use 1-cup ramekins and cover with foil for baking.

Fill as follows:

Vegan Chili

1/4 of the chopped onion
1/2 of the beans
1/4 teaspoon chili powder
Pinch of salt
1 teaspoon olive oil

Everything but Gluten Chili

Four servings of chili, all a little different, cooked at the same time. Ideal for families where people have allergies, preferences, or tastes.1/4 of the diced onion
1/4 of the beans
1/4 of the chicken
1/4 teaspoon chili powder
Pinch of salt
2 tablespoon shredded cheese

Dairy Free Chili Mac

1/4 of the diced onion
1/4 of the beans
1/4 of the chicken
1/4 teaspoon chili powder
Pinch of salt
1 generous tablespoon small pasta

Meaty Bean-Free Chili

1/4 of the onion
1/2 of the chicken
1/4 teaspoon chili powder
Pinch of salt
1 generous tablespoon small pasta
2 tablespoons shredded cheese

These are just suggestions on how to fill them. You can put cheese on all of them, pasta in none of them, use beef instead of chicken, or go crazy with hot peppers. The point here is that you can make different chilis depending on what people like, or don't.

As you're filling the pots, try to make them relatively evenly filled compared to each other.

Fill each pot with tomato sauce until they're almost full. There will be some simmering, so if you overfill, there will some spillage. Cover the pots.

Place the pots in the proofer set to 195 degrees. That's a nice simmer, but below boiling.

The temperate in the proofer is the temperature of the items in the proofer, not the air temperature, as is the case with your oven. That's something to keep in mind if you're using the proofer for cooking.

For actual proofing, there's a rack that you set the bowl of dough on. For slow cooking, the pots don't use the rack. If I was making a large pot of chili, I'd probably put heat the pot on the stove to a simmer, then put it in the proofer for a long, slow cook. The small pots heated through pretty quickly, though, and then they started simmering just a little bit. Perfect.

Yes, you can make this in your oven. I didn't try it, but I'd suggest 325 degrees and just check it until the chicken is done.

The proofer doesn't have a timer, so I set a timer for 2 hours and walked away. I checked the chilis a couple times during the cooking time and decided they were done after 1 hour, 45 minutes. The ones without the pasta could have happily cooked longer, but I thought the chili mac was definitely done.

These can be topped with more cheese, sour cream, avocado, jalapenos, or anything else you like. Serve hot.

I received the proofer from Brod & Taylor at no cost to me.
Yum

Monday, August 24, 2015

Very Veggie Chili Spuds

There are a couple of theories about making quick dinners. One is to find things that can be cooked from start to finish very quickly. The other is prep and cook ahead as much as possible, so that dinner can be on the table quickly.

This is definitely the second version. The chili can be made ahead of time, refrigerated and reheated.

Or it can be tossed in the slow cooker earlier in the day and served straight from the slow cooker. This is particularly useful if people are on different schedules, since it can rest on the warm setting until everyone is done.

As far as the potatoes, they can be cooked ahead of time and reheated for dinner, or they can be cooked in the microwave right before dinner. A lot of microwaves these days have a "potato" button for cooking baked potatoes, so older kids can independently make dinner.

Very Veggie Chili Idaho® Potatoes
Makes 12 servings (1/2 potato plus 1 cup of chili per person)

For the chili:
1 pound ground beef*
2 medium bell peppers, cored and diced
2 medium onions, peeled and diced
1/2 pound mushrooms, sliced
1 small zucchini, cubed
1 28-ounce can plum tomatoes
Kernels from 2 ears of corn
2 15-ounce cans kidney, navy, pinto, garbanzo, or other beans, drained
1 teaspoon salt
2 tablespoons salt-free chili powder
1/4 cup masa harina
1 tablespoon oregano (Mexican preferred)
1 tablespoon ground cumin

For the potatoes and toppings:
6 Idaho® potatoes (1/2 potato per person)
Shredded cheese, as desired (optional)
Sour cream or Greek yogurt, as desired (optional)

To make the chili:
This can be made in a slow cooker or in a heavy-bottomed pot on the stove. If you cook on the stovetop, you'll need to do some stirring to make sure it doesn't stick and burn.

If your slow cooker has a browning setting, you can make the chili entirely in the slow cooker. Otherwise, you'll need to brown the meat in a separate pan before adding to the slow cooker.

Brown the ground beef (you can add a splash of oil, if you think it's necessary), breaking it up as you cook it. Add the bell peppers, onions, mushrooms, and zucchini and cook for another minute or two, until the vegetables begin to cook just a little.

If you've used a separate pan for the browning, transfer to the slow cooker.

Add the tomatoes, breaking them up with your hands as you add them, or you can break them up in the pot with a wooden spoon. Add the corn kernels, beans, salt, chili powder, masa harina, oregano, and cumin. Stir to combine.

Set the slow cooker on low and cook, covered, for 4 hours, or up to 6 hours. While you could leave it a little longer if you need to, it's best to let it switch to warm after 6 hours or there's a chance the beans can begin to break down.

To cook the potatoes:
Scrub the potatoes, then stab the potatoes on all sides with a fork or paring knife and place them in the microwave on a microwave-safe plate. Use the "potato" setting on your microwave, or if your microwave doesn't have a potato setting cook on high. A single 7-8 ounce potato will be done in about 6-8 minutes; 2 potatoes will take about 10-12 minutes; four potatoes will take about 22-24 minutes, and six potatoes will take 28-30 minutes depending on your microwave.

It’s a good idea to turn the potatoes over halfway through the cooking time, and if you’re cooking a larger number of potatoes, you may need to rearrange them during cooking time so they cook evenly. Be careful, as they be quite hot. If the potatoes are not done in the time indicated, continue cooking as needed.

When the potatoes are done, carefully remove them from the microwave - they'll be very hot - and cut them in half lengthwise.

Place each half potato on a plate. Use a fork to fluff the meat of the potato, then top with chili and your other desired toppings. Serve hot.

You can cook the potatoes in advance, if desired, and refrigerate until needed. Just reheat to warm them enough for serving.

*You can use ground turkey if you like. To make it completely vegetarian, you can eliminate the meat, or substitute it with additional vegetables, beans, or your favorite meat substitute.

This post was sponsored by Idaho® Potatoes.

Potatoes stuffed with chili are an easy meal.
Yum

Tuesday, August 18, 2015

Taco Salad

A long, long time ago, I had a job that required that I spend countless hours driving all over the Chicagoland area.

On some days, I went out to lunch with customers. Most days, I ate lunch alone.

If I was in a hurry to get from one side of town to the other, I sometimes grabbed fast food. But if I was close to my next appointment and it was lunchtime, I had plenty of time to have a decent meal.

I had some criteria for where I dined. For example, I didn't like getting seated at a tiny table, even though I was alone. Sometimes I brought work with me to read over, and sometimes I brought a book. I didn't need a huge table, but I wanted a little bit of elbow room, if the restaurant wasn't crowded. It irked me to be seated at a tiny table if the restaurant was only 1/4 full, so I tended to avoid those sorts of places.

As far as food, I wanted something filling enough to get me through the rest of the day, but not so heavy that I'd want a nap in a couple hours. I also didn't want a super-expensive lunch. This wasn't a special treat, it was just an everyday lunch.

And I didn't want something messy. After all, I was going to be visiting with customers after lunch.

Over time, I found favorite places in many of the areas where I had customers, and I had favorite dishes at many of those restaurants. One of my favorite lunches was served at a Mexican restaurant, but it certainly wasn't a traditional Mexican dish. It was taco salad.

The salad was served in an oversized flour tortilla that was deep-fried in the shape of a bowl. While a giant deep-fried tortilla wasn't exactly the most healthy thing to eat, the rest of the salad was reasonably healthy.

I haven't had one of those salads in years, and I'm not sure why not - it's pretty easy to assemble as long as I have chili on hand.

I don't bother with the giant deep-fried flour-tortilla bowl - I just use a normal shallow bowl.

The appeal of this salad is the contrast between the warm chili and the chilled salad ingredients, as well as the spiciness of chili and jalapenos contrasting with the creaminess of the sour cream.

If you look at it, a taco salad is very similar to nachos, with crisp lettuce instead of crunchy chips. And probably with less cheese - depending on how your make yours.

Just like any salad, you can modify it to suit your tastes. You could even add a handful of tortilla chips, if you like.

Taco Salad

Romaine or iceberg lettuce
Sliced zucchini or cucumbers
Pitted olives (sliced, if you like)
Tomatoes, cut in wedges or bite-sized chunks
Pickled jalapeno peppers, sliced
Sliced or cubed avocado or guacamole
Shredded cheese
Chili (home made preferred, but a good canned brand is fine)
Sour cream or Greek yogurt

Scatter the lettuce in a shallow bowl. I aim for a salad that's at least half lettuce compared to the rest of the toppings, but make it the way you like.

Add the zucchini and/or cucumbers, olives, tomato, and jalapeno over the top of the lettuce. add a few small dollops of guacamole or slices of avocado around the edges.

Add the chili in the center. Sprinkle with cheese, and top with a dollop of sour cream or yogurt.

Serve immediately.

Note: this salad would also work well as a built-it-yourself meal with all of the ingredients available for everyone to add as much or as little of each item as they like.
If you're going to have salad, you might as well make it a taco salad, right? Want some chips with that?Want some taco salad? I know you do!
Yum

Monday, August 3, 2015

Frito Pie - It was never pie, and now it's a dip!

Last night I was watching a re-run of Hawaii 5-0 and the plot revolved around a surfer who was murdered. At the end of the show, a bunch of surfers paddled out into the ocean and formed a circle and spread the ashes of their deceased friend.

For me, it was a completely foreign ritual, and also very moving.

Particularly because a friend of mine had died suddenly, and I've been a bit weepy.

I started thinking about the rituals we have in our different cultures. Our religions and our ethnic groups and even our geographical locations dictate what sort of things we do when a friend or loved one dies, ranging from the mournful playing of a bagpipe, to a 21-gun salute at a military funeral, to the joyous celebration of life as it's done in New Orleans.

In those instances, mourners gather together to comfort each other in a way that is familiar to them. Different cultures have developed different rituals, but the purpose is the same. They help people move beyond the grieving to the point where they can think of their loved one with a smile and a fond memory.

Besides the usual geographic and familial cultural groups I'm a part of, I also belong to relatively new and unique culture. It spans many religions and nationalities and pays no attention to geography. We're a loosely connected and firmly knotted group of people who go online and bond over food and fun. We talk every day. We laugh, celebrate, kvetch, and sometimes cry. We are close friends, even though many of us have never met in person.

But when one of us dies, the rest of us can't hug or hold hands or perform rituals together. We can't eat funeral potatoes or hot dish or go to that one restaurant where everyone goes after a funeral. We're a new sort of tribe, we don't have those generations-old traditions, and we're not geographically close enough to get together for happy or sad events.

The funny thing is that new rituals have emerged, all by themselves. I guess people need a way to bond and celebrate the lives of those who have touched us. With our group, we talk about our friend's favorite food or their signature recipe. We choose a time to raise a glass in a tearful toast. We make their recipes. We post photos. And we are comforted because we know that despite the distance between us, we have a bond.

Don't those Fritos look happy in their chili and cheese spa?
My friend Chris Hughes, who recently died, was from Texas and one of her favorite foods was Frito Pie. So when we started talking about her recipes, people suggested that we make Frito Pie in her honor. I said, "Sure, I'll make it." Then I said, "What's Frito Pie?"

And I got a dozen or so answers. I looked it up on the Frito website. I asked more people. The only constants in the recipes were Fritos, chili, and cheese. Canned chili was a popular choice, with Wolf brand being a favorite among the Texans in the group, since it's a Texas product.

Some people put the chips on the chili, other people put the chili on the chips. Some people mixed it all up in a small bag of Fritos and ate it straight from the bag, and others put it in a casserole dish. Some people ate it with a fork or spoon. Some people layered it. Others mixed it. Some baked it and some didn't. And then there were toppings.

I was confused. It sounded like a cross between nachos and chilaquiles, but with chili and Fritos.

And then someone said that it doesn't matter - just make it the way you like it.

That totally sounded like what Chris would say, because she really liked to change or modify recipes to make them her own. When presented with the challenge to make a recipe from my cookbook, she turned blueberry and cream cheese sweet rolls into candied jalapeno and cream cheese rolls. I was totally impressed.

So I embarked on my Frito Pie adventure knowing that whatever I did would be okay.

My first attempt was with Fritos on the bottom, chili on top, followed by cheese. I baked it to melt the cheese, and topped it with onion, tomato, sour cream, and jalapenos. It was good, but I had leftover chili, so I decided to try something different for lunch the next day.

I didn't want to turn the oven on for a lunch portion, so I turned Frito Pie into a dip. I used a mini pie plate - hey, it's called pie, so why not - and put the chili and cheese in the microwave to warm them. And I scooped it up with crisp Fritos. Totally not like what anyone else told me to do.

Oh, and since I'm a midwesterner rather than a Texan, I used chili with beans. Apparently Chris was okay with that, too.

This one's for Chris!

Frito Pie

Wolf brand chili
Shredded cheddar cheese
Chopped onions
Chopped tomatoes
Pickled jalapenos
Sour cream
Fritos

For a single serving, put the chili (as much as you think is one serving!) in a microwave-safe bowl, and add the cheese. As much cheese as you like. If you want to take a little of the "bite" out of the onions, you can add them as well.

Microwave on high for 30 to 60 seconds, until the chili is hot and the cheese is melted.

Add onions (if you didn't add them before cooking) tomatoes, jalapenos, and sour cream.

Use Fritos to scoop up the chili. I nestled three into the dish for photos, but grabbed chips from the bag for the rest of the scooping. Remember, there's no wrong way to do it!

Have you had Frito Pie? How do you like yours?
Frito pie was never a pie - and now it's a dip!
Yum

Thursday, December 4, 2014

Vegetarian Taco Salad #MezzettaMemories

Here's the salad and the four types of peppers I used.
I used to love taco salads. Have you ever had one? They've gone out of style, it seems, but the ones I loved best were a spicy chili on top of sturdy lettuce, and topped with cheese and assorted garnishes.

That's the very first thing I thought of when Mezzetta 
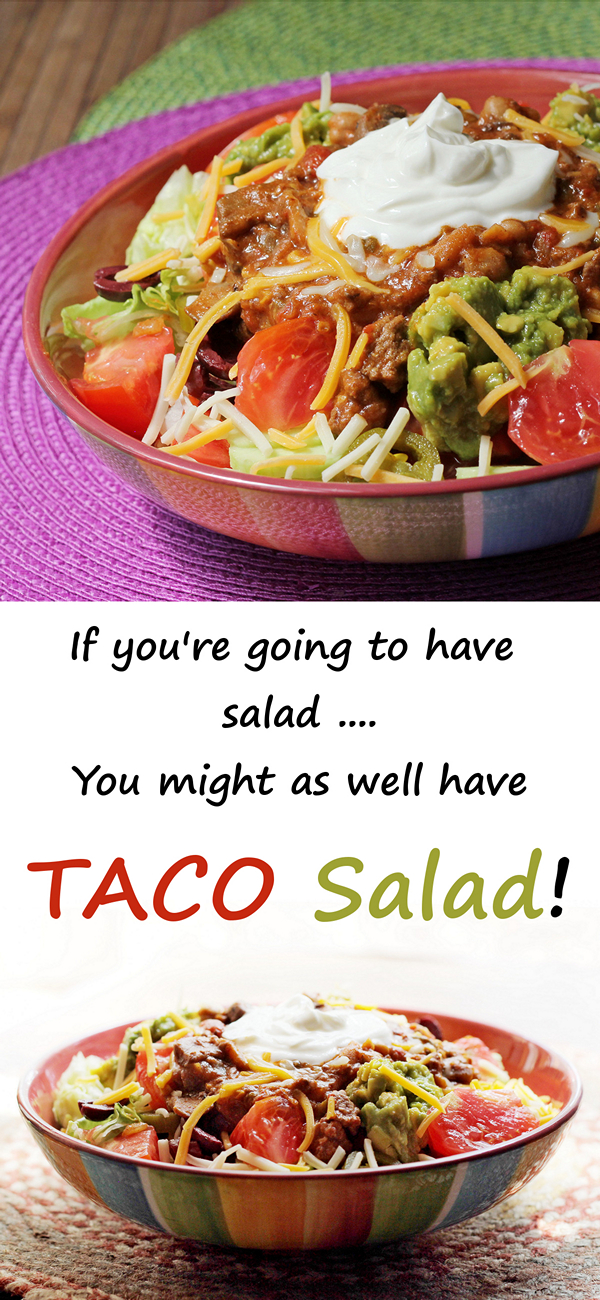
offered to sponsor a post, because they happen to sell a whole lot of different peppers, and peppers are essential for a taco salad..

While taco salad might not seem like a holiday recipe, it was one of my favorite things to order when I was out holiday shopping when I was in my teens. It was filling enough to keep me going, but not so heavy that I felt like I needed a nap afterwards.

Best of all, it was a quick meal out of the restaurant kitchen, so I could get back to important shopping.

There's the whole array of Mezzetta items I used for this post.
While I loved the old-style taco salads, recently I started wondering why they always included meat.

When I think of salad, I think about vegetables, mostly. Okay, there's tuna salad and chicken salad. Even steak salad, I guess. But I thought that taco salad deserved a meat-free makeover.

It's not that I'm a vegetarian. Far from it. But I adore vegetables. And salads. So sometimes I just want to celebrate them all by themselves.

I might have gotten carried away with the peppers in this salad. But that's okay. They're all different, in color and in flavor.

If you have everything prepped in advance, you can have this assembled in no time. Even better, let everyone assemble their own salads with the ingredients they like the best.

Vegetarian Taco Salad

For the bean "chili":
1 tablespoon olive oil
1 small onion, diced
1 15-ounce can navy beans (or other bean that you like), drained
1 14.5-ounce can petite diced tomatoes
1/4 cup Mezzetta tamed jalapeno slices, roughly chopped
1 teaspoon chili powder
2 tablespoons Mezzetta sundried tomatoes, diced
Salt, as needed

For the salad;
Shredded lettuce (use a sturdy lettuce like romaine or iceberg)
Bean chili
Sour cream
Shredded cheese (jack, mozzarella, colby, cheddar, or a Mexican blend would be good)
Diced or sliced avocado (or guacamole)
Mezzetta peppers (I used Roasted Bell Peppers, Deli Sliced Mild Pepper Rings, and Deli Sliced Golden Greek Peperoncini)

To make the chili:
You couldn't see the chili well in the salad. Here it is.
Heat the olive oil in a saucepan and add the onion. Cook, stirring, until the onions begin to soften. Add the beans, tomatoes, jalapenos, chili powder, and sundried tomatoes.

Cook, stirring as needed, until the tomatoes cook down and the mixture thickens so you have beans in hearty sauce that isn't too runny. Taste and add salt, as needed. If you like it spicier, you can add more chili powder or jalapenos, but keep in mind that peppers will be a garnish for the salad.

To assemble the salad:
Pile the shredded lettuce on a plate, then add a scoop of the hot chili. Add a dollop of sour cream in the center, then sprinkle with cheese overall - as much as you like. Add the avocado, then garnish with peppers, as desired.

You'll note that the garnish peppers I added aren't super-hot, but they have entirely different flavors that add a lot to the salad. The bell peppers I bought were all red, but the red-and-yellow ones are nice, too, for more color. I've bought those red-and-yellow peppers several times, and I like them as much as the all-red.

The deli-sliced peppers that I bought are a time-saver, but you can also buy whole peppers and slice them any way you like.

If you want more heat, add the same jalapenos that you used in the bean chili. The ones I used were "tamed," so they're not killer hot, but still have some spice. Or choose another pepper that packs more heat, like the Mezzetta hot chili peppers.

If you want to add other things to your salad, feel free. I was tempted to add cucumbers, hard-boiled eggs, halved cherry tomatoes, and some thinly sliced scallions, but I thought those were taking me too far from my taco ideal. Of course, feel free to add whatever you like!

A final gently sprinkle of snow ... uh, I mean more cheese .... just because it's pretty, and you're all done.

If you're still wondering if this is really a holiday recipe, take another look. It's all red and green and gold and white - traditional Christmas colors.


Okay can I tell you something funny? I was working on this post and trying to decide if I liked the 4-jar or the 5-jar photo better. Turns out I had space for both, so I didn't have to decide. But while I was looking at them, and trying to decide ... four jars ... five jars ... I kept hearing Patrick Stewart's voice saying "There. Are. Four. Jars."

If you're laughing, that's great. If not, search Google for "Piccard four lights" and you'll get it.

Giveaway is OVER

Every day in December, one happy winner will receive:

100% Italian Estate Grown Extra Virgin Olive Oil
Golden Greek Peperoncini
Garlic Stuffed Olives
Castelvetrano Olives
Pitted Greek Kalamata Olives
Roasted Marinated Red & Yellow Sweet Bell Peppers
Cocktail Onions
1 Apron (from House Party contents)
1 Metal Olive Spoon (from House Party contents)
1 Tote Bag (from House Party contents)
1 Ceramic Bowl

This post is sponsored by Mezzetta.
Yum

Wednesday, April 3, 2013

Rootin' Beer Chili

Since I didn't grow up where chili was like a religion, I don't feel compelled to make my chili any particular way. This one is an homage to mom's chili (which, let's face it, was really close to being spaghetti sauce with beans) but with a couple of oddball additions.

Pretty sure this one doesn't mesh with ANYONE's traditional chili. But it's pretty darned good. It's a teeny bit sweet, but not terribly so. There's a little bit of heat from the seasonings, but it's not nearly what I'd call hot.

The sweetness in this chili is going to vary depending on the root beer you use. Some brands are less sweet and more peppery, while others are nearly syrupy, so keep that in mind. If you're scared, use less and make up the difference with water. Or use actual beer.

If you want a really spicy chili, you probably already have the means to make that happen. Feel free to add your favorite fire. And, as always, salt to taste.

Rootin' Beer Chili

1 pound ground beef
1 clove garlic, small dice
1 onion, medium dice
1 green pepper, cored, seeded, diced
1 tablespoon salt (plus more, if desired)
2 tablespoons tomato powder (Savory Spice)
2 tablespoons Chili con Carne seasoning (Penzeys)
1 15-ounce can pinto beans
1 15-ounce can navy beans
2 tablespoons cornmeal
1 8-ounce can root beer (or measure 1 cup from a regular can)
Chili powder or chile powder (yes, there is a difference) as desired. Or cayenne or your favorite hot pepper.

Begin browning the ground beef in your slow cooker (or a heavy-bottomed pot or Dutch oven on your stove.) When it's about half-done, add the garlic, onion, green pepper, salt, tomato powder, and chili con carne seasoning.

Continue cooking, stirring as needed, until the meat is cooked and the vegetables are starting to get tender.

Add the tomato powder, chili con carne seasoning, beans, and cornmeal. If you want your chili spicy, add your firepowder of choice. Stir to combine. Add the root beer and stir again.

Put the lid on the slow cooker, turn it to a low slow-cook, and let it cook for as long as you have time. And hour is good, four is better.

Taste for seasoning and add salt and/or more spice, as desired. Stir and let it cook another 10 minutes or so, if you've added more heat.

Serve hot.

Avocado chunks, lime wedges, and sour cream make a nice garnish. My mother would have served this with oyster crackers. I won't judge.
Yum